Category: Uncategorized

  • Living Room Renovation Ideas

    Living Room Renovation Ideas

    Introduction

    Living Room Renovation Ideas | A living room can look outdated even when the furniture is still in good condition. Perhaps the layout feels cramped, the walls look tired, the lighting is insufficient, or the flooring no longer suits your family’s needs. These problems can make an otherwise comfortable home feel less inviting. The solution is not always a complete makeover. With the right living room renovation ideas, you can improve the appearance, comfort, and functionality of your space without wasting money on unnecessary changes.

    At Heartomenal, practical home improvement begins with understanding how a space is used before deciding what needs to change. Whether you are updating a small apartment, refreshing an older family home, or planning a complete living room renovation, the most important decisions involve layout, materials, lighting, storage, and budget.

    This guide explains how to evaluate your existing room, choose suitable finishes, organize renovation work, avoid common mistakes, and create a living room that looks attractive while supporting everyday activities.

    1. How Do You Plan a Living Room Renovation Before Starting?

    A successful living room renovation starts with a clear plan that identifies existing problems, establishes priorities, and sets a realistic budget. Before buying materials or hiring contractors, assess the room’s dimensions, structural condition, lighting, furniture arrangement, and storage needs. This preparation helps you distinguish essential improvements from optional decorative changes.

    Identify What Needs to Change

    Begin by spending time in your living room and observing how it functions throughout the day. Consider whether the room feels crowded when several people are sitting together, whether sunlight creates glare on the television, or whether there is enough space for reading and entertaining guests.

    Write down the problems rather than immediately choosing products.

    For example, a family may believe that a new sofa is necessary because the room feels uncomfortable. After examining the layout, they may discover that the sofa blocks a walking route and that rearranging the furniture would solve most of the problem.

    Your renovation priorities might include:

    • Repairing cracked plaster or damaged wall finishes.
    • Improving natural and artificial lighting.
    • Replacing worn or unsuitable flooring.
    • Creating better furniture circulation.
    • Adding practical storage.
    • Updating outdated colors and decorative finishes.
    • Resolving dampness or other underlying defects.

    Separate these tasks into essential repairs, functional improvements, and decorative upgrades. Essential repairs should receive attention before optional styling.

    Measure the Room Accurately

    Measure the room’s length, width, and ceiling height. Record the positions of doors, windows, electrical outlets, radiators, and other permanent features.

    These measurements help you determine whether proposed furniture will fit and whether the intended layout leaves sufficient walking space.

    Measure the access route as well. A sofa that fits the room may still be difficult to bring through a narrow doorway or staircase.

    Establish Your Renovation Goals

    Choose two or three primary goals for the project. You might want a brighter interior, a more practical family room, a modern appearance, or improved seating for visitors.

    A focused plan makes decisions easier because every purchase can be evaluated against your main objectives.

    Pro Tip: Take photographs of the existing room and keep a written list of defects, measurements, and planned changes. This creates a useful reference when comparing quotations and checking completed work.

    For broader preparation advice, explore House Renovation Planning.

    2. Which Living Room Renovation Ideas Offer the Best Value?

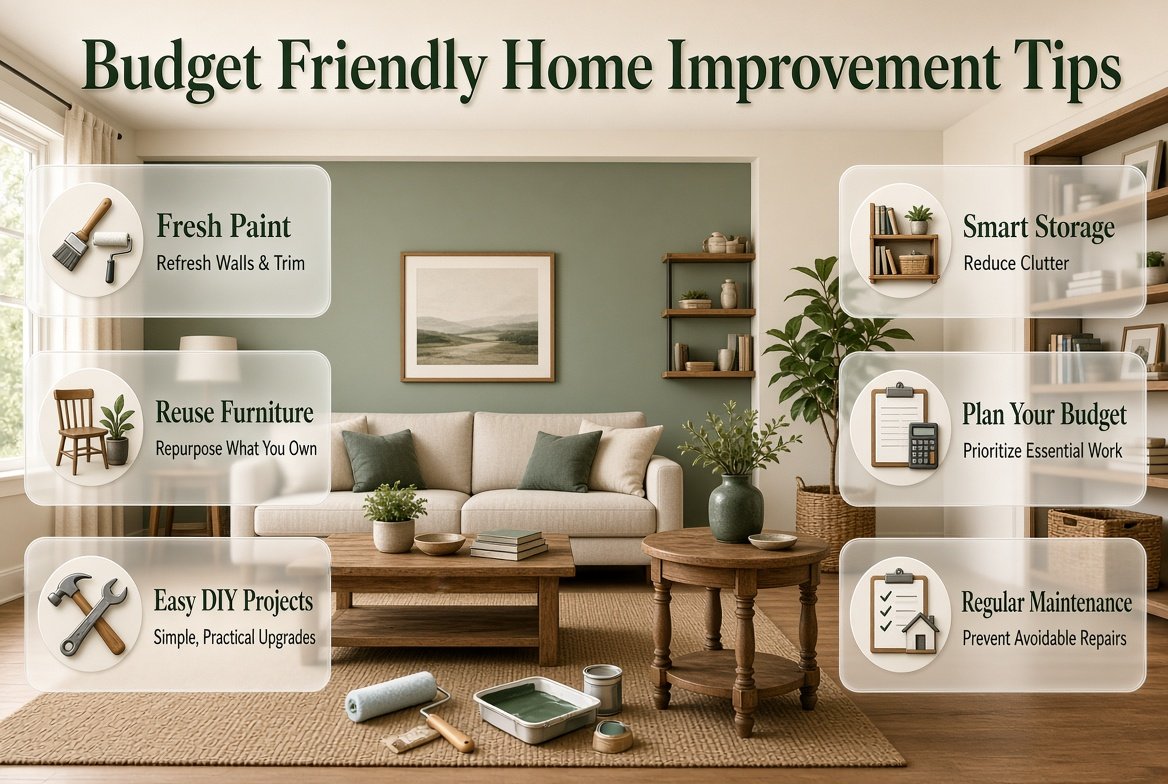
    The best-value living room improvements address visible problems or everyday inconveniences without requiring unnecessary structural changes. Repainting walls, improving lighting, updating hardware, repairing existing furniture, and rearranging the layout can often make a substantial difference. More expensive upgrades should be considered when the existing materials are damaged, unsuitable, or no longer practical.

    Refresh the Walls With a Suitable Paint Color

    Painting is one of the most flexible ways to update a living room. A fresh finish can make an older interior feel cleaner and more coordinated, especially when the existing walls are faded, marked, or painted in an unsuitable shade.

    Warm white, soft beige, muted green, and light greige are useful starting points for many interiors. However, the best choice depends on natural light, flooring, furniture, and personal preference.

    Before purchasing paint, test sample patches on different walls. Observe them in morning daylight, afternoon light, and under your evening lamps.

    The finish matters too. A washable finish may be useful in a busy family room, while a lower-sheen finish can help disguise minor surface imperfections. Product suitability and cleaning requirements should guide the final decision.

    Reuse Furniture That Still Works

    Replacing every piece of furniture can consume a large portion of the renovation budget. Inspect existing items before deciding what to discard.

    A sturdy wooden coffee table may need only refinishing. A comfortable sofa may look more suitable with new upholstery or coordinated cushions. Cabinet handles can often be replaced without purchasing entirely new storage units.

    Consider replacing furniture only when it is damaged, uncomfortable, poorly sized, or incompatible with your intended layout.

    Update Small Details

    Small improvements can help unify the room without requiring extensive construction.

    Useful options include:

    • Replacing outdated lampshades.
    • Installing suitable curtain rods.
    • Updating cabinet handles.
    • Repairing loose skirting boards.
    • Replacing damaged switch plates.
    • Refreshing a tired fireplace surround.
    • Adding a coordinated rug where appropriate.

    These changes work best when they support a consistent design rather than introducing unrelated colors and finishes.

    Common Mistake: Spending the budget on accessories before completing necessary repairs. A decorative centerpiece cannot compensate for damaged flooring, inadequate lighting, or unresolved moisture.

    For additional cost-conscious improvements, read Budget Friendly Home Improvement Tips.

    3. How Can You Renovate a Small Living Room Without Making It Feel Crowded?

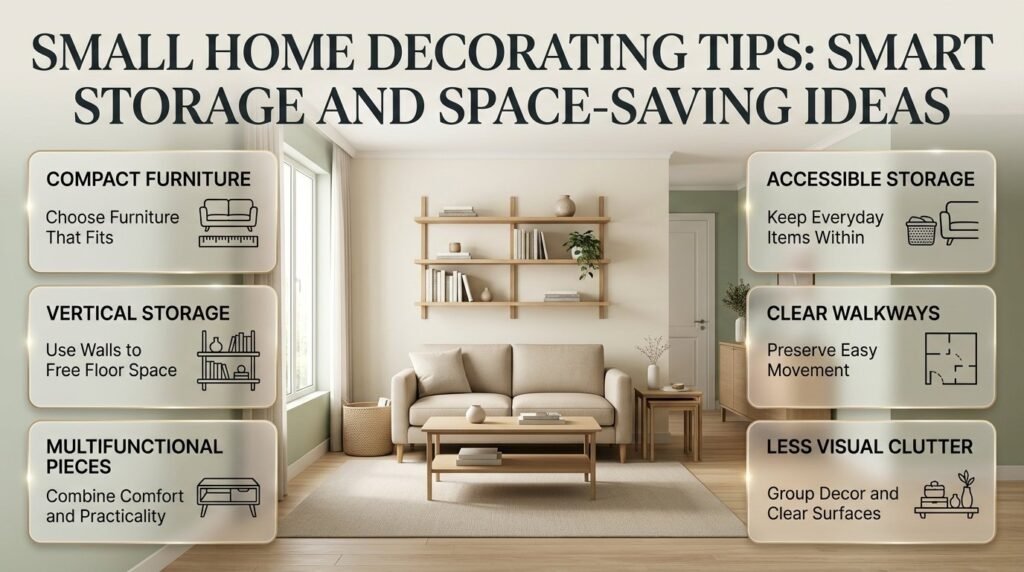
    A small living room can feel more spacious when furniture is correctly proportioned, walking routes remain clear, and storage reduces visible clutter. Lighter finishes and carefully positioned lighting may also help, but neither can compensate for an unsuitable layout. The goal is to make the available space easier to use rather than filling it with features designed only to create a visual effect.

    Choose Furniture According to the Available Space

    Measure furniture before purchasing it. Pay attention to sofa depth, arm width, coffee table dimensions, and the space needed to open cabinets or drawers.

    A compact sofa with narrow arms may provide sufficient seating without overwhelming the room. Furniture with exposed legs can also make more of the floor visible, creating a lighter appearance.

    Avoid buying an oversized sectional simply because it looks attractive in a showroom. Its proportions may not suit a narrow living room.

    Keep Walking Routes Clear

    Identify the main routes between the entrance, seating, windows, and adjoining rooms. Arrange furniture so people can move through the space without squeezing between tables or walking around unnecessary obstacles.

    As a general planning reference, a main passage around 30–36 inches wide may be useful where the room permits. Actual requirements depend on the layout, accessibility needs, and applicable standards.

    A simple floor plan can reveal problems before furniture is moved or purchased.

    Make Better Use of Vertical Space

    Wall-mounted shelves, tall bookcases, and appropriately sized cabinets can provide storage without taking up excessive floor space.

    However, vertical storage should not turn every wall into a display area. Too many shelves and decorative objects can make a small room feel visually crowded.

    Choose a few practical storage locations and leave some surfaces relatively clear.

    Use Mirrors and Lighting Thoughtfully

    A well-positioned mirror may reflect daylight and make a room appear brighter. Place it where it reflects a pleasant view or a source of natural light rather than an untidy corner.

    Use floor lamps, wall lights, or table lamps to illuminate darker areas. Multiple light sources can create a more balanced atmosphere than relying on a single ceiling fixture.

    For more practical space-saving guidance, explore Small Space Home Tips.

    4. What Wall Treatments Work Best for Living Room Renovations?

    Living room wall treatments featuring a balanced feature wall, decorative paneling, elegant wallpaper, repaired surfaces, and coordinated interior finishes.
    Discover living room wall treatment ideas that combine style, texture, and practicality. Explore feature walls, decorative paneling, wallpaper, and proper surface preparation for a polished renovation.

    Living room wall treatments include paint, wallpaper, decorative molding, paneling, and textured finishes. The right choice depends on the room’s architectural style, wall condition, maintenance requirements, and budget. A well-planned treatment can create a focal point, introduce texture, or make different finishes feel coordinated without overwhelming the space.

    Create a Balanced Feature Wall

    A feature wall draws attention to one area of the room. It may sit behind the sofa, surround a fireplace, or frame a television installation.

    Suitable treatments include contrasting paint, subtle wallpaper, decorative molding, or wood-look panels.

    Choose the wall according to the room’s layout. A feature wall should strengthen the existing arrangement rather than compete with windows, artwork, and several other decorative elements.

    For example, a muted green wall behind a neutral sofa can introduce color without requiring the entire room to be repainted.

    Consider Decorative Paneling

    Wall paneling can add depth and architectural interest. Simple rectangular molding often complements traditional interiors, while restrained vertical panels can suit contemporary spaces.

    Before installation, inspect the wall for cracks, loose plaster, and moisture damage. Paneling should never be used simply to conceal a persistent damp problem.

    Check the position of switches, outlets, doors, and skirting boards before finalizing the panel design. Poor measurements may result in awkward gaps or obstructed fittings.

    Choose Wallpaper Carefully

    Wallpaper is useful when you want a pattern or texture that paint cannot easily reproduce. Small-scale patterns can add interest without dominating a room, while larger designs may work well on a carefully selected focal wall.

    Request samples when possible. Check the pattern under the room’s actual lighting and compare it with the flooring, sofa fabric, and curtains.

    Also consider cleaning requirements and whether the wall surface is suitable for the selected product.

    Repair the Surface Before Decorating

    Paint and wallpaper cannot reliably hide serious wall defects. Remove loose material, repair appropriate cracks, and prepare the surface according to the product manufacturer’s instructions.

    If cracks continue to widen or dampness repeatedly returns, investigate the underlying cause before applying decorative finishes.

    For complementary interior styling guidance, visit Home Decorating Tips.

    5. How Should You Choose Flooring for a Renovated Living Room?

    The best living room flooring balances durability, comfort, maintenance, appearance, and installation requirements. Vinyl, laminate, engineered wood, tile, and carpet each offer different benefits. The right material depends on household traffic, moisture conditions, cleaning habits, existing floor levels, and the atmosphere you want to create.

    Compare Common Flooring Materials

    Flooring materialAdvantagesConsiderations
    Luxury vinylAvailable in many designs and generally easy to cleanCheck wear layer, installation requirements, and product quality
    LaminateWood-like appearance and varied finishesMoisture resistance varies between products
    Engineered woodNatural wood surface with layered constructionRequires suitable moisture conditions and product-specific care
    Ceramic or porcelain tileDurable surface with straightforward cleaningHard underfoot and may feel cold
    CarpetSoft, warm, and comfortableRequires appropriate cleaning and stain management

    Inspect the Existing Subfloor

    Before choosing new flooring, determine whether the existing surface is level, stable, and dry enough for the intended installation.

    Loose tiles, uneven areas, moisture, and structural movement may need to be addressed first. Installing new flooring over a defective base can lead to movement, poor joints, or premature damage.

    The required preparation depends on the existing material and the flooring system being installed.

    Consider Floor Height and Door Clearance

    Adding a new floor can increase the finished floor height. This may affect doors, adjoining rooms, thresholds, and skirting boards.

    Ask the installer to account for underlay, adhesive, and the complete flooring system before finalizing the material.

    Compare Total Installation Costs

    The product price is only one part of the total cost. Include removal of the existing floor, subfloor preparation, underlay, adhesive, trims, waste, delivery, and labor.

    Expert Tip: Request a written installation quotation that identifies preparation work and excluded costs. Two flooring options with similar material prices can have very different final costs.

    6. How Can Lighting Improve a Living Room Renovation?

    Effective living room lighting combines general illumination, task lighting, and accent lighting. General lighting makes the room usable, task lighting supports specific activities, and accent lighting highlights selected architectural or decorative features. Combining these layers creates a more adaptable space than relying on one bright ceiling fixture.

    Plan General Lighting

    Ceiling fixtures or suitable recessed lights can provide overall illumination. Their placement should consider room dimensions, ceiling height, furniture, and the activities taking place.

    Avoid assuming that a larger or brighter fixture will automatically improve the room. Excessive glare can make television viewing uncomfortable and create harsh reflections on glossy surfaces.

    Add Task Lighting

    Reading, studying, sewing, and other activities may require more focused light.

    Floor lamps can work beside a sofa, while table lamps may be useful near an armchair or side table. Choose fixtures that provide sufficient light without obstructing movement.

    Use Accent Lighting Selectively

    Accent lighting can highlight artwork, shelving, or a decorative architectural feature.

    Use it to support the room’s main design rather than illuminating every object. Too many competing light sources can make the space feel visually busy.

    Consider Bulb Color and Controls

    Warm white lighting often creates a relaxed atmosphere, while neutral white may suit spaces used for several different activities. Test the appearance with your wall paint and furniture before settling on a bulb type.

    Dimmers can provide useful flexibility where the fixtures and electrical system support them.

    Any new circuits, relocated switches, or concealed wiring should be planned and installed in accordance with applicable safety requirements by a qualified professional where necessary.

    7. Which Living Room Layout Is Best for Everyday Use?

    The best living room layout supports the activities that matter most to the household while maintaining comfortable circulation. Seating should relate to a suitable focal point, tables should be easy to reach, and doors and windows should remain accessible. The arrangement should reflect how the room is actually used rather than copying a layout from a photograph.

    Arrange Seating Around a Focal Point

    The focal point may be a fireplace, television, large window, or piece of artwork.

    Position the main sofa so it relates naturally to that feature. Add chairs where they support conversation without blocking circulation.

    If the room is mainly used for social gatherings, arrange seats so people can see and speak to one another comfortably. A television-focused arrangement may require different viewing distances and angles.

    Keep Furniture Proportions Consistent

    A large sofa combined with several oversized tables can overwhelm a modest room. Conversely, very small furniture may look disconnected in a large living area.

    Consider the overall visual weight of the furniture. A combination of a substantial sofa, a lighter coffee table, and one or two appropriately sized chairs may create a better balance than several bulky pieces.

    Plan Around Doors and Windows

    Avoid blocking doorways, access panels, ventilation points, or frequently used windows.

    Consider the space needed for curtains, blinds, and window cleaning. Furniture placed directly against a radiator or another heat source may interfere with its operation or create a safety concern.

    Create Zones in Multipurpose Rooms

    A living room may also serve as a reading area, homework space, or occasional dining area.

    Define each zone through furniture arrangement, lighting, or a suitable rug. You usually do not need to build permanent partitions to separate activities.

    For instance, a floor lamp and armchair can establish a reading corner, while a compact desk can create a work area if sufficient circulation remains.

    8. How Can You Improve Living Room Storage During Renovation?

    Living room storage ideas featuring multifunctional furniture, built-in cabinets, organized open shelving, closed cupboards, and space-saving storage solutions.
    Discover practical living room storage ideas that reduce clutter while preserving comfort and style. Combine multifunctional furniture, open shelving, and built-in cabinets to make better use of available space.

    Effective living room storage provides convenient places for everyday belongings without filling the room with unnecessary cabinets. Closed storage hides visual clutter, while open shelving displays selected items. The best solution depends on what you need to store, how frequently you use it, and the amount of space available.

    Choose Storage According to Your Needs

    Before buying cabinets, list the items that regularly accumulate in the room.

    These may include books, remote controls, games, charging accessories, blankets, children’s toys, and paperwork.

    Group similar items together and assign each category a practical storage location. This reduces the temptation to purchase furniture that looks attractive but does not solve an actual problem.

    Use Multifunctional Furniture

    Storage ottomans, nesting tables, and cabinets with drawers can provide additional function without requiring separate pieces for every purpose.

    Check the dimensions and access requirements before purchasing them. A storage lid that cannot open fully because it touches the sofa may be inconvenient in daily use.

    Balance Open and Closed Storage

    Open shelves work well for books and a limited selection of decorative objects. Closed cupboards are often more practical for miscellaneous belongings that would otherwise remain visible.

    Avoid filling every shelf. Leaving some visual space helps the room feel calmer and makes cleaning easier.

    Plan Built-In Cabinets Carefully

    Built-in storage can make effective use of awkward corners or unused wall space. However, custom cabinetry may involve higher design, installation, and repair costs than freestanding furniture.

    Confirm measurements, door clearances, internal shelf heights, and electrical access before approving the final design.

    For broader organization advice, read Home Tips and Ideas.

    9. Which Colors and Materials Create a Cohesive Living Room?

    A cohesive living room combines wall colors, flooring, furniture, textiles, and decorative finishes that work together. You do not need to match every item exactly. Instead, choose a small group of complementary colors and repeat selected materials so the room feels coordinated without appearing overly uniform.

    Start With a Practical Color Palette

    Choose one dominant color, supporting neutral shades, and one or two accent colors.

    For example, warm white walls, medium-toned wood, muted green cushions, and a neutral rug can create a relaxed environment.

    Other combinations include:

    • Beige, cream, and natural oak for a warm interior.
    • Navy, soft white, and medium wood for a classic look.
    • Sage green, warm gray, and linen textures for a calm atmosphere.
    • Charcoal, off-white, and restrained wood details for a contemporary room.

    These are starting points rather than strict rules. Existing furniture and natural light should influence the final choice.

    Test Finishes Together

    Paint, fabric, flooring, and wallpaper can appear different under various lighting conditions.

    Collect samples and examine them in the room before making large purchases. This is particularly important when combining materials with different undertones.

    A beige wall may look yellow beside a cool gray floor, while a warm wood finish may complement it more naturally.

    Choose Materials for Household Conditions

    A busy family room may benefit from durable upholstery, washable paint, and flooring that suits frequent cleaning. A quieter household may prioritize delicate textures or specialist decorative finishes.

    Read product care instructions before buying fabrics, rugs, or wall coverings.

    Avoid Following Every Trend

    Trends can help you discover new ideas, but they should not determine every decision. A room filled with several unrelated patterns, colors, and finishes may become difficult to maintain or update.

    Choose improvements that suit your preferences and can remain useful for years.

    For more ideas about making interiors comfortable and practical, explore Home Comfort Tips.

    10. What Common Living Room Renovation Mistakes Should You Avoid?

    The most common living room renovation mistakes include inaccurate measurements, insufficient budgeting, unsuitable material choices, neglected repairs, and poorly coordinated work. These problems often occur when homeowners make decisions too quickly or focus on the finished appearance before checking the room’s condition. Careful planning helps reduce unnecessary expense and disruption.

    Mistake 1: Buying Furniture Before Measuring

    Furniture can look smaller in a showroom than it does in a compact room.

    Why it causes problems: Oversized items can block walking routes, obstruct windows, and make the room difficult to use.

    How to avoid it: Measure the furniture and room, mark the proposed arrangement, and check delivery access before ordering.

    Mistake 2: Ignoring Hidden Defects

    Fresh paint may temporarily improve the appearance of a wall affected by moisture, but it does not resolve the underlying problem.

    Why it causes problems: Defects can return and damage the new finish or other materials.

    How to avoid it: Investigate persistent dampness, unusual cracking, unstable flooring, or electrical concerns before proceeding.

    Mistake 3: Underestimating the Budget

    Homeowners sometimes calculate only the visible materials and overlook preparation, labor, delivery, disposal, and specialist work.

    Why it causes problems: Money may run out before the essential work is finished.

    How to avoid it: Prepare an itemized budget and include an appropriate contingency allowance. Around 10–20% can be a useful starting point, although uncertain or older properties may require more.

    Mistake 4: Choosing Materials Only by Appearance

    A finish may look attractive but require maintenance that does not suit the household.

    Why it causes problems: The room may become difficult to clean or the materials may deteriorate prematurely.

    How to avoid it: Compare durability, care instructions, installation requirements, and suitability for the actual room conditions.

    Mistake 5: Changing the Design Halfway Through

    Late changes can affect material quantities, labor schedules, and the order of work.

    Why it causes problems: Contractors may need to repeat tasks or remove completed finishes.

    How to avoid it: Finalize the layout, major materials, lighting positions, and storage requirements before construction begins.

    Mistake 6: Neglecting Ventilation and Safety

    Decorative improvements should not compromise ventilation, access to electrical fittings, or the safe operation of existing equipment.

    How to avoid it: Check clearances, follow manufacturer instructions, and seek qualified advice when the project affects electrical systems, structural elements, or other safety-critical features.

    11. What Is the Best Order for a Living Room Renovation?

    A practical renovation sequence begins with inspection and planning, followed by essential repairs, concealed work, surface preparation, decorative finishes, flooring where appropriate, and final furnishing. The exact order can vary with the materials and project requirements, but coordinating the stages helps prevent damage to completed work.

    Step 1: Inspect and Measure

    Document the room’s dimensions, fixed features, and visible defects.

    Why it matters: Accurate information reduces mistakes when ordering materials and planning furniture.

    Professional advice: Confirm unusual cracks, dampness, or suspected structural problems before cosmetic work begins.

    Step 2: Finalize the Layout and Budget

    Select the main furniture arrangement, wall treatments, lighting, storage, and flooring.

    Obtain written quotations for specialist work and confirm which tasks are included.

    Step 3: Complete Essential Repairs

    Address moisture problems, damaged plaster, unstable flooring, and other underlying issues.

    Structural changes may require professional assessment and local approvals.

    Step 4: Complete Concealed Services

    Where needed, coordinate electrical alterations and other concealed work before closing walls or ceilings.

    Use appropriately qualified professionals for work requiring specialist skills or legal authorization.

    Step 5: Prepare Walls and Ceilings

    Repair surfaces, remove loose finishes, and apply suitable primers according to the chosen products.

    Allow the necessary drying time before proceeding.

    Step 6: Coordinate Paint, Wallpaper, and Flooring

    The correct sequence depends on the materials and installation method. Plan the work to minimize dust, spills, and damage to finished surfaces.

    Follow the flooring manufacturer’s requirements for subfloor preparation, moisture conditions, and installation.

    Step 7: Install Fixtures and Furniture

    Position the main furniture first, then add lighting, storage accessories, curtains, and decorative items.

    Check that doors open properly and walking routes remain clear.

    Step 8: Conduct a Final Inspection

    Inspect the agreed work, test relevant fixtures, and record outstanding defects.

    Confirm that the contractor has completed the agreed scope before final sign-off and payment arrangements.

    12. How Much Does a Living Room Renovation Cost?

    Living room renovation cost infographic featuring itemized budgeting, material selection, labor expenses, lighting upgrades, furniture costs, and contingency planning.
    Plan your living room renovation with a clear, itemized budget covering materials, labor, repairs, lighting, furniture, and unexpected expenses. Prioritize durability and comfort while keeping spending under control.

    Living room renovation costs vary according to room size, local labor rates, material quality, the condition of the property, and the complexity of the work. A cosmetic refresh usually costs less than a project involving new flooring, extensive electrical changes, custom cabinetry, or structural alterations. A reliable estimate should be based on actual measurements and written quotations.

    Build an Itemized Budget

    Budget categoryExpenses to consider
    PlanningMeasurements, design, and inspection
    PreparationSurface protection and removal of existing finishes
    RepairsPlaster, flooring, and underlying defects
    MaterialsPaint, wallpaper, panels, and flooring
    LaborInstallation, decorating, and specialist trades
    LightingFixtures, switches, and electrical changes
    FurnitureSeating, tables, and storage
    FinishingCurtains, rugs, and accessories
    ContingencyUnforeseen work and price variations

    Decide Where to Spend More

    Prioritize items that influence safety, durability, and everyday comfort. Proper subfloor preparation, suitable electrical work, and quality installation may be more valuable than expensive decorative accessories.

    You can often save money by retaining functional furniture, simplifying custom details, and selecting materials that provide appropriate performance without unnecessary premium features.

    Track Spending Throughout the Project

    Keep quotations, receipts, delivery records, and approved changes together. Review spending regularly rather than waiting until the end.

    For detailed cost-planning guidance, visit Home Renovation Budgeting.

    13. What Do Renovation Professionals Recommend for Better Results?

    Professionals generally focus on preparation, accurate specifications, suitable materials, and coordinated installation. These details help create a finished room that not only looks attractive but also performs well over time. Homeowners can apply the same principles even when the project is relatively small.

    Prioritize Preparation

    Paint requires an appropriately prepared surface. Flooring requires a suitable base. Cabinets need accurate measurements and appropriate fixing points.

    Skipping these stages to save time can lead to poor finishes or premature repairs.

    Confirm Materials Before Ordering

    Document the selected paint color, finish, flooring product, fixture specifications, and furniture dimensions.

    Check that all items are compatible with the room and available within the project schedule.

    If a contractor proposes a substitute, review its appearance, specifications, cost, and installation requirements before approving it.

    Coordinate Different Trades

    When several professionals are involved, agree on the order in which they will work. Electrical changes, wall preparation, painting, flooring, and cabinetry must be coordinated to avoid repeated work.

    Protect completed surfaces and arrange deliveries so materials do not obstruct access.

    Keep Written Records

    Written quotations should explain the scope, exclusions, expected schedule, payment arrangements, and process for approving additional work.

    Clear records reduce misunderstandings and help everyone understand what the finished project should include.

    Review the Finished Room Carefully

    Before signing off, check the work against the agreed specifications.

    Inspect wall finishes, flooring transitions, cabinet alignment, doors, and relevant electrical fittings. Record defects and agree on the process for resolving them.

    What Are the Best Living Room Renovation Ideas to Transform an Outdated Space?

    The best living room renovation ideas focus on improving the room’s layout, lighting, wall finishes, flooring, and storage without making unnecessary changes. Before starting, identify what makes the room feel outdated or uncomfortable. Sometimes, fresh paint and better furniture placement are enough, while older rooms may benefit from new flooring, updated lighting fixtures, or decorative wall paneling.
    A coordinated renovation usually produces better results than changing every feature independently. For example, warm neutral walls, natural wood finishes, layered lighting, and appropriately sized furniture can create a comfortable and timeless interior. The right improvements depend on the room’s dimensions, natural light, existing materials, and household requirements.
    Professional recommendations:
    Start with essential repairs before investing in decorative upgrades.
    Choose a consistent color palette that complements your flooring and furniture.
    Improve lighting in darker areas instead of relying on one ceiling fixture.
    Consider a feature wall only when it supports the overall design.
    Retain functional furniture when updating it is more practical than replacing it.

    How Can I Renovate My Living Room on a Budget Without Compromising Quality?

    A budget-friendly living room renovation begins with prioritizing improvements that deliver the greatest practical benefit. Instead of replacing everything, inspect existing furniture, walls, flooring, and lighting to determine which items genuinely need attention. Repainting walls, rearranging seating, updating cabinet handles, improving storage, and replacing outdated lampshades can refresh the room without requiring a complete remodel.
    However, saving money should not mean ignoring important repairs or choosing unsuitable materials. Poor surface preparation, low-quality installation, and neglected electrical or moisture problems can create additional expenses later. A realistic budget should account for labor, materials, preparation, delivery, waste removal, and unexpected issues.
    Practical ways to control renovation costs:
    Divide the budget into essential repairs, functional improvements, and decorative upgrades.
    Obtain written quotations and compare the work included in each.
    Reuse furniture that remains comfortable, safe, and structurally sound.
    Measure accurately before ordering flooring, wallpaper, or furniture.
    Keep a contingency allowance based on the property’s condition and project risks.
    Complete the renovation in planned stages if the budget cannot cover every improvement at once.

    What Is the Best Flooring for a Living Room Renovation?

    The best flooring for a living room depends on durability, comfort, maintenance requirements, household traffic, and the condition of the existing subfloor. Luxury vinyl flooring is often considered for its variety of designs and straightforward cleaning, while laminate can provide a wood-like appearance at different price points. Engineered wood offers a natural wood surface, ceramic or porcelain tile provides a durable finish, and carpet creates a softer feel underfoot.
    No single material is ideal for every household. Families with children or pets may prioritize easy cleaning and resistance to everyday wear, while homeowners seeking a warmer atmosphere may prefer wood-based finishes or carpet in suitable areas. Installation quality is equally important because an uneven or damp subfloor can affect the performance of many flooring systems.
    What to check before choosing flooring:
    Compare the complete installed cost, including preparation, underlay, trims, and labor.
    Check the manufacturer’s moisture limitations and maintenance instructions.
    Confirm that the existing subfloor is stable, level, and suitable for the product.
    Consider comfort, noise, cleaning requirements, and the room’s daily use.
    Check door clearance and floor-height transitions before installation.

    How Can I Make a Small Living Room Look Bigger During Renovation?

    A small living room can feel more open when the furniture fits the available space, the main walking routes remain clear, and storage reduces visible clutter. Light wall colors and well-planned lighting can help brighten the interior, but the most important improvement is often a practical furniture layout. Removing unnecessary pieces may create more usable space than purchasing additional decorative items.
    Choose furniture with suitable dimensions and avoid oversized sofas or bulky tables that dominate the room. Wall-mounted shelves, compact cabinets, and multifunctional furniture can provide storage without consuming too much floor space. Mirrors may also help reflect daylight when positioned thoughtfully.
    Design strategies that work well:
    Measure furniture and doorways before purchasing new items.
    Keep entrances, windows, and main circulation routes unobstructed.
    Use vertical storage instead of filling the floor with cabinets.
    Combine general lighting with table lamps or floor lamps to brighten darker corners.
    Limit competing patterns and decorative accessories.
    Select a small, coordinated color palette to create visual continuity.

    What Is the Correct Order for Renovating a Living Room?

    The correct renovation order depends on the project’s scope, materials, and installation requirements, but most projects should begin with inspection and planning. Identify structural concerns, moisture problems, damaged surfaces, and electrical issues before starting cosmetic work. Next, finalize the layout, budget, materials, and work schedule so contractors can coordinate their tasks efficiently.
    Essential repairs and concealed services should generally be completed before walls and ceilings are closed or decorative finishes are applied. Surface preparation, painting, wallpaper installation, flooring, fixtures, and furniture placement should then be scheduled according to the products’ instructions and the needs of the project. Some jobs require a different sequence, so confirm the details with the relevant installers.
    Recommended renovation checklist:
    Inspect the room and record its measurements.
    Identify essential repairs and establish a realistic budget.
    Finalize furniture placement, finishes, lighting, and storage.
    Complete necessary repairs and approved electrical work.
    Prepare walls, ceilings, and floors for the selected materials.
    Coordinate painting, wallpaper, flooring, and fixture installation.
    Place furniture and accessories after the main work is complete.
    Inspect the finished room and document outstanding defects before final sign-off.
    Following a clear sequence helps protect completed work, reduce avoidable delays, and keep renovation spending under better control.

    Conclusion: Transform Your Home with the Right Living Room Renovation Ideas

    A successful living room renovation is not simply about choosing attractive furniture, modern finishes, or trending colors. It is about creating a space that supports your daily routine, reflects your personal style, and remains comfortable and practical for years to come. The best living room renovation ideas begin with a clear plan, realistic budget, suitable layout, durable materials, and thoughtful attention to lighting, storage, and everyday functionality.

    Before starting your project, identify the changes that will make the greatest difference to your living space. You might refresh the walls, replace outdated flooring, improve the lighting, reorganize furniture, introduce built-in storage, or update the entire layout. You do not necessarily need a complete structural renovation to achieve a noticeable transformation. Prioritizing essential improvements and making informed decisions can help you create a beautiful room without unnecessary spending.

    Remember to plan each stage carefully, compare material options, allow a contingency for unexpected expenses, and consult qualified professionals when electrical, structural, or other specialist work is required. Avoid choosing trends at the expense of comfort, durability, and your household’s actual needs.

    Ultimately, the most successful living room renovation is one that balances style, functionality, and long-term value. With thoughtful preparation and the right design choices, you can transform an outdated or uncomfortable room into a welcoming place for relaxing, entertaining guests, and spending quality time with family. Start with your priorities, work within your budget, and make every improvement contribute to a living room that genuinely feels like home.


  • Home Renovation Budgeting

    Home Renovation Budgeting

    Introduction

    Home Renovation Budgeting | Renovating a home can be exciting until the bills start adding up. You might begin with plans to repaint a few rooms, replace outdated flooring, or improve your kitchen, only to discover that labor, materials, repairs, and unexpected expenses cost more than you expected. Without a clear financial plan, even a small renovation can become difficult to manage.

    Home renovation budgeting helps you understand how much a project may cost, where your money should go, and how to avoid unnecessary spending without sacrificing quality. Whether you’re planning a single-room makeover or a complete house renovation, a realistic budget gives you a practical starting point and helps you make better decisions at every stage.

    For homeowners looking for practical ways to create a more organized and comfortable living space, Heartomenal offers a useful starting point for exploring home improvement ideas alongside a carefully planned renovation budget.

    This guide explains how to estimate renovation expenses, divide your budget into manageable categories, compare contractor quotations, plan a contingency fund, prioritize essential repairs, and monitor spending until the project is complete. You’ll also learn which budgeting mistakes commonly cause problems and how to build a financial plan that suits your home, priorities, and available resources.

    What Is Home Renovation Budgeting, and Why Does It Matter?

    Home renovation budgeting is the process of estimating, organizing, and tracking the money required to improve a property’s condition, appearance, functionality, or comfort. It includes construction materials, professional labor, design work, permits where required, demolition, delivery, finishing, and unexpected repairs.

    A renovation budget is more than a list of prices. It is a decision-making tool that helps you determine which improvements are affordable, which should be completed first, and which can wait until additional funds become available.

    For example, suppose you want to update your kitchen. You might initially consider cabinets, countertops, and lighting. However, the complete project may also involve plumbing adjustments, electrical work, wall preparation, flooring, installation, and waste removal. A budget that includes only the visible upgrades will underestimate the real cost.

    A well-prepared renovation budget helps you:

    • Set a realistic spending limit before construction begins.
    • Identify essential repairs before optional improvements.
    • Compare contractor quotations on a consistent basis.
    • Avoid spending too much on decorative features.
    • Prepare for unexpected problems discovered during construction.
    • Track payments and identify cost increases early.
    • Make informed decisions when plans or prices change.

    The main objective is not to spend as little as possible. It is to use your available money wisely while completing the work that matters most.

    How Do You Set a Realistic Home Renovation Budget?

    The first step is to establish how much you can comfortably afford to spend. Your budget should reflect your financial situation, the condition of your property, the type of renovation, and the amount of uncertainty involved.

    Start with your available funds rather than choosing expensive upgrades and trying to make the numbers work afterward.

    Step 1: Establish Your Maximum Spending Limit

    Review your savings, expected project expenses, and ongoing household commitments. Decide how much you can allocate to renovation without putting essential bills, regular expenses, or emergency savings at risk.

    If you intend to use financing, consider the full repayment cost, interest, fees, and payment schedule. Avoid relying on borrowing that has not been approved or income that you cannot confidently expect.

    Your maximum budget should represent a realistic financial limit, not simply the amount you would like to spend.

    Example: If you have $12,000 available for a renovation, you should not automatically commit the entire amount to materials and contractor payments. Part of that money may need to remain available for unexpected repairs and other essential expenses.

    Pro Tip: Set your financial limit before visiting showrooms or selecting premium finishes. This reduces the temptation to increase your budget because an attractive product costs more than you originally planned.

    Step 2: Decide What Needs to Be Renovated

    Walk through your home and list the areas that require attention. Separate visible improvements from maintenance problems that could affect the building’s safety or condition.

    A simple inspection list might include:

    • Damaged flooring or deteriorating wall finishes.
    • Leaking taps, pipes, or other plumbing problems.
    • Outdated lighting or electrical installations.
    • Poor ventilation or signs of moisture.
    • Worn cabinets, doors, or window fittings.
    • Insufficient storage or an inefficient room layout.
    • Decorative features that you would like to improve.

    Do not assume every problem needs to be fixed immediately. Instead, determine its urgency, likely consequences, and the professional assessment it may require.

    Active leaks, suspected structural problems, and unsafe electrical installations deserve particular attention because delaying appropriate repairs can create additional costs or safety concerns.

    Step 3: Divide Improvements Into Priority Levels

    Once you have listed the work, organize it into three groups.

    PriorityType of workBudget decision
    EssentialSafety concerns, active leaks, necessary structural repairsAddress first
    ImportantWorn flooring, inefficient storage, outdated but functional fixturesPlan according to available funds
    OptionalDecorative panels, premium fittings, cosmetic upgradesAdjust or postpone

    This system gives you flexibility when estimates exceed your initial expectations.

    For example, you might decide to repair a leaking bathroom pipe and replace damaged flooring now while postponing decorative wall panels until a later stage.

    The benefit is simple: your renovation remains focused on the improvements that provide the greatest practical value.

    Step 4: Research Local Material and Labor Prices

    Renovation costs vary according to location, property condition, material availability, project size, and contractor experience. A price estimate from another city may not accurately reflect what you will pay.

    Request current prices for the materials and services your project requires. Compare similar products and make sure quotations include the same specifications.

    Check whether the quoted amount covers:

    • Product cost and required quantities.
    • Delivery and transportation.
    • Installation and preparation.
    • Applicable taxes and fees.
    • Removal of existing materials.
    • Cleanup and disposal.
    • Any specialist work required.

    A lower advertised price does not necessarily mean a lower total cost. The complete installed price is usually more useful for budgeting than the purchase price alone.

    Step 5: Check Whether the Project Fits Your Budget

    After gathering estimates, add the expected costs and compare the total with your available funds.

    If the project exceeds your limit, reconsider the scope before construction begins. You might retain serviceable cabinets, select a more affordable finish, complete the renovation in phases, or postpone optional work.

    Do not solve an affordability problem by removing essential safety work or assuming that no unexpected costs will arise.

    What Expenses Should a Home Renovation Budget Include?

    Home renovation budget infographic showing materials, labor, professional fees, permits, demolition, delivery, temporary living costs, and final cleanup.
    Plan every stage of your home renovation by accounting for materials, installation, professional services, permits, waste removal, and finishing costs. A complete budget helps you identify overlooked expenses before work begins.

    A reliable budget covers the complete renovation process, from initial assessment to final cleanup. Many cost overruns happen because homeowners calculate the price of visible materials but overlook the work required to prepare, install, and finish them.

    Materials and Fixtures

    Materials often represent a substantial share of the total project cost. Depending on the renovation, they may include paint, flooring, tiles, timber, drywall, cabinets, countertops, windows, doors, lighting, pipes, and bathroom fittings.

    Choose products according to their purpose, durability, maintenance requirements, and compatibility with the property.

    For example, flooring in a frequently used entrance should be selected for suitable durability and ease of maintenance rather than appearance alone.

    Before ordering materials, confirm measurements, quantities, specifications, delivery dates, and return policies. Incorrect dimensions or incompatible products can create waste and additional labor expenses.

    Labor and Installation

    Labor costs depend on the type of work, the number of tradespeople required, the project’s complexity, and the time needed to complete it.

    A quotation should explain which tasks are included. Demolition, surface preparation, installation, finishing, and cleanup may be charged separately.

    Ask how the contractor calculates additional work and whether the estimate assumes particular working hours or site conditions.

    When multiple trades are involved, coordinate their schedules. Poor sequencing can force workers to return, delay other tasks, or damage previously completed work.

    Design and Professional Services

    Some projects require architects, designers, structural specialists, engineers, or other qualified professionals.

    These services may be particularly important when changing a room layout, removing walls, extending a building, or modifying major plumbing and electrical systems.

    Confirm which services are necessary before setting your final budget. Also establish whether drawings, inspections, revisions, and follow-up visits are included in the quoted fees.

    Permits and Inspections

    Local rules determine whether a renovation requires permits, inspections, or formal approval. Requirements may depend on the type of work, the building, and the property’s location.

    Check these obligations before construction begins rather than assuming that every interior improvement can proceed without approval.

    Include applicable fees and clarify who will arrange the necessary documentation.

    Demolition and Waste Removal

    Removing old cabinets, tiles, flooring, fixtures, or damaged materials may require labor, transportation, protective coverings, and disposal services.

    Budget for the removal process separately when it is not included in the contractor’s estimate.

    Older properties may also contain materials that require specialist assessment or handling. If you suspect a hazardous material, arrange appropriate professional advice before disturbing it.

    Delivery, Storage, and Temporary Living Costs

    Material delivery charges can increase when products are bulky, heavy, or delivered in several separate orders. Some projects may also require temporary storage for furniture or household belongings.

    If renovation work makes your kitchen, bathroom, or bedroom temporarily unusable, consider whether you will need alternative arrangements.

    Depending on the circumstances, your budget might include temporary accommodation, transportation, additional meals, storage, or the cost of protecting furniture and belongings.

    Finishing and Final Cleanup

    The final stage may involve paint touch-ups, sealant, trim, hardware adjustments, cleaning, and correcting minor defects.

    These expenses are easy to overlook because they occur after the main construction work. However, leaving them out can create an unfinished result or require additional money after the contractor has completed the primary tasks.

    Before approving the final budget, review the entire sequence of work and identify expenses that occur at the beginning, during construction, and at completion.

    How Much Contingency Should You Include in a Renovation Budget?

    A contingency fund is money reserved for unexpected expenses that arise during a renovation. A common starting point is 10%–20% of the estimated project cost, with a larger allowance potentially appropriate for older properties, structural changes, or projects where hidden conditions are difficult to assess.

    The right amount depends on how much you know about the property, how clearly the work has been defined, and whether a professional inspection has identified potential problems.

    Calculate Your Contingency Fund

    Use this straightforward formula:

    Contingency fund = Base renovation estimate × Contingency percentage

    Suppose your planned renovation has a base estimate of $10,000 and you choose a 15% contingency allowance.

    Budget calculationAmount
    Base renovation estimate$10,000
    Contingency at 15%$1,500
    Total planned funding$11,500

    This example assumes the contingency is additional to the base project estimate.

    The $1,500 reserve should remain available for genuine unexpected expenses rather than being treated as money for optional upgrades.

    When Might You Need a Larger Reserve?

    Some projects involve more uncertainty than others.

    You may need a larger contingency when:

    • The house is older and its maintenance history is incomplete.
    • Existing plumbing or electrical installations may need attention.
    • Walls, ceilings, or floors will be opened during construction.
    • Structural alterations are planned.
    • Material availability or delivery schedules are uncertain.
    • The original scope depends on findings that cannot be confirmed until work begins.

    A professional inspection can help identify risks, but it cannot always reveal every concealed problem.

    Expert Tip: Keep your contingency separate from your normal project spending. If an unexpected repair costs $400, record the reason, update the remaining reserve, and check whether the total project still fits your spending limit.

    What Should You Do If the Contingency Fund Runs Low?

    First, identify why the reserve has been used. A necessary repair discovered during demolition is different from a decorative upgrade added after construction starts.

    Ask the contractor to explain the problem, provide a written estimate for the proposed solution, and identify whether delaying the work would create further damage or a safety concern.

    If the additional expense is essential, review optional parts of the project that could be postponed. Avoid covering the shortfall with unplanned borrowing without carefully assessing affordability.

    How Do You Estimate Renovation Costs Room by Room?

    Room-by-room budgeting helps you see how much each part of your home will require. It also makes it easier to compare priorities, revise the project scope, and complete work in stages if your available funds are limited.

    Instead of assigning one rough figure to the entire house, create a separate estimate for each room and include the labor, materials, preparation, installation, and finishing work it requires.

    Kitchen Renovation Budget

    Kitchen renovations can involve cabinets, countertops, appliances, flooring, lighting, plumbing, electrical work, and wall finishes.

    Before choosing materials, decide whether you need a complete redesign or simply want the existing kitchen to work better.

    Keeping the current layout can reduce costs when it avoids moving plumbing connections, drainage, gas lines, or electrical points. However, the existing installations should still be assessed if they are damaged or unsuitable.

    Consider these budgeting priorities:

    • Repair or replace damaged cabinets before selecting decorative accessories.
    • Measure countertops, cupboards, and appliance spaces carefully.
    • Include installation and delivery in the material estimate.
    • Confirm electrical and plumbing requirements before ordering fixtures.
    • Allow for surface preparation and cleanup.

    A kitchen that needs better storage may not require a complete replacement. Adjusting shelves, repairing cabinet doors, or replacing worn handles could address the main problem at a lower cost.

    Bathroom Renovation Budget

    Bathroom projects need careful planning because several systems operate within a small area. Costs may include plumbing, waterproofing, tiles, ventilation, lighting, sanitary fittings, and installation.

    Waterproofing and drainage deserve particular attention. Cutting costs in these areas may result in moisture damage and expensive repairs later.

    Before preparing the budget, determine whether the existing layout can remain. Moving a toilet, shower, or basin may require additional plumbing work and changes to flooring or walls.

    Include the following items in your estimate:

    • Removal of existing tiles and fixtures.
    • Plumbing inspection and necessary repairs.
    • Waterproofing and appropriate curing time.
    • Tiles, adhesives, grout, and installation labor.
    • Shower fittings, taps, basins, and other fixtures.
    • Ventilation, lighting, and final sealing.

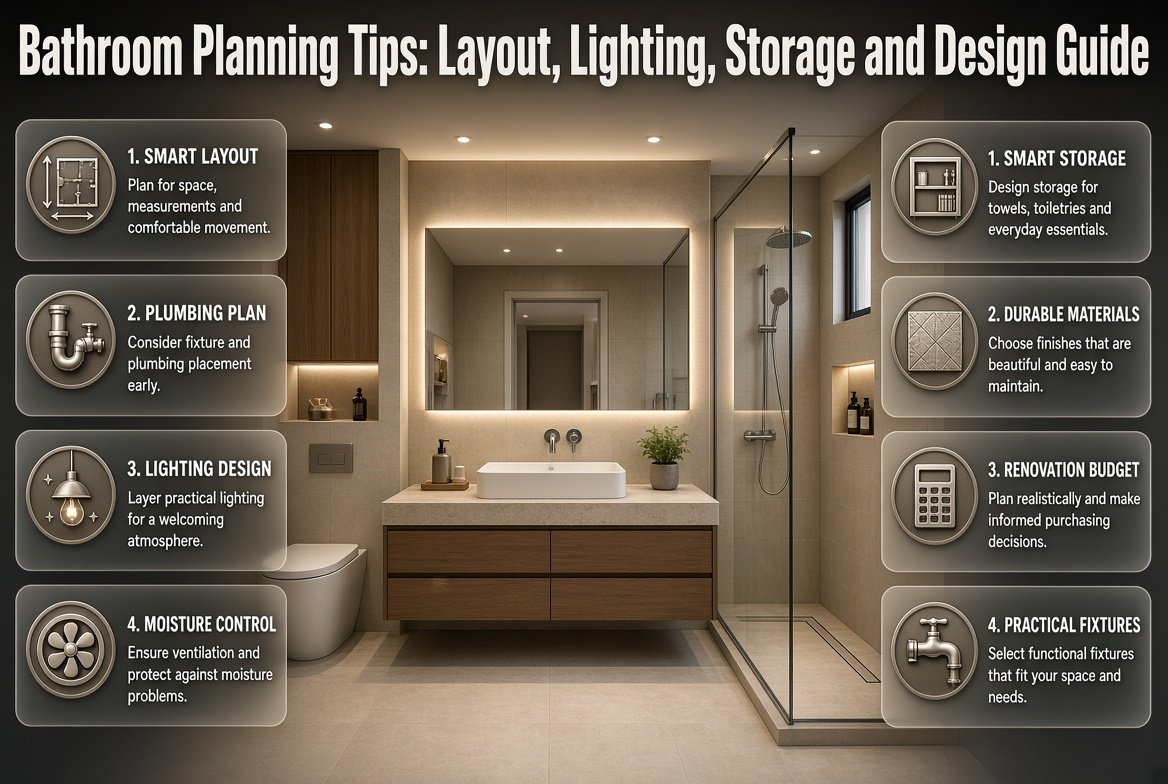
    For a more organized approach to this specific room, see Bathroom Planning Tips. Use the guidance to think through layout, practical requirements, and the sequence of decisions before finalizing your bathroom budget.

    Bedroom Renovation Budget

    Bedroom improvements may involve paint, flooring, wardrobes, lighting, window coverings, doors, and storage.

    Begin by identifying what actually needs to change. If the room has good flooring and functional furniture, you may achieve a noticeable improvement through repainting, better storage, or updated lighting.

    Built-in wardrobes can improve organization, but their price depends on dimensions, materials, internal fittings, and installation requirements. Obtain measurements and a detailed quotation before committing to a design.

    Avoid buying furniture before confirming the finished room dimensions, especially when flooring or wall treatments will change.

    Living Room Renovation Budget

    Living rooms often offer several opportunities to improve comfort without undertaking major construction.

    Potential expenses include repainting, flooring, lighting, curtains, furniture repairs, shelving, and electrical adjustments.

    Prioritize changes that solve a real problem. For example, improved lighting may make a room more useful, while reorganizing existing furniture may create a better layout without requiring new purchases.

    If your main goal is a more attractive room, compare the cost of repainting, refinishing existing furniture, and replacing decorative features before considering a complete makeover.

    You can explore Home Decorating Tips for ideas that complement a practical renovation budget.

    Roof, Exterior, and Structural Renovations

    Exterior and structural projects require a different approach because the work can affect the building’s safety, weather protection, and long-term condition.

    Roof repairs, exterior wall treatment, extensions, and structural modifications may require specialist assessments, permits, inspections, access equipment, and more complex scheduling.

    Do not rely on a cosmetic inspection when there are signs of structural movement, persistent water entry, or other significant damage. Arrange an appropriate professional assessment before committing to a final estimate.

    For these projects, budget according to the actual scope of work rather than assuming that a simple price per square foot will capture every expense.

    Use a Room-by-Room Budget Worksheet

    The following example shows how a homeowner might divide an illustrative $10,000 base renovation budget.

    Project areaEstimated allocation
    Kitchen$3,000
    Bathroom$2,000
    Bedroom$1,200
    Living room$1,300
    Necessary repairs and preparation$1,500
    Delivery, disposal, and finishing$1,000
    Base estimate$10,000

    These figures are examples, not recommended market prices. Actual allocations should be based on your property, local quotations, material specifications, and project requirements.

    If you also reserve 15% of the base estimate for contingency, your total planned funding becomes $11,500.

    How Do You Compare Contractor Quotes and Control Labor Costs?

    Home renovation budgeting infographic comparing contractor quotes, labor costs, itemized estimates, credentials, payment terms, and additional work approvals.
    Compare contractor quotations by reviewing the complete scope of work, labor charges, material responsibilities, and payment milestones. Written agreements and approved cost changes help keep renovation spending organized.

    Contractor quotations help you estimate the cost of completing the renovation, but comparing prices properly requires more than looking at the final figure.

    Two contractors may offer different prices because they have included different materials, preparation tasks, installation methods, or finishing requirements. A lower quotation may leave important work outside the agreed scope.

    Request Itemized Quotations

    Ask each contractor to describe the work in enough detail for you to understand what you are paying for.

    A useful quotation should identify:

    • The rooms and areas covered by the work.
    • The tasks included and excluded.
    • Material types, quantities, and specifications.
    • Labor charges and expected working duration.
    • Permit and inspection responsibilities, where applicable.
    • Delivery, waste removal, and cleanup arrangements.
    • Payment milestones and additional-work procedures.
    • Relevant warranties and completion requirements.

    Provide the same project description to each contractor. This makes it easier to compare quotations on a like-for-like basis.

    Check the Contractor’s Experience

    Look for relevant experience with the type of renovation you are planning. Ask about previous projects, references, appropriate credentials, insurance, and any local licensing requirements.

    A contractor who regularly handles bathroom waterproofing may be a better fit for that work than someone whose experience is mainly decorative painting.

    Specialist electrical, plumbing, gas, and structural work should be assessed according to applicable local requirements.

    Understand Labor-Only and Full-Service Arrangements

    Some contractors charge for labor while the homeowner purchases materials. Others provide materials and labor under one agreement.

    ArrangementPotential advantagePossible drawback
    Labor onlyGreater control over material purchasesYou may need to coordinate deliveries and quantities
    Materials and laborSimpler coordination through one contractorMaterial allowances and markups need careful review
    Separate specialist contractorsDirect control over specialist appointmentsScheduling and responsibility may become more complicated

    Neither approach is automatically cheaper. Compare the complete cost, time commitment, product quality, and responsibilities before deciding.

    Agree on Payment Terms in Writing

    Your contract should clearly explain the payment schedule, project scope, expected timeline, and procedures for changes.

    Avoid paying the entire project cost before the agreed work has been completed. Instead, use a payment arrangement that is appropriate to the contract, local rules, and actual project milestones.

    Keep copies of receipts, invoices, written approvals, and proof of payments.

    How Should You Handle Additional Work?

    Suppose a contractor discovers a damaged pipe after removing a bathroom cabinet. Ask for a written explanation of the problem, the repair options, the additional cost, and the likely effect on the schedule.

    Do not approve a significant variation simply because the contractor says it will be inexpensive. Establish the cost before the extra work proceeds, except where an immediate action is necessary to prevent further harm and the applicable agreement permits it.

    This process protects both parties by creating a clear record of what changed and why.

    How Can You Reduce Home Renovation Costs Without Sacrificing Quality?

    The most effective savings often come from reducing unnecessary work, making decisions early, and choosing materials carefully. Cheap products are not always economical if they require frequent repairs or replacement.

    Retain Functional Features

    If existing cabinets, doors, windows, flooring, or fixtures remain safe and serviceable, consider whether they can be repaired or refinished.

    For example, repainting sound cabinets and replacing damaged handles may improve the appearance of a kitchen without the cost of new cabinetry.

    Reuse should be based on condition, compatibility, and expected lifespan. Do not retain defective installations merely to reduce the immediate bill.

    Avoid Moving Plumbing and Electrical Points Without a Clear Reason

    Changing the location of sinks, toilets, cookers, and electrical connections can increase labor and material requirements.

    If the current layout works, keeping it may help control costs. If it creates serious functional problems, compare the long-term benefits of redesigning it against the additional expense.

    Any changes to major systems should be assessed by appropriately qualified professionals.

    Compare Materials by Durability

    Evaluate the purchase price alongside expected maintenance, cleaning requirements, suitability, and replacement frequency.

    A product that costs slightly more initially may be more economical if it lasts longer and is easier to maintain.

    Ask suppliers about specifications, warranties, installation requirements, and whether replacement products will remain available.

    Plan Purchases and Delivery Dates

    Prepare a materials list before ordering. Check measurements, quantities, availability, and delivery arrangements with the contractor.

    Purchasing materials too early can create storage and damage risks. Purchasing them too late can delay installation or lead to rushed substitutions.

    Coordinate orders with the construction schedule so products arrive when the site is ready for them.

    Avoid Late Design Changes

    Changes made after materials have been ordered or installed can create waste, extra labor, and delivery charges.

    Set decision deadlines for major items such as flooring, cabinets, tiles, bathroom fittings, and lighting.

    If a change becomes necessary, review its full financial and scheduling impact before approving it.

    For further ideas that focus on practical improvements rather than unnecessary spending, explore Budget Friendly Home Improvement Tips.

    How Do You Track Renovation Spending From Start to Finish?

    A renovation budget is only useful if you update it as the project progresses. Recording expenses regularly helps you identify overspending while there is still time to make sensible adjustments.

    You can use a spreadsheet, a notebook, or a budgeting application. The method matters less than maintaining accurate records of estimates, payments, invoices, and approved changes.

    Create a Renovation Expense Tracker

    Include these columns in your budget sheet:

    ExpenseOriginal estimateActual costDifference
    Materials$2,500$2,650+$150
    Labor$2,000$1,900-$100
    Fixtures$900$1,050+$150
    Waste removal$250$200-$50
    Total$5,650$5,800+$150

    The figures are illustrative. A positive difference means the expense exceeded its estimate, while a negative difference means it cost less than expected.

    When a category goes over budget, investigate the reason. An increase caused by a necessary repair may be justified, while an unplanned decorative purchase may be avoidable.

    Review Your Budget Every Week

    During active construction, review the budget at least weekly and whenever a major purchase or change is proposed.

    Check:

    • How much money has already been spent.
    • Which invoices and payments are outstanding.
    • Whether upcoming material orders fit the remaining budget.
    • Whether additional work has been approved.
    • How much contingency remains.
    • Whether the project still fits your financial limit.

    A regular review helps you identify problems early instead of discovering them when the renovation is nearly complete.

    Keep Renovation Documents Together

    Save quotations, receipts, contracts, warranties, product specifications, permits, and inspection records in one organized location.

    These documents help you check charges, confirm agreed specifications, and identify the correct products when future repairs are required.

    If several contractors are involved, label records by room or work category. This simple habit makes it easier to locate the information you need.

    What Are the Most Common Home Renovation Budgeting Mistakes?

    Many budget problems begin before construction starts. Understanding these mistakes can help you avoid unnecessary expenses and protect the quality of your renovation.

    Underestimating the Complete Project Cost

    Homeowners sometimes calculate the price of their preferred materials without including installation, preparation, delivery, demolition, or finishing.

    The result is a budget that looks affordable on paper but does not cover the full project.

    How to avoid it: Estimate each stage separately and review the complete scope before agreeing to a spending limit.

    Choosing a Contractor Based Only on Price

    A low quotation can appear attractive, particularly when funds are limited. However, missing tasks, unsuitable materials, and unclear exclusions can increase the final cost.

    How to avoid it: Compare itemized quotations, specifications, relevant experience, and contract terms. Choose the proposal that offers the best overall value for your requirements.

    Spending the Contingency on Upgrades

    A contingency fund is intended for unexpected expenses. Using it for optional improvements leaves less money available if genuine problems arise.

    How to avoid it: Keep contingency funds separate and approve optional upgrades only when the remaining budget can comfortably support them.

    Making Too Many Changes During Construction

    Changing tile designs, cabinet dimensions, fixtures, or room layouts after work begins can create additional material and labor costs.

    How to avoid it: Finalize important selections before construction, and require a written cost assessment for significant changes.

    Ignoring the Condition of Older Installations

    Covering damaged surfaces without investigating the underlying cause can lead to repeat work. For example, repainting a wall will not resolve a continuing moisture problem.

    How to avoid it: Investigate the cause of visible damage and obtain professional advice when necessary before paying for cosmetic repairs.

    Forgetting Daily Household Disruption

    Renovations can affect cooking, washing, sleeping, and working at home. If these effects are not considered, you may incur unexpected costs for meals, transport, storage, or alternative accommodation.

    How to avoid it: Plan how your household will function during each stage and include realistic disruption costs where necessary.

    Failing to Document Agreements

    Verbal discussions can create confusion about what a contractor promised, which materials were selected, and how much additional work should cost.

    How to avoid it: Keep written records of the original agreement, approved changes, payment milestones, and outstanding work.

    What Do Professionals Recommend for Better Renovation Budgeting?

    Home renovation budgeting infographic featuring material inspections, construction sequencing, clear specifications, contractor coordination, and final quality checks.
    Follow professional renovation planning practices to reduce avoidable expenses and keep work organized. Accurate measurements, clear specifications, coordinated deliveries, and final inspections help support better budget control.

    Professional renovation planning relies on clear specifications, accurate measurements, sensible sequencing, and regular communication. Homeowners can apply these principles even when managing a relatively small project.

    Inspect Before Ordering Materials

    Determine what needs to be repaired and measure the relevant areas before purchasing supplies.

    For flooring, confirm the actual area and allow for an appropriate quantity of additional material based on the layout and installation method. For cabinets and fixtures, check dimensions and service connections before placing an order.

    Buying materials before the requirements are clear can lead to unsuitable purchases and unnecessary returns.

    Complete Hidden Work Before Finishes

    Where the project requires plumbing, electrical, structural, or waterproofing work, coordinate these tasks before installing finishes that could need to be removed later.

    For example, repairing a pipe after new bathroom tiles have been installed may require damaging the completed surface.

    Follow the appropriate construction sequence and ensure that necessary inspections or checks are completed before covering relevant installations.

    Set Clear Specifications

    Avoid vague descriptions such as standard tiles or good-quality paint when preparing quotations.

    Identify the required dimensions, finish, product type, quantities, and installation expectations. This helps contractors price the same work and reduces the risk of unexpected substitutions.

    If you are still deciding between products, establish a realistic allowance and understand how selecting a more expensive option will affect the budget.

    Coordinate Contractors and Deliveries

    Create a basic schedule that shows when each trade is expected to work and when essential materials should arrive.

    Poor coordination may leave workers waiting for materials or cause completed surfaces to be damaged by later work.

    Allow realistic time for delivery, preparation, drying, inspections, and corrections. Do not assume every stage can be completed immediately after the previous one.

    Inspect Work Before Final Payment

    Compare completed work with the written agreement. Check visible finishes, agreed installations, doors, windows, fixtures, and any specified testing or inspections.

    Document defects and follow the contract’s procedure for correcting them. Keep relevant records for future maintenance and warranty claims.

    For broader planning guidance, read House Renovation Planning. You can also explore Home Tips & Ideas for related ways to organize and improve your living space.

    How Can You Create a Home Renovation Budget Step by Step?

    If you are starting from scratch, use this sequence to turn your renovation ideas into a practical financial plan.

    1. List the work. Identify every repair, replacement, and improvement you want to complete.
    2. Set priorities. Separate essential repairs from important upgrades and optional decorative changes.
    3. Assess the property. Inspect visible conditions and arrange specialist assessments where appropriate.
    4. Collect quotations. Request current material prices and comparable contractor estimates.
    5. Calculate the base cost. Include labor, materials, fees, delivery, demolition, and finishing.
    6. Add contingency. Reserve an appropriate amount for uncertain or unexpected expenses.
    7. Check affordability. Make sure the total fits your available funding and household commitments.
    8. Finalize the scope. Confirm materials, responsibilities, payment terms, and the proposed schedule.
    9. Track spending. Record actual costs and review the remaining budget regularly.
    10. Inspect and close the project. Check the completed work, address outstanding defects, and organize all documents.

    This process gives you a structured way to manage decisions without losing sight of your financial limit

    How Do You Create a Realistic Home Renovation Budget Without Overspending?

    Creating a realistic home renovation budget starts with understanding the full scope of your project before spending money on materials or hiring contractors. Estimate the cost of labor, materials, demolition, delivery, permits, installation, and finishing work. Then compare the total with the amount you can comfortably afford without affecting essential household expenses.
    A common budgeting problem occurs when homeowners focus on visible improvements, such as new cabinets, flooring, or decorative finishes, while overlooking hidden repairs and additional labor. A detailed estimate helps identify these expenses before construction begins.
    Practical steps to follow:
    List all planned repairs and improvements, separating essential work from optional upgrades.
    Obtain itemized quotations from contractors and compare similar materials and services.
    Set aside a contingency fund, commonly around 10%–20% of the estimated project cost, depending on the property’s condition and renovation complexity.
    Track actual expenses regularly and revise the plan when necessary.
    The goal is to create a budget that covers the complete project rather than simply choosing a figure that looks affordable at the beginning.

    How Much Contingency Money Should You Set Aside for a Home Renovation?

    A contingency fund is money reserved for unexpected expenses that arise during renovation work. A planning allowance of approximately 10%–20% of the base renovation estimate is common, although older properties, structural alterations, and projects with uncertain conditions may require a larger reserve.
    For example, if your estimated renovation cost is $15,000, a 15% contingency would provide an additional $2,250, bringing your total planned funding to $17,250. These figures are illustrative; your actual allowance should reflect the risks identified during planning and inspection.
    Unexpected expenses may include damaged pipes discovered during demolition, deteriorated surfaces beneath old flooring, or additional preparation required before new materials can be installed.
    How to manage your contingency effectively:
    Keep the reserve separate from your regular construction budget.
    Request a written explanation and cost estimate when an unexpected problem appears.
    Use contingency funds for necessary unforeseen work rather than optional upgrades.
    Reassess the remaining reserve after each additional expense.
    A contingency fund cannot prevent every overrun, but it gives you more flexibility to handle problems without immediately abandoning essential work.

    What Are the Biggest Hidden Costs in Home Renovation Budgeting?

    Hidden renovation costs are expenses that homeowners may overlook when preparing their initial estimates. They often arise from preparation work, concealed damage, project delays, or services that are not included in the original contractor quotation.
    For example, replacing bathroom tiles may also require removing old materials, repairing the underlying surface, waterproofing, transporting supplies, and disposing of construction waste. If these tasks are excluded from the original estimate, the final cost can be considerably higher than expected.
    Common expenses to include in your budget:
    Demolition and disposal of existing materials.
    Plumbing and electrical repairs discovered during construction.
    Surface preparation, waterproofing, and finishing supplies.
    Delivery charges, equipment rental, and material storage.
    Permit fees, inspections, and specialist assessments where required.
    Temporary accommodation or alternative household arrangements when necessary.
    To reduce these surprises, inspect the property before finalizing the scope, ask contractors to identify exclusions, and clarify how additional work will be priced.
    The most reliable approach is to budget for the entire renovation process, from the initial inspection to the final cleanup, rather than concentrating only on the materials you can see.

    How Can You Reduce Home Renovation Costs Without Sacrificing Quality?

    Reducing renovation costs does not necessarily mean purchasing the cheapest materials or choosing the lowest contractor quotation. Better savings usually come from avoiding unnecessary work, making decisions early, comparing suitable alternatives, and retaining features that remain safe and functional.
    For instance, if your kitchen cabinets are structurally sound, repairing the doors, refreshing the finish, and replacing worn handles may improve their appearance without the expense of a complete replacement.
    Practical ways to control renovation costs:
    Keep the existing layout when moving plumbing or electrical connections is unnecessary.
    Compare materials based on durability, maintenance, and installation costs.
    Reuse serviceable furniture, cabinets, doors, and fixtures where appropriate.
    Finalize measurements and material selections before placing orders.
    Obtain comparable, itemized quotations from qualified contractors.
    Postpone decorative upgrades if they threaten the budget for essential repairs.
    Avoid cutting costs on structural safety, required permits, waterproofing, or qualified installation work. Poor workmanship can lead to expensive repairs that outweigh the original savings.
    A successful budget balances affordability with durability, functionality, and the long-term condition of your home.

    Should You Renovate Your Entire House at Once or Complete One Room at a Time?

    The decision depends on your available funds, the condition of your property, the complexity of the work, and how much disruption your household can manage. Renovating several rooms together may make it easier to coordinate contractors, order materials in larger quantities, and complete related work within one schedule.
    However, a whole-house renovation generally requires more money upfront and may make parts of the property difficult to use. Completing one room at a time spreads expenses over a longer period, although repeated contractor visits, equipment setup, and separate material deliveries can sometimes increase the overall cost.
    Choose the approach that suits your situation:
    Whole-house renovation: Consider this when the work is interconnected, the budget is sufficient, and the schedule can be coordinated effectively.
    Room-by-room renovation: Consider this when funds are limited, only certain areas need immediate attention, or maintaining access to the rest of the home is important.
    Essential repairs first: Address safety concerns, active leaks, and problems that could cause further damage before either approach moves forward.
    Before deciding, compare the complete cost of both options, including labor, delivery, temporary living arrangements, and potential delays.
    The best strategy is the one that allows you to complete necessary work to an appropriate standard while keeping spending manageable and avoiding unfinished renovation projects.

    Conclusion: Plan Your Home Renovation Budget With Confidence

    A successful home renovation begins with a realistic budget, careful planning, and a clear understanding of your priorities. Whether you are updating a single room or improving your entire property, knowing how much you can afford before work begins helps you make better decisions, manage expenses, and avoid unnecessary financial pressure. The goal is not simply to spend less, but to invest wisely in improvements that make your home more functional, comfortable, and durable.

    Before starting your project, assess the condition of your property, list essential repairs, compare contractor quotations, and research material costs. Include a contingency fund for unexpected problems, such as hidden water damage, outdated wiring, or additional repairs discovered during construction. Track every payment throughout the project and review your spending regularly so you can address budget concerns before they become difficult to manage.

    Keep these essential principles in mind:

    • Set clear priorities: Complete safety-related repairs and essential improvements before optional decorative upgrades.
    • Prepare a detailed budget: Account for labor, materials, permits where applicable, delivery charges, waste removal, and finishing work.
    • Allow for unexpected expenses: Maintain a contingency reserve appropriate to the age, condition, and complexity of your property.
    • Compare before purchasing: Evaluate material quality, warranties, and installation requirements rather than choosing products solely because they are inexpensive.
    • Avoid unnecessary changes: Finalize your design and specifications early to reduce delays, extra labor, and costly last-minute decisions.
    • Monitor your spending: Keep written quotations, invoices, receipts, and a record of any approved changes to the original plan.

    If you need more practical ideas for improving your living space, explore Heartomenal for helpful home improvement guidance and inspiration. You can also use the principles discussed in this guide alongside your renovation plan to make informed choices at every stage.

    Ultimately, effective home renovation budgeting is about balancing affordability, quality, and long-term value. With realistic expectations, organized planning, and consistent cost monitoring, you can transform your home without losing control of your finances. Start with the improvements that matter most, make decisions according to your available budget, and build a renovation plan that supports your household’s needs today and in the years ahead.

  • House Renovation Planning

    House Renovation Planning

    Introduction

    House Renovation Planning | Renovating a house can be exciting until the expenses start increasing, the work takes longer than expected, and one small change leads to three more problems. These situations often happen when homeowners begin construction before deciding what needs to be improved, how much they can spend, and which tasks should come first.

    House renovation planning helps you turn an overwhelming project into a manageable process. Whether you want to update an outdated kitchen, improve your bathroom, repair aging walls, or renovate several rooms, a clear plan can help you control costs, coordinate contractors, and make better decisions.

    This guide explains how to assess your property, establish a realistic renovation budget, create a practical timeline, select suitable professionals, choose materials, and avoid costly mistakes. It also covers renovation permits, safety, temporary living arrangements, and the final inspection process so you can approach your project with greater confidence.

    For more practical ideas about improving everyday living spaces, visit Heartomenal.

    1. What Is House Renovation Planning?

    House renovation planning is the process of identifying the improvements a home needs, setting priorities, estimating costs, arranging professional help, choosing materials, and organizing the work before construction begins.

    A good plan connects your renovation goals with your available budget, property condition, household needs, and expected completion date. It also prepares you for unexpected repairs instead of allowing every new problem to disrupt the entire project.

    For example, imagine you want to renovate an older home with a dated kitchen, a leaking bathroom, and peeling paint. Repainting the entire house first might seem productive, but repairing the bathroom leak and checking the kitchen plumbing should come earlier. Otherwise, later work could damage newly finished surfaces.

    Effective planning answers five important questions:

    • What needs to be repaired, replaced, or improved?
    • Which problems are urgent, and which can wait?
    • How much money can you realistically spend?
    • What sequence of work will prevent unnecessary rework?
    • Who will complete each task, and how will progress be checked?

    The purpose is not to make every decision months in advance. It is to make the important decisions early enough to avoid preventable delays, waste, and expensive changes.

    2. How Should You Assess Your House Before Renovating?

    Start by inspecting the property and recording its current condition. This initial assessment helps you distinguish essential repairs from cosmetic improvements and reveals problems that could affect the budget or construction sequence.

    Walk through every room, including storage areas, hallways, bathrooms, the kitchen, and outdoor spaces. Look for visible damage, poor ventilation, water stains, cracked finishes, loose fittings, and areas that no longer function well.

    Inspect the main areas of the property

    Structure and foundations: Look for unusual cracks, uneven floors, sagging areas, or signs of movement. A small surface crack is not necessarily a structural problem, but widening cracks or significant movement deserve professional assessment.

    Roof and drainage: Check for leaks, damaged roofing materials, blocked gutters, and water collecting near the building. Moisture entering from above can damage ceilings, walls, insulation, and electrical fittings.

    Plumbing: Examine visible pipes, taps, drains, water pressure, and areas around sinks and toilets. Persistent dampness or unexplained water bills may indicate a hidden leak.

    Electrical systems: Note damaged outlets, exposed wiring, flickering lights, or frequently tripping circuits. Have a qualified electrician assess potentially unsafe installations rather than attempting risky repairs yourself.

    Walls, ceilings, and floors: Record peeling paint, loose plaster, uneven surfaces, damaged tiles, and flooring that moves or feels unstable.

    Windows and doors: Check whether they close properly, allow unwanted drafts, or show signs of moisture damage.

    Ventilation and comfort: Notice rooms that remain damp, become excessively hot, or receive little natural light. These issues may require better ventilation, shading, insulation, or layout changes.

    Create a renovation inspection checklist

    Use a simple table to organize what you find.

    AreaProblem identifiedPriorityNext action
    BathroomWater leaking near the showerHighArrange a plumbing inspection
    KitchenInsufficient storageMediumPlan cabinet improvements
    Living roomPeeling paintLow, if the surface is soundPrepare and repaint
    RoofSigns of water penetrationHighArrange a roof assessment
    BedroomPoor natural lightingMediumReview lighting and window options

    Priorities depend on the severity of the problem. Water intrusion, structural concerns, electrical hazards, and other safety issues should be evaluated before decorative upgrades.

    Pro Tip: Photograph existing damage before work starts. These pictures create a useful record, help contractors understand the scope, and make it easier to compare the property’s condition before and after renovation.

    3. How Do You Set Renovation Goals That Make Sense?

    Before choosing paint colors or browsing furniture, decide what you want the renovation to achieve. Clear goals make it easier to compare options and prevent the project from expanding unnecessarily.

    Homeowners generally renovate for one or more of four reasons: repairing damage, improving daily function, updating appearance, or preparing a property for future needs.

    Separate essential repairs from optional upgrades

    Create three lists:

    • Essential work: Repairs related to safety, structural condition, water intrusion, damaged utilities, and basic functionality.
    • Important improvements: Better storage, improved lighting, updated fixtures, more usable space, or improved room layouts.
    • Optional upgrades: Decorative wall treatments, premium finishes, statement lighting, and luxury accessories.

    This method helps you protect the budget if an unexpected repair becomes necessary.

    Suppose your original plan includes installing expensive kitchen countertops, replacing bedroom flooring, and repairing a leaking roof. If the budget cannot comfortably cover everything, the roof should generally take priority because delaying water-related repairs can increase damage.

    Think about how your household uses each room

    A successful renovation should solve real problems, not simply make rooms look different.

    Ask yourself:

    • Does the kitchen provide enough preparation space?
    • Is there adequate storage for everyday belongings?
    • Does the bathroom have suitable ventilation?
    • Can family members move comfortably through the main living areas?
    • Are there rooms that feel too dark, noisy, hot, or cold?
    • Will the house still suit your needs in the next several years?

    If you need more guidance on practical improvements throughout your home, explore Home Tips & Ideas.

    Common Mistake: Choosing a design before identifying the problem. A beautiful kitchen can still be frustrating to use if storage, lighting, appliance placement, and work surfaces have not been planned properly.

    4. How Do You Create a Realistic House Renovation Budget?

    A renovation budget should include more than materials and labor. It must also account for professional assessments, permits where required, waste removal, delivery, temporary accommodation when necessary, and unexpected repairs.

    The best starting point is to estimate the cost of each part of the project rather than relying on one broad figure.

    Build your budget category by category

    Budget categoryWhat to include
    Assessment and designInspections, drawings, and professional consultations
    Structural workNecessary repairs to foundations, walls, roofs, or supporting elements
    Plumbing and electricalPipework, wiring, fixtures, and safety upgrades
    LaborContractors, tradespeople, and installation services
    MaterialsTiles, paint, flooring, cabinets, timber, and other supplies
    PermissionsRequired permits, inspections, and associated charges
    Site managementWaste disposal, delivery, protection, and cleanup
    Temporary arrangementsAlternative accommodation or additional transport, if needed
    ContingencyA reserve for unexpected but necessary costs

    Obtain written estimates using the same project specifications wherever possible. One contractor may include demolition and waste disposal, while another may exclude them. Comparing the headline totals alone can therefore be misleading.

    How much contingency should you keep?

    A contingency reserve of around 10–20% of the planned renovation cost is a useful starting point for many projects. Older homes, properties with hidden moisture damage, and major structural renovations may require a larger reserve based on professional advice.

    For example, if your estimated renovation budget is 1,000,000 in your local currency, a 15% contingency would be 150,000. Your working budget would therefore be 1,150,000, provided you have the funds available.

    The contingency is not money intended for decorative upgrades. Keep it available for genuine surprises, such as damaged plumbing discovered after removing a cabinet or deteriorated materials uncovered during repairs.

    Estimate the cost of individual tasks

    Instead of writing “renovate bathroom,” break the work into measurable components:

    • Remove old fixtures and finishes.
    • Repair the underlying surfaces.
    • Inspect and update plumbing where necessary.
    • Complete waterproofing.
    • Install new tiles and fixtures.
    • Improve ventilation and lighting.
    • Finish, test, and clean the room.

    Request separate prices for major components when practical. This makes it easier to identify where costs are increasing and which changes could reduce spending without compromising safety.

    Decide what to do if the budget becomes tight

    Use this order of review:

    1. Remove optional upgrades that do not affect essential function.
    2. Compare alternative materials with similar durability and maintenance requirements.
    3. Keep existing fixtures or layouts where they remain suitable.
    4. Phase nonessential rooms into a later project.
    5. Obtain clarification about labor, delivery, and installation charges.

    Do not cut costs by ignoring structural defects, using unsuitable electrical components, skipping waterproofing, or hiring unqualified people for regulated work.

    Expert Tip: Track the original estimate, approved changes, actual payments, and remaining balance in one spreadsheet. Update it whenever a purchase or payment is made, rather than trying to reconstruct expenses at the end of the month.

    5. How Do You Build a Renovation Timeline?

    House renovation timeline infographic showing planning, demolition, repairs, plumbing, electrical work, flooring, installations, and final inspections.
    Organize your renovation from initial inspection to final inspection with a practical project timeline. Coordinate contractors, material deliveries, repairs, and finishing work to reduce avoidable delays.

    A renovation timeline identifies what must happen first, which activities can overlap, and when important decisions or deliveries must be completed.

    The total duration depends on the size of the property, the condition of existing systems, material availability, contractor schedules, and whether you need permits or specialist inspections. A simple room refresh may take days, while a full-house renovation can take several months or longer.

    Follow a sensible order of work

    A typical renovation sequence looks like this:

    Inspection and planning → Design and approvals → Ordering and preparation → Demolition → Structural repairs → Plumbing and electrical work → Insulation and wall preparation → Flooring and surface finishes → Cabinets and fixtures → Final testing and cleanup

    The exact order may vary. For example, some flooring is installed before cabinetry, while other flooring is fitted afterward. Follow the product specifications and the agreed construction plan.

    The essential principle is to complete concealed work, inspections, and messy construction before delicate final finishes.

    Prepare a sample timeline

    StageMain activitiesScheduling consideration
    PlanningInspection, priorities, budget, designAllow time for decisions
    PreparationQuotes, permits, material ordersConfirm availability before demolition
    DemolitionRemoval of approved materialsCheck for hazardous materials in older properties
    Repairs and rough-insStructural, plumbing, electrical workArrange required inspections
    Surface workPlastering, waterproofing, painting preparationRespect curing and drying times
    InstallationCabinets, flooring, fixtures, fittingsConfirm accurate measurements
    CompletionTesting, corrections, cleanupKeep time for outstanding defects

    Add some flexibility to the schedule. Deliveries may be delayed, surfaces may require additional drying time, or a contractor may discover a problem that was hidden during the initial inspection.

    Coordinate material deliveries carefully

    Buying everything too early can fill the house with items that may become damaged, while ordering too late can leave workers waiting.

    Confirm delivery dates for long-lead items such as custom cabinets, windows, doors, specialty tiles, and certain fixtures. Verify dimensions and specifications before approving orders.

    Quick Tip: Ask each contractor which decisions they need from you and by what date. Choosing a tile after the installer is scheduled to begin can create avoidable delays.

    6. Should You Renovate One Room at a Time or the Whole House?

    The right approach depends on the project scope, available funds, household needs, and how much disruption you can tolerate.

    ApproachAdvantagesLimitationsBest suited to
    One room at a timeEasier to control spending and disruptionMay involve repeated setup costsSmaller budgets and occupied homes
    Several rooms togetherBetter coordination for connected workRequires more planning and upfront fundsHomes needing related upgrades
    Whole-house renovationAllows an integrated design and coordinated systems workHighest disruption and management demandsMajor, well-planned projects

    Renovating related spaces together can reduce duplicated work. For example, if several rooms require the same electrical upgrade, coordinating the work may be more efficient than arranging separate visits.

    However, renovating everything simultaneously increases the number of decisions and expenses that must be managed at once.

    Consider whether you can remain in the house

    Living through a renovation may be practical when work is limited to one room and essential facilities remain usable. It becomes harder when the project involves major dust, unsafe work areas, water interruptions, electrical upgrades, or extensive kitchen and bathroom demolition.

    Before deciding, consider:

    • Whether there will be a functioning toilet and washing area.
    • How meals will be prepared.
    • Whether children or pets can remain safely away from work zones.
    • Whether noise and dust will interfere with sleep or work.
    • Whether temporary accommodation costs less than managing the disruption.

    Do not occupy areas that contractors have identified as unsafe.

    7. How Do You Choose Materials and Finishes?

    Materials should be selected according to performance, durability, maintenance, appearance, and total installed cost. A low purchase price does not always mean a lower long-term cost.

    A material may require specialist installation, frequent maintenance, expensive cleaning products, or replacement sooner than a more suitable alternative.

    Compare materials using practical criteria

    For flooring, consider moisture exposure, foot traffic, slip resistance, cleaning requirements, and the condition of the existing subfloor.

    For walls, consider whether the surface is dry and sound, whether the finish can tolerate cleaning, and whether the room requires moisture-resistant products.

    For kitchen and bathroom surfaces, assess resistance to water, heat, stains, and regular use. Always follow the manufacturer’s instructions for installation, sealing, and maintenance.

    Match the material to the room

    LocationMain considerations
    KitchenCleaning, moisture, heat, storage, and heavy daily use
    BathroomWaterproofing, ventilation, slip resistance, and plumbing access
    BedroomComfort, noise, durability, and ease of cleaning
    Living roomFoot traffic, appearance, lighting, and furniture placement
    Outdoor areasWeather exposure, drainage, surface stability, and maintenance

    Request samples when color, texture, or finish matters. Materials often look different under natural daylight, warm artificial lighting, and the lighting already installed in your home.

    Avoid changing specifications midway

    Late changes can affect costs beyond the price difference between two products. A heavier fixture may need additional support, a different tile may require another adhesive, and a replacement cabinet may not fit the existing plumbing.

    Finalize key dimensions and product specifications before ordering whenever possible.

    For ideas on creating a cohesive appearance without losing sight of function, explore Home Decorating Tips.

    8. How Do You Select the Right Renovation Contractor?

    A contractor can influence the quality, cost, and pace of your renovation. Choosing someone solely because they offer the lowest quote can create problems if the estimate excludes essential work or the contractor lacks relevant experience.

    Look for professionals whose qualifications, experience, communication, and written proposals match the work required.

    Check experience and credentials

    Ask potential contractors about similar projects they have completed. Where appropriate, inspect previous work or request references from recent customers.

    Verify licenses, registrations, insurance, and specialist qualifications required in your location. Requirements differ by jurisdiction and type of work, so do not assume that one set of credentials covers every trade.

    For major structural, electrical, gas, or plumbing work, use appropriately qualified professionals.

    Request comparable written estimates

    Give each contractor the same scope of work and specifications. Ask for a written breakdown that explains:

    • Included and excluded tasks.
    • Material types, grades, and quantities.
    • Labor charges and payment stages.
    • Expected start and completion dates.
    • Waste removal and site protection.
    • Responsibility for obtaining permits.
    • Procedures for variations and unexpected repairs.
    • Warranty terms and defect correction arrangements.

    A detailed proposal makes it easier to identify omissions before the contract is signed.

    Put the agreement in writing

    Your contract should describe the work, price, schedule, payment arrangements, responsibilities, and method for approving changes. It should also address how disputes, delays, and defects will be handled.

    Avoid making large payments without a clear contractual basis. Payment schedules should correspond to agreed milestones and applicable local requirements.

    Common Mistake: Relying entirely on verbal promises. A written agreement helps both parties understand what was included in the original price and what counts as an additional charge.

    9. What Permits and Safety Checks May Be Required?

    House renovation permits and safety checks infographic featuring building approvals, structural inspections, electrical safety, fire prevention, and hazardous material assessment.
    Prepare for a safer renovation by checking local permit requirements, arranging necessary inspections, and identifying potential hazards before construction begins. Proper planning helps protect occupants and prevent avoidable compliance problems.

    Not every renovation needs formal permission, but certain projects require building approvals, specialist inspections, or authorization from a landlord, housing association, or relevant authority.

    Requirements depend on your location, property type, and the nature of the proposed work. Structural alterations, additions, changes to certain utility systems, and work affecting protected buildings may involve additional requirements.

    Check before construction begins

    Ask the relevant local authority or a qualified professional whether your project requires:

    • Building or renovation permits.
    • Structural drawings or engineering approval.
    • Electrical or plumbing inspections.
    • Fire-safety measures.
    • Permission for exterior changes or additions.
    • Landlord or shared-property approval.
    • Special handling for hazardous materials.

    Do not assume that cosmetic work and structural alterations follow the same rules.

    Plan for safety during the renovation

    Construction areas should be separated from occupied spaces wherever practical. Keep children and pets away from tools, exposed wiring, open trenches, unstable materials, and unfinished stairs.

    Control dust and debris using suitable protective measures. Older properties may contain asbestos, lead-based paint, or other hazardous materials. If you suspect such materials, arrange appropriate professional assessment before disturbing them.

    Never remove potentially hazardous materials simply because they are hidden beneath a newer finish.

    Expert Tip: Confirm who is responsible for inspections and documentation before work starts. A contractor’s statement that permission is unnecessary should be checked against the applicable local requirements when the project involves regulated work.

    10. How Can You Make a Renovation More Energy-Efficient?

    Renovation is an opportunity to improve comfort and reduce avoidable energy use. The best improvements depend on the building, local climate, existing equipment, and how the household uses electricity or fuel.

    Start by identifying where energy is being wasted rather than automatically replacing equipment that may still be suitable.

    Review insulation, air leakage, and shading

    Check for gaps around windows and doors, poorly insulated areas, and rooms that receive excessive heat. Appropriate weather sealing, insulation, exterior shading, and ventilation improvements may reduce discomfort and energy demand.

    However, sealing a building without considering ventilation can trap moisture and pollutants. Choose a balanced solution suitable for the property’s construction and climate.

    Improve lighting and equipment

    Energy-efficient lighting can reduce electricity consumption, particularly where lights are used frequently. When replacing appliances, compare their rated energy use, expected lifespan, maintenance requirements, and purchase price.

    A more expensive product may offer savings over time, but the result depends on actual usage and operating costs.

    Consider water efficiency

    Repair leaking taps, select appropriate water-saving fittings, and review hot-water system performance. In bathrooms and kitchens, plan plumbing changes before installing final finishes so pipes can be accessed without damaging completed work.

    For broader ideas about making a house more comfortable and practical, visit Home Comfort Tips.

    11. How Do You Manage a Renovation While Living at Home?

    Living in a property during renovation requires clear boundaries, daily organization, and realistic expectations. Even well-planned projects create noise, dust, temporary access restrictions, and interruptions to normal routines.

    Before work starts, decide which areas must remain usable and which can be closed off completely.

    Establish a temporary household setup

    If the kitchen is being renovated, prepare a safe temporary area for simple meals. Store essential dishes, utensils, and frequently used items where they remain accessible.

    If the bathroom is unavailable, arrange a reliable alternative before demolition. For larger projects, temporary accommodation may be more practical than trying to maintain normal routines in an active construction zone.

    Keep personal belongings away from dust and moisture. Label storage boxes and photograph the location of essential items before moving furniture.

    Agree on working hours and access

    Discuss arrival times, parking, deliveries, keys, alarm arrangements, and access to water or electricity. Establish how the contractor will contact you about decisions or unexpected problems.

    Keep children and pets away from the work zone even when workers are not present. Tools, open service areas, sharp materials, and incomplete installations can remain hazardous after the working day ends.

    Keep essential household information available

    Store important contact details, contracts, receipts, material specifications, and emergency arrangements in one accessible place.

    If you are also reorganizing everyday routines during the project, Everyday Household Tips and Tricks can provide additional ideas for keeping household tasks manageable.

    12. How Should You Track Progress and Control Changes?

    A renovation needs regular oversight even when you have hired experienced professionals. Monitoring progress helps you identify missed details, coordinate deliveries, and resolve small issues before they become expensive problems.

    You do not need to supervise every technical task. Instead, establish a consistent process for reviewing milestones and confirming decisions.

    Hold short progress meetings

    At agreed intervals, review completed work, upcoming tasks, outstanding decisions, and any issues affecting the schedule.

    Ask practical questions:

    • What has been completed since the previous review?
    • What is scheduled next?
    • Are any materials or approvals outstanding?
    • Has the budget changed?
    • Are inspections required before the next stage?
    • Is any decision needed from the homeowner?

    Keep a written record of important answers.

    Use a formal change process

    Unexpected conditions sometimes require changes. A hidden leak, damaged subfloor, or unsuitable existing installation may justify additional work.

    Before approving a change, ask the contractor to explain the reason, cost, schedule effect, and alternatives. Record the agreed adjustment in writing before the additional work proceeds, except where immediate action is necessary to address an urgent safety issue.

    Track the budget and schedule together

    A cheaper material that arrives late may cost more overall if it delays several trades. Similarly, approving a layout change may affect plumbing, electrical work, cabinets, and finishes.

    Evaluate decisions based on their full impact rather than looking only at the immediate price difference.

    13. What Are the Most Common House Renovation Planning Mistakes?

    Many renovation problems are not caused by a lack of design ideas. They happen because homeowners underestimate the amount of coordination required.

    Avoiding these common mistakes can protect your budget and reduce disruption.

    Mistake 1: Starting without a detailed scope

    A vague instruction such as “modernize the kitchen” leaves too much room for different interpretations.

    Why it causes problems: Contractors may estimate different tasks, making quotations difficult to compare. Important work may be excluded.

    How to avoid it: List the exact repairs, replacements, materials, and finishes required. Clarify what will remain unchanged.

    Mistake 2: Spending the entire budget on visible upgrades

    Expensive finishes can consume the available funds before hidden repairs are addressed.

    Why it causes problems: Essential work may be delayed or the project may stop when unexpected damage appears.

    How to avoid it: Fund safety and necessary repairs first, keep a contingency reserve, and choose decorative upgrades afterward.

    Mistake 3: Ignoring hidden problems

    Fresh paint can temporarily disguise a stain, but it will not solve a leak or persistent moisture problem.

    Why it causes problems: The underlying issue may continue damaging the property and ruin new finishes.

    How to avoid it: Investigate the cause of recurring stains, dampness, movement, or unusual odors before covering the area.

    Mistake 4: Changing the design too often

    Repeated changes to layouts, fixtures, and materials create additional purchases, rework, and scheduling conflicts.

    Why it causes problems: Contractors may need to redo completed tasks or wait for replacement products.

    How to avoid it: Finalize important selections early. Approve later changes only after reviewing their full cost and schedule impact.

    Mistake 5: Hiring based only on price

    A low quote may exclude preparation, waste disposal, testing, or suitable materials.

    Why it causes problems: The final cost can rise through additional charges, or the work may fail to meet the required standard.

    How to avoid it: Compare written scopes, credentials, references, exclusions, and payment terms.

    Mistake 6: Ordering materials without checking measurements

    Cabinets, doors, appliances, and flooring can be unsuitable if dimensions or installation requirements are incorrect.

    Why it causes problems: Returns, replacements, and modifications create delays and extra costs.

    How to avoid it: Verify measurements on site, confirm specifications, and coordinate orders with the relevant installer.

    Mistake 7: Forgetting ventilation and moisture control

    A room can look finished while still having inadequate ventilation or unresolved dampness.

    Why it causes problems: Moisture can damage materials, encourage mold growth, and reduce indoor comfort.

    How to avoid it: Plan ventilation and moisture management as part of the renovation, especially in kitchens, bathrooms, and other humid spaces.

    Mistake 8: Treating the completion date as guaranteed

    A schedule is an estimate based on assumptions about access, materials, approvals, and existing conditions.

    Why it causes problems: Rigid expectations may create pressure to skip appropriate checks or accept unfinished work.

    How to avoid it: Include realistic flexibility, track milestones, and address delays promptly.

    14. What Do Renovation Professionals Recommend?

    Good renovation decisions are usually based on preparation, sequencing, accurate measurements, and consistent communication. The following practices help homeowners coordinate their projects without attempting to replace specialist judgment.

    Investigate before covering a problem

    If a wall shows recurring dampness, determine whether the cause relates to plumbing, exterior water penetration, condensation, or another issue. The correct repair depends on the cause.

    Applying a new finish without resolving the underlying problem can waste money and create further damage.

    Complete concealed work before decorative finishes

    Plumbing, electrical installations, structural repairs, and required inspections should be coordinated before surfaces are closed. Taking photographs of relevant concealed installations, where safe and permitted, can help future maintenance and repairs.

    Keep any required inspection records and product documentation.

    Use accurate measurements rather than estimates

    Measure openings, floor areas, cabinet spaces, and appliance clearances before ordering materials. Check measurements against the final design and the installer’s requirements.

    For complicated spaces, obtain professional measurements rather than relying on a rough sketch.

    Confirm product compatibility

    Tiles, adhesives, sealants, waterproofing products, paints, and substrates must be compatible. A product that performs well in one location may be unsuitable for a wet room, exterior surface, or high-temperature area.

    Follow manufacturer instructions and obtain specialist advice when specifications are unclear.

    Protect completed work

    Cover suitable finished surfaces during later construction, but use protection that will not trap moisture or damage delicate materials. Keep heavy equipment and debris away from completed floors, fixtures, and cabinets.

    Schedule final painting and touch-ups after the messiest work has been completed wherever the construction sequence permits.

    Maintain a single record of decisions

    Keep approved plans, quotations, receipts, product details, warranties, inspection documents, and change approvals together. A clear record helps resolve misunderstandings and supports future maintenance.

    Professional Recommendation: Prioritize the building’s condition and functionality before making expensive cosmetic choices. A visually impressive result is most valuable when the underlying systems are safe, durable, and suitable for everyday use.

    15. How Do You Complete a Final Renovation Inspection?

    Final house renovation inspection infographic showing a contractor checklist, snagging list, finished interiors, fixture testing, warranties, and project documents.
    Complete your renovation with a thorough final inspection, a documented snagging list, and essential project records. Check finished surfaces, test installations, and confirm outstanding corrections before final acceptance and payment.

    The renovation is not truly complete simply because the contractors have finished their main tasks. Before making final payments, inspect the agreed work and identify outstanding defects, incomplete installations, missing documents, or items that require correction.

    Your contract and local requirements determine the formal acceptance and payment process.

    Check each renovated area

    Inspect walls, ceilings, flooring, doors, windows, cabinets, and visible finishes under suitable lighting. Look for obvious damage, uneven installation, loose fittings, incomplete sealing, and unfinished edges.

    Test accessible fixtures and equipment according to their intended use. Have qualified professionals complete technical testing for electrical systems, plumbing, heating, gas installations, and other specialist work.

    For wet areas, confirm that the required waterproofing and installation checks were completed before final finishes were installed.

    Prepare a snagging list

    A snagging list is a written record of defects or incomplete work that needs attention.

    Include:

    • The room or exact location.
    • A clear description of the issue.
    • A photograph when useful.
    • The correction required.
    • The person responsible.
    • The agreed completion date.

    Review the list with the contractor and confirm the process for correcting each item.

    Collect the necessary documents

    Depending on the project, you may need:

    • Final invoices and payment records.
    • Warranties and product manuals.
    • Permit and inspection documentation.
    • Details of installed equipment and materials.
    • Records of approved changes.
    • Maintenance recommendations.
    • Contact information for relevant contractors.

    Keep these records for future repairs, maintenance, and property transactions.

    16. How Can You Maintain Your Home After Renovation?

    Regular maintenance helps protect the investment you have made in your property. A new finish or replacement component still needs appropriate care, and small problems are usually easier to address before they develop into larger repairs.

    Start by following the maintenance instructions supplied with your new materials, appliances, fixtures, and equipment.

    Create a simple maintenance schedule

    Monthly: Check for visible leaks, unusual odors, blocked drains, damaged sealant, and signs of moisture.

    Seasonally: Inspect accessible drainage areas, exterior finishes, window seals, ventilation, and weather protection as appropriate for the local climate.

    Annually: Review the condition of major building elements and arrange qualified inspections where needed. Follow the recommended service intervals for installed equipment.

    This is a general framework, not a replacement for manufacturer instructions or professional maintenance requirements.

    Keep renovation records updated

    Record the date of installation, product specifications, warranty details, and any maintenance performed. This information makes it easier to select compatible replacement parts and understand the property’s history.

    Do not assume that every new component has the same maintenance requirements as the one it replaced.

    Address warning signs promptly

    New leaks, recurring dampness, unusual cracks, electrical faults, and persistent ventilation problems deserve timely attention. Avoid covering or ignoring symptoms simply because the renovation has recently finished.

    A well-maintained home is not necessarily one that never needs repairs. It is one where problems are identified, assessed, and addressed before avoidable damage spreads.

    17. What Is the Best Way to Plan a House Renovation on a Limited Budget?

    A limited budget requires careful prioritization rather than simply choosing the cheapest materials available. The goal is to complete the most important work safely, retain suitable existing features, and postpone optional improvements without compromising the building.

    Use a needs-first renovation strategy

    Begin with a professional assessment of urgent repairs and essential systems. Then decide which improvements will make the biggest practical difference to daily life.

    For example, repairing a leaking sink, improving inadequate storage, replacing damaged cabinet hardware, and repainting sound walls may provide meaningful improvements without requiring a complete kitchen replacement.

    Keep what still works

    If existing cabinets are structurally sound, you may be able to retain them and update the handles, finish, or internal organization. Suitable flooring, doors, and fixtures may also remain in place if they are safe and functional.

    However, retaining an item should not prevent necessary repairs or create compatibility problems with new work.

    Compare total value rather than purchase price

    When reviewing alternatives, consider purchase cost, installation, maintenance, durability, expected lifespan, and replacement difficulty.

    A lower-cost material may be a sensible choice in a lightly used area but a poor choice in a location exposed to frequent moisture or heavy wear.

    Divide the project into manageable phases

    A sensible sequence might involve essential repairs first, functional upgrades second, and decorative changes later. Each phase should have its own scope, budget, and completion criteria.

    Avoid beginning a new phase until you know how it will affect unfinished work, access, and the total project cost.

    What Is the Best Way to Plan a House Renovation From Start to Finish?

    The best way to plan a house renovation is to begin with a detailed property inspection, identify essential repairs, establish a realistic budget, and organize the work in the correct sequence. Before choosing finishes or purchasing materials, understand the condition of the house and decide which improvements will make the biggest difference to safety, functionality, and comfort. A structured plan helps you control expenses, compare contractor quotations, and avoid unnecessary changes during construction.
    Important steps to follow:
    Inspect the roof, plumbing, electrical systems, walls, floors, and drainage.
    Separate urgent repairs from optional upgrades.
    Prepare a written scope of work and budget with a contingency reserve.
    Confirm permits, contractor responsibilities, material specifications, and timelines.
    Schedule a final inspection before accepting the completed work.

    How Much Should You Budget for a House Renovation?

    Your renovation budget should cover materials, labor, professional services, permits where required, waste removal, delivery charges, and any temporary accommodation you may need. The total depends on the property’s condition, the size of the renovation, local labor rates, and the quality of materials selected. A room makeover generally requires a different budget from a renovation involving structural changes or complete plumbing and electrical upgrades.
    A practical starting point is to reserve approximately 10–20% of your estimated renovation cost for unexpected expenses. Older properties or projects with uncertain structural conditions may require a larger reserve. Obtain detailed quotations and compare what each contractor includes before committing your funds.
    Budget management tips:
    Prioritize essential repairs before decorative improvements.
    Record estimated and actual expenses separately.
    Confirm additional costs before approving changes.
    Keep contingency funds available for genuine unexpected repairs.
    Consider completing nonessential improvements in later phases.

    Which Renovation Projects Should Be Completed First?

    Renovation work should generally begin with safety concerns, structural defects, active leaks, and problems affecting essential building systems. These issues can become more expensive if they remain unresolved beneath new finishes. Once the property’s condition has been assessed, plan work involving plumbing, electrical installations, and other concealed systems before closing walls or installing final surfaces.
    The exact sequence depends on the house and the scope of work. For example, repairing a roof leak should come before repainting a water-damaged ceiling, while bathroom waterproofing should be completed and checked before the final tiles are installed.
    Recommended priorities:
    Address structural concerns and immediate safety hazards.
    Repair roof leaks, plumbing problems, and persistent moisture.
    Complete necessary electrical and plumbing upgrades.
    Finish wall preparation, flooring, cabinetry, and fixtures in the appropriate order.
    Complete painting, decorative details, and final styling toward the end.

    How Can You Avoid Delays and Costly Mistakes During a House Renovation?

    The most effective way to reduce renovation delays is to finalize the project scope, confirm measurements, arrange required approvals, and coordinate materials and contractors before work begins. Many problems arise when homeowners change layouts midway through construction, order unsuitable products, or discover that quotations exclude important tasks. Regular communication and written records make these issues easier to manage.
    Create a realistic timeline that accounts for material deliveries, professional inspections, drying times, and possible hidden damage. When an unexpected problem occurs, ask the contractor to explain the proposed solution, additional cost, and effect on the completion date before approving nonurgent changes.
    Practical ways to prevent problems:
    Compare written quotations using the same specifications.
    Confirm material dimensions and availability before ordering.
    Maintain a written record of decisions and approved changes.
    Review progress against agreed milestones.
    Avoid rushing safety checks or essential repair work to meet a deadline.

    Is It Better to Renovate a House All at Once or One Room at a Time?

    The right approach depends on your available budget, the extent of the work, and whether you can comfortably live in the property during construction. Renovating one room at a time can make expenses easier to manage and allow you to maintain access to other parts of the house. However, separate phases may increase overall costs if contractors need to repeat setup, transportation, or demolition arrangements.
    Renovating several connected areas together can improve coordination when the work involves shared plumbing, electrical systems, flooring, or structural changes. A whole-house renovation may also produce a more consistent design, but it usually requires greater financial preparation and more careful management of temporary living arrangements.
    Choose the approach that fits your situation:
    One room at a time: Suitable for limited budgets and smaller upgrades.
    Several connected rooms: Useful when work can be coordinated efficiently.
    Whole-house renovation: Better suited to major projects with a defined scope and sufficient funding.
    Temporary accommodation: Consider it when essential facilities are unavailable or the property cannot be occupied safely.

    Conclusion

    Successful house renovation planning starts with understanding your property’s needs, setting clear priorities, and creating a realistic budget before construction begins. Whether you’re updating a single room or renovating the entire house, careful preparation helps you avoid unnecessary expenses, reduce delays, and make informed decisions throughout the project.

    Focus on essential repairs first, choose durable materials that suit your household, and work with qualified professionals who provide clear quotations and written agreements. Keep a contingency fund for unexpected problems, monitor progress regularly, and inspect the finished work before considering the renovation complete.

    Remember, a successful renovation isn’t just about creating a beautiful home. It’s about improving safety, functionality, comfort, and long-term value while staying within your financial limits. Start with a clear plan, take each stage step by step, and make decisions based on your actual needs rather than temporary design trends. With the right preparation and consistent attention to detail, you can transform your house into a more practical, comfortable, and welcoming place to live.

  • Everyday Household Tips and Tricks

    Everyday Household Tips and Tricks

    Introduction

    Everyday Household Tips and Tricks | Keeping a home clean, comfortable, organized, and functional can feel like a full-time job. Between preparing meals, managing laundry, putting away belongings, handling small repairs, and keeping shared spaces tidy, everyday household responsibilities can quickly become overwhelming. The good news is that you do not need expensive products, complicated systems, or hours of free time to make your home easier to manage.

    With the right everyday household tips and tricks, you can simplify common chores, reduce unnecessary clutter, save time, and create a more welcoming environment for everyone in your household. Small habits, such as resetting the kitchen after dinner, returning frequently used items to their proper places, and preparing for the next morning before going to bed, can make a noticeable difference over time.

    At Heartomenal, practical home advice focuses on making everyday living more comfortable, organized, and manageable. The most effective household routines are not necessarily the most complicated ones. They are the routines that fit your schedule, work with your available space, and remain easy to maintain.

    This guide explores practical ways to manage household chores, organize rooms, reduce waste, improve home comfort, handle laundry, maintain essential household items, and establish routines that work for busy families, students, couples, and individuals. You will also learn which common mistakes to avoid and how to build a household system that saves effort without making everyday life feel restrictive.

    1. What Are Everyday Household Tips and Tricks?

    Everyday household tips and tricks are simple, practical methods that help people manage routine responsibilities more efficiently. They include organizing belongings, cleaning regularly, planning meals, maintaining household equipment, managing laundry, reducing waste, and creating habits that prevent small problems from becoming larger ones.

    The purpose is not to keep every surface perfect. Instead, it is to make your home easier to use, maintain, and enjoy.

    For example, placing a small basket near the entrance for keys and everyday essentials can prevent repeated searching. Preparing a short shopping list before visiting the supermarket can reduce forgotten purchases. Wiping kitchen surfaces after cooking can make the next cleaning session quicker.

    Why do small household habits matter?

    Small habits reduce the mental effort required to manage repetitive tasks. When everyday items have designated places and chores follow a predictable routine, you spend less time deciding what to do next.

    These habits can also help you:

    • Reduce unnecessary spending on duplicate household items.
    • Keep frequently used areas functional.
    • Avoid letting small cleaning tasks accumulate.
    • Make shared responsibilities easier to divide.
    • Identify maintenance problems before they become urgent.
    • Create a more comfortable environment for daily activities.

    Pro Tip: Choose household habits that solve a problem you experience regularly. A useful routine should make your life easier rather than introduce another complicated responsibility.

    2. How Can You Keep Your Home Organized Every Day?

    Daily organization works best when every frequently used item has a convenient home. Instead of relying on occasional large organizing sessions, create simple systems that make putting things away easier than leaving them scattered around.

    Give everyday items a permanent place

    Keys, chargers, mail, shoes, bags, remote controls, and frequently used kitchen tools often create clutter because they do not have obvious storage locations.

    Start by identifying the items that regularly appear in the wrong places. Choose storage locations based on how and where you use them.

    For example, keep keys near the main entrance, store charging cables close to the devices they serve, and place everyday shoes near the entrance if space allows.

    A good storage location should be easy to reach and easy to use. If putting an item away requires opening several boxes or moving other belongings, the system may be too complicated.

    Use a short daily reset

    A daily reset is a brief period dedicated to returning a room to a functional condition. It is not a deep-cleaning session.

    During a reset, you might:

    • Return misplaced belongings to their usual locations.
    • Put dirty dishes in the sink or dishwasher.
    • Fold blankets and straighten cushions.
    • Clear unnecessary items from frequently used surfaces.
    • Prepare essential belongings for the following day.

    Choose a consistent time, such as after dinner or before bedtime. Even a short reset can prevent clutter from spreading throughout the home.
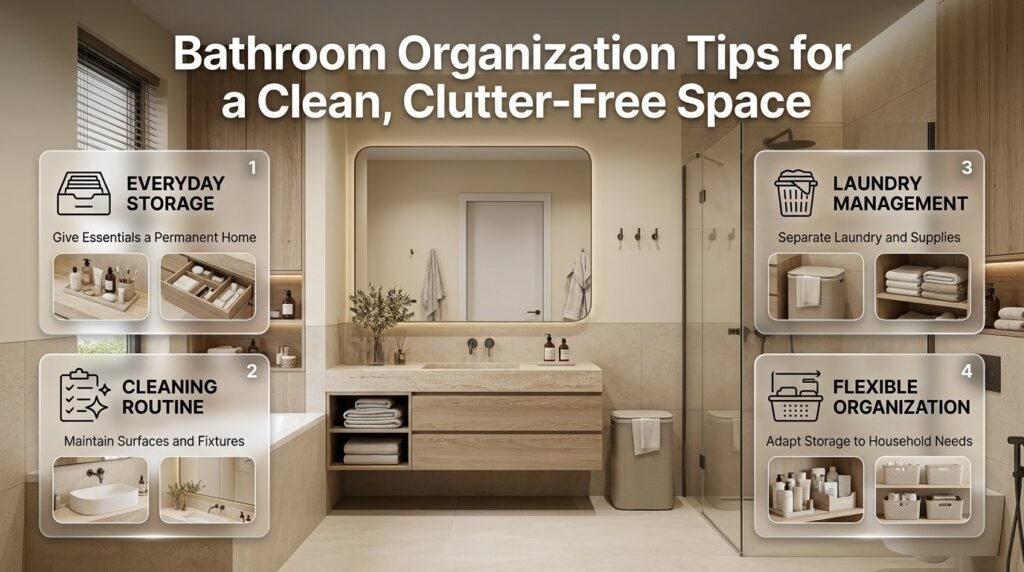
    For more structured ideas, explore Smart Home Organization Tips, which can help you develop practical systems for everyday belongings.

    Organize according to frequency of use

    Items used daily should generally be easier to reach than items used only occasionally.

    Item categoryPractical storage location
    Daily essentialsAccessible drawers, shelves, or baskets
    Weekly-use itemsRegular cupboards or designated storage areas
    Seasonal belongingsClearly labeled storage containers
    Rarely used equipmentSafe, suitable secondary storage
    Important documentsA secure, organized filing location

    Keep frequently used items accessible without making every surface a storage area. The aim is to reduce unnecessary movement while preserving enough clear space for everyday activities.

    Common Mistake: Buying storage containers before deciding what needs to be stored. Sort your belongings first, measure the available space, and purchase containers only when they solve a specific problem.

    3. What Is the Easiest Way to Keep a Home Clean?

    The easiest way to maintain a clean home is to combine small daily tasks with regular weekly cleaning. Waiting until every room looks dirty usually creates a larger workload than dealing with routine messes as they appear.

    Clean messes before they spread

    Spills, crumbs, food residue, and wet bathroom surfaces are generally easier to address when noticed. Prompt attention also helps prevent certain stains, odors, and buildup.

    After preparing food, wipe suitable kitchen surfaces. When changing clothes, place used garments in the laundry hamper. After showering, follow an appropriate bathroom ventilation and moisture-management routine.

    These small actions reduce the number of separate cleaning jobs waiting for you later.

    Follow a practical cleaning order

    When cleaning a room, work from higher surfaces toward lower ones and finish with the floor. This helps prevent dust or crumbs from falling onto areas you have already cleaned.

    A simple sequence is:

    1. Remove rubbish and misplaced belongings.
    2. Put away items that belong elsewhere.
    3. Dust suitable surfaces.
    4. Clean frequently touched areas as appropriate.
    5. Wipe suitable counters and furniture.
    6. Vacuum or sweep the floor.
    7. Mop compatible flooring when necessary.

    Always follow product instructions and use cleaning materials suitable for the surface. Never mix household cleaning chemicals, especially bleach with ammonia or acids, because dangerous gases can form.

    Build a manageable cleaning schedule

    A cleaning schedule should reflect how many people live in your home, how frequently rooms are used, and how much time you have available.

    FrequencyExamples of household tasks
    DailyDishes, food preparation surfaces, basic tidying
    Several times weeklyVacuuming busy areas and managing laundry
    WeeklyBathroom cleaning, changing bedding as needed, dusting
    MonthlyChecking overlooked areas and cleaning suitable fixtures
    SeasonallyReviewing storage, inspecting weather-related maintenance needs

    These are starting points, not strict rules. Homes with pets, children, allergies, or heavy daily use may require different schedules.

    For more detailed cleaning routines, read Easy Home Cleaning Tips. It provides a natural next step for readers who want to develop more consistent cleaning habits.

    Quick Tip: Keep suitable basic cleaning supplies together in a safe, organized location. Having the correct cloth, brush, or surface-appropriate cleaner available can remove an unnecessary barrier to starting a task.

    4. How Can You Make Kitchen Tasks Easier?

    The kitchen becomes easier to manage when food preparation, cooking, storage, and cleaning follow a predictable routine. Because this room supports several activities throughout the day, even small improvements can save time.

    Arrange your kitchen around daily activities

    Store cooking tools close to the area where they are used. Keep frequently used utensils near the food preparation space, place everyday dishes in an accessible cupboard, and organize pantry items so that ingredients are easy to identify.

    Group similar items together, such as baking ingredients, breakfast foods, cooking oils, and lunch supplies. Use clear labels where they genuinely improve identification.

    Avoid placing heavy appliances or frequently used items in inconvenient locations that require unnecessary reaching or lifting.

    Plan meals before shopping

    Meal planning does not require an elaborate spreadsheet. A simple plan for several upcoming meals can help you use existing ingredients and avoid buying duplicates.

    Before shopping:

    • Check the refrigerator, freezer, and pantry.
    • Identify ingredients that should be used soon.
    • Select meals that share suitable ingredients.
    • Write down missing essentials.
    • Consider your schedule when choosing meals.

    For example, vegetables purchased for a planned dinner might also work in the following day’s lunch. Using ingredients across several meals can reduce waste without making every meal identical.

    Make food storage safer

    Store food according to its packaging instructions and recognized food-safety guidance. Refrigerate perishable foods promptly, maintain appropriate refrigerator temperatures, and keep raw foods separate from ready-to-eat items.

    Use suitable containers and label leftovers with dates when helpful. Do not assume that food is safe simply because it smells normal.

    The Kitchen Organization Tips guide can help you explore more detailed approaches to arranging cupboards, drawers, food supplies, and preparation areas.

    Expert Tip: Organize your kitchen for the way you actually cook. A household that prepares simple weekday meals needs a different arrangement from one that regularly bakes or cooks elaborate dishes.

    5. How Can You Keep Your Bedroom Tidy and Comfortable?

    A bedroom should support rest, getting dressed, and personal routines. When clothes, accessories, and miscellaneous belongings accumulate, the room can become harder to maintain and less comfortable to use.

    Make your bed and clear key surfaces

    Making the bed is a simple visual reset. It does not replace cleaning, but it can make the room feel more orderly.

    Next, clear bedside tables and dressers of items that do not need to remain there. Keep essentials such as a lamp, glasses, or a book accessible while moving unrelated belongings to their proper locations.

    Avoid filling every available surface with decorative objects. Leaving some clear space makes routine dusting easier.

    Establish a clothing routine

    Clothes often become clutter because clean garments, worn clothing, and items that can be worn again are mixed together.

    Create separate, practical arrangements for these categories. Use a laundry hamper for dirty clothes and an appropriate designated place for garments that are not ready for washing.

    Return clean clothes to drawers or wardrobes instead of allowing them to accumulate on chairs.

    Improve everyday bedroom comfort

    Comfort depends on more than appearance. Consider ventilation, suitable bedding, lighting, noise, temperature, and how easily you can move around the room.

    Wash bedding according to fabric care instructions, avoid blocking ventilation openings, and keep walkways clear.

    For further ideas, explore Bedroom Organization Tips. Readers who want to improve the room’s overall appearance can also benefit from practical guidance on making bedrooms easier to use.

    6. How Can You Make Your Living Room Easier to Maintain?

    Living rooms often serve several purposes, including relaxing, entertaining, reading, watching television, and spending time together. Their organization should support these activities without requiring constant rearrangement.

    Create activity-based zones

    Instead of organizing the room around decoration alone, consider what happens in each area.

    A seating area might need a small table for drinks and a nearby place for remote controls. A reading corner may benefit from suitable lighting and a place for books. A family activity area might require accessible storage for games or other frequently used belongings.

    These arrangements help everyday items remain close to where they are needed.

    Reduce clutter on shared surfaces

    Coffee tables, side tables, and television units can quickly collect miscellaneous objects.

    Use a simple rule: keep essential items accessible, return temporary belongings after use, and avoid treating every flat surface as permanent storage.

    A small tray may help group a few related items, but too many decorative containers can create another layer of clutter.

    Choose practical fabrics and finishes

    Furniture covers, rugs, cushions, and upholstery should suit the room’s actual use. Consider cleaning instructions, durability, household activity, and the manufacturer’s recommendations before choosing materials.

    Regularly remove crumbs and dust using methods appropriate for each surface. Address spills according to the fabric or material care instructions.

    For room-specific ideas, see Living Room Home Tips. The aim is to create a room that remains welcoming without making its upkeep unnecessarily difficult.

    7. How Can You Save Space in a Small Home?

    Small homes become easier to manage when each area serves a clear purpose and storage takes advantage of available space without obstructing movement.

    Use vertical space thoughtfully

    Shelves, wall-mounted organizers, and tall storage furniture can help use otherwise empty wall space. Before installing anything, check the wall type, weight limits, suitable fixings, and whether the location is safe.

    Keep frequently used items at comfortable heights. Heavy belongings should not be stored overhead where they could fall or require unsafe lifting.

    Choose furniture that serves more than one purpose

    Multifunctional furniture can be useful in compact rooms. Examples include a desk that folds away, a bed with suitable built-in storage, or an ottoman that provides both seating and storage.

    However, additional features are valuable only when the furniture remains practical to use. A storage unit that is difficult to open or access may become an inconvenient place to hide clutter.

    Keep pathways clear

    Do not fill every corner simply because space is available. Clear pathways improve movement and make cleaning easier.

    Before purchasing furniture, measure the room and consider door swings, drawer access, and walking space. A piece that fits on paper may still make the room awkward to use.

    The Small Space Home Tips guide offers further practical approaches to arranging compact homes without sacrificing everyday functionality.

    Pro Tip: When evaluating a storage solution, ask whether it makes belongings easier to find and return. More storage is not automatically better if it encourages you to keep unnecessary items.

    8. How Can You Reduce Household Clutter Without Feeling Overwhelmed?

    Decluttering means reviewing belongings and deciding what deserves space in your home. It is not about owning as little as possible or discarding useful items simply to achieve a particular appearance.

    The most effective approach is to work in small, clearly defined areas.

    Start with one manageable category

    Choose one drawer, one shelf, one section of a wardrobe, or one group of household supplies. Empty the selected area only if you have enough time to finish the task.

    Sort the contents into practical categories:

    • Keep and return to a suitable location.
    • Relocate to another room.
    • Donate or give away usable items when appropriate.
    • Recycle or dispose of items according to local rules.
    • Set aside uncertain items for a later decision.

    Avoid turning the entire house upside down during a short organizing session.

    Use a simple decision process

    Ask yourself whether an item is useful, regularly used, needed for a specific occasion, or genuinely important to you.

    Consider safety and replacement costs before discarding tools, documents, spare parts, or emergency supplies. Some items deserve storage even when they are not used frequently.

    For example, a spare household key, an essential instruction manual, or a suitable emergency torch may have a clear purpose despite limited use.

    Prevent clutter from returning

    Once an area is organized, decide how new items will enter and where they will go. Review purchases before bringing them home, return belongings after use, and periodically check categories that tend to accumulate.

    Read Home Decluttering Tips for additional strategies that help make these decisions more manageable.

    Common Mistake: Treating decluttering as a one-time project. Household needs change, so a brief review every few weeks may be more useful than expecting one large session to solve every future problem.

    9. What Are the Best Household Storage Tricks?

    Best household storage tricks featuring labeled containers, organized cupboards, neatly stored clothing, pantry supplies, and practical home storage solutions.
    Discover the best household storage tricks to organize everyday essentials, maximize available space, and keep belongings easy to find. Labeled containers, suitable storage conditions, and first-in, first-out organization help create a more functional home.

    Good storage protects belongings, uses space appropriately, and makes important items easy to locate. The best system is one that suits the contents rather than forcing every item into the same kind of container.

    Label containers where it helps

    Labels are particularly useful for seasonal decorations, craft materials, spare household supplies, and items stored in opaque boxes.

    Use descriptions that are specific enough to identify the contents. A label such as “spare batteries and small torches” is more useful than “miscellaneous.”

    Do not rely on labels to replace safe storage practices. Keep medicines, cleaning products, and potentially hazardous materials in suitable secure locations, following their instructions.

    Store items according to their needs

    Different belongings have different storage requirements.

    BelongingStorage consideration
    Important documentsDry, secure, organized location
    Seasonal clothingClean and completely dry before storage
    Cleaning suppliesSecure location away from children and pets
    ToolsAppropriate protection against moisture and damage
    Pantry ingredientsSuitable containers and required storage conditions
    ElectronicsManufacturer-recommended conditions and cable organization

    Avoid storing moisture-sensitive belongings in damp areas. Check containers occasionally for signs of damage, pests, or moisture.

    Use the first-in, first-out principle

    For suitable consumable supplies, place older usable items where they will be selected first and put newer purchases behind them.

    This method can help with pantry ingredients, cleaning supplies, and other products, provided their labels and storage requirements are followed.

    Never use an item beyond its safety limits merely because it is the oldest. Follow expiry dates, storage instructions, and applicable product guidance.

    For more ideas, visit Home Storage Solutions, particularly if you struggle with crowded cupboards or limited storage space.

    10. How Can You Make Laundry Less Time-Consuming?

    Laundry becomes more manageable when sorting, washing, drying, folding, and putting clothes away are treated as connected steps rather than separate jobs that can remain unfinished indefinitely.

    Sort clothes according to care needs

    Read garment labels before washing. Separate items when necessary according to colour, fabric type, soil level, and washing requirements.

    Avoid assuming that every garment can tolerate the same temperature, detergent, or drying method.

    Delicate fabrics, heavily soiled clothing, and items with special care instructions may need different treatment. Follow the washing machine and detergent manufacturers’ guidance.

    Establish a realistic laundry routine

    Choose laundry days based on the size of your household and how quickly essential clothing is used.

    A small household might manage several smaller loads throughout the week, while a larger household may benefit from a more structured schedule.

    The important point is to avoid allowing clean laundry to remain in baskets until the next wash cycle creates an even larger pile.

    Make putting clothes away easier

    Keep everyday clothing in accessible drawers or wardrobe sections. Fold items according to the available space and store similar categories together.

    You do not need an elaborate folding system. The goal is to make clothing easy to find without repeatedly searching through piles.

    Allow garments to dry appropriately before putting them away, as storing damp clothing can encourage unpleasant odors and mould.

    The Laundry Tips and Tricks guide can provide further help with organizing laundry tasks and handling everyday clothing more efficiently.

    Quick Tip: Pair a regular laundry task with a natural point in your day, such as starting a suitable load after breakfast or folding dry clothes while watching a programme. Choose a routine that does not interfere with safe machine operation or other responsibilities.

    11. How Can You Keep Your Bathroom Clean and Functional?

    Bathrooms need regular attention because they combine moisture, frequent contact, plumbing fixtures, and personal-care products in a relatively small space.

    Keep frequently used products organized

    Store everyday toiletries where they are easy to reach. Keep backup products separate from the items currently in use, and review supplies periodically to identify products that are empty, damaged, or no longer needed.

    Use suitable organizers that can be cleaned and dried easily. Avoid overcrowding shelves and counters, particularly around sinks and taps.

    Manage moisture and ventilation

    After bathing or showering, use the available ventilation system as appropriate. Follow manufacturer guidance for extractor fans and other equipment.

    Where practical, dry wet surfaces and hang towels so they can dry properly. Address persistent leaks, recurring condensation, or signs of mould rather than relying solely on repeated surface cleaning.

    If mould covers a large area or returns repeatedly, investigate the underlying moisture problem and seek suitable professional advice when needed.

    Maintain a safe cleaning routine

    Choose products designed for the surface being cleaned. Follow label directions, use appropriate ventilation, and never mix cleaning chemicals.

    Store products securely and keep them away from children and pets. Avoid placing electrical appliances where they could come into contact with water.

    For more detailed planning advice, explore Bathroom Planning Tips. Thoughtful arrangements can make bathrooms easier to clean, safer to use, and more practical for everyday routines.

    12. What Basic Home Maintenance Should You Do Regularly?

    Household maintenance involves checking the condition of the home, looking for early signs of problems, and arranging appropriate repairs. It differs from routine cleaning because the objective is to keep building components, fixtures, and equipment functioning properly.

    Create a simple maintenance checklist

    A basic checklist helps you remember tasks that may otherwise be overlooked.

    Consider periodically checking:

    • Taps and visible plumbing for leaks.
    • Doors and windows for difficult operation or damaged seals.
    • Smoke alarms and carbon monoxide alarms, where applicable, according to their instructions.
    • Ventilation openings and accessible filters.
    • Visible signs of dampness or water damage.
    • Household equipment for unusual noises or visible damage.
    • Exterior drainage and accessible outdoor areas, where safe.

    The frequency of checks depends on the equipment, the property, the local climate, and manufacturer recommendations.

    Deal with small warning signs early

    A dripping tap, loose handle, unusual appliance sound, or recurring damp patch may indicate a problem that deserves attention.

    Record the issue, identify whether it presents an immediate safety concern, and determine whether you can address it safely or need a qualified professional.

    Do not attempt electrical, gas, structural, or other high-risk repairs without the necessary qualifications and equipment.

    Keep important household information together

    Store manuals, warranties, service records, and maintenance dates in an organized place. This information can help you identify the correct replacement parts, follow recommended servicing schedules, and explain previous problems to a professional.

    The Basic Home Maintenance Tips guide is a useful next resource for readers who want to establish a more consistent preventive maintenance routine.

    Expert Tip: A maintenance checklist should record what needs attention, when it was checked, and what action was taken. This is more useful than a long list of tasks with no dates or follow-up.

    13. How Can You Improve Home Comfort Without Spending Much?

    A comfortable home supports everyday activities through appropriate lighting, temperature, ventilation, sound management, and practical furniture arrangements. Many improvements begin with adjusting existing resources rather than buying new products.

    Make lighting work for each activity

    Different rooms and activities require different lighting arrangements. Reading, cooking, cleaning, and relaxing may benefit from different combinations of general and task lighting.

    Keep light fixtures clean according to their instructions, replace unsuitable or failed bulbs with compatible options, and avoid placing lamps where cables create trip hazards.

    Natural daylight can also make rooms more pleasant when it is available. Use window coverings according to privacy, glare, and temperature needs.

    Reduce unnecessary sources of discomfort

    Notice what makes a room difficult to use. It may be poor airflow, an uncomfortable chair, cluttered pathways, excessive noise, or a temperature that is difficult to regulate.

    Make one practical adjustment at a time. For example, repositioning a chair may improve movement, while rearranging frequently used items may reduce repeated trips across a room.

    Avoid blocking vents or making changes that interfere with heating, cooling, or ventilation equipment.

    Use soft furnishings thoughtfully

    Cushions, curtains, rugs, and bedding can contribute to comfort, but their usefulness depends on the room’s needs and the effort required to maintain them.

    Choose washable or otherwise manageable materials where appropriate. Keep rugs secure and avoid arrangements that create tripping hazards.

    For further guidance, explore Home Comfort Tips, which can help you consider practical ways to make everyday spaces more enjoyable.

    14. How Can You Improve Your Home Without Overspending?

    Budget-friendly home improvements begin with identifying a genuine problem and choosing a solution that offers practical value.

    A home does not need constant redecorating to remain functional. Sometimes a small repair, a better arrangement, or a careful review of existing belongings makes a greater difference than buying something new.

    Prioritize improvements by need

    Before spending money, consider three questions:

    1. Does the issue affect safety or essential household functions?
    2. Will the proposed improvement solve a recurring problem?
    3. Is the expected benefit worth the total cost and maintenance involved?

    Safety concerns, active leaks, damaged electrical components, and failing essential equipment generally deserve attention before purely decorative changes.

    For non-urgent projects, compare the costs of materials, tools, installation, maintenance, and possible professional assistance.

    Reuse suitable belongings

    Before purchasing organizers or decorations, review what you already own. A suitable tray, existing shelf, or spare container may solve a storage problem without additional spending.

    However, reuse should not compromise safety. Food containers should be appropriate for food, electrical components should not be improvised, and storage solutions must support the intended weight.

    Make small improvements gradually

    You do not need to improve every room at once. Choose one area, establish a budget, complete the task, and evaluate the result before moving to another project.

    The Budget-Friendly Home Improvement Tips guide can help you plan practical upgrades while keeping unnecessary expenses under control.

    Common Mistake: Buying inexpensive items repeatedly without solving the underlying problem. Several low-cost purchases can become more expensive than one well-planned, durable solution.

    15. How Can You Make Home Decorating Easier to Maintain?

    Easy home decorating tips featuring coordinated colours, practical furniture, durable fabrics, natural lighting, and clutter-free styling for a low-maintenance home.

    Make home decorating easier to maintain with functional furniture, coordinated colours, practical materials, and thoughtfully arranged accessories. Create a beautiful living space that supports everyday comfort without adding unnecessary cleaning or upkeep.

    Home decorating should support the way you live. A room may look attractive initially but become frustrating if its furniture, fabrics, and accessories are difficult to clean or interfere with everyday activities.

    Start with function before decoration

    Think about the room’s main purpose, available floor space, storage requirements, lighting, and maintenance needs before choosing decorative details.

    For example, a busy family living room may benefit from durable upholstery and accessible storage. A small bedroom may need fewer accessories to preserve usable surface space.

    Choose a manageable colour and material scheme

    A coordinated selection of colours and materials can make rooms feel more connected. Consider existing furniture, natural light, floor finishes, and the way different materials age or require cleaning.

    Before committing to paint or other finishes, test suitable samples in the actual space and review them under different lighting conditions.

    Avoid decorating every empty space

    Empty space can improve movement and make a room feel less crowded. You do not need to fill every shelf, wall, or corner.

    Choose decorative items that contribute something useful or meaningful to the room. Regularly review arrangements that collect dust or interfere with cleaning.

    For more ideas, read Home Decorating Tips. Practical decorating choices should improve the experience of living in a room rather than create additional work.

    16. How Can Families Share Household Responsibilities Fairly?

    Household work becomes easier when responsibilities are visible, realistic, and shared according to people’s abilities and circumstances.

    One person should not have to remember every task, notice every problem, and coordinate every other household member’s contribution.

    Assign clear responsibilities

    Instead of asking everyone to help generally, agree on specific tasks.

    For example, one person might prepare dinner while another handles suitable kitchen cleanup. Household members can rotate responsibilities so that the same person is not permanently assigned the least desirable jobs.

    Children can participate in age-appropriate activities under suitable supervision, such as putting away their belongings or helping organize their school supplies.

    Use a shared checklist

    A simple checklist on paper or in an existing digital calendar can make responsibilities easier to track.

    Keep it short enough to use consistently. Include recurring essentials and avoid listing every tiny action, as excessive detail can make the system difficult to maintain.

    Review the arrangement when circumstances change

    Work schedules, school commitments, health needs, and household size can affect how much time each person has available.

    Review responsibilities periodically and make adjustments when necessary. Fairness does not always mean dividing every task into identical portions; it means agreeing on a manageable arrangement that considers everyone’s circumstances.

    Expert Tip: Focus on completed outcomes rather than expecting everyone to perform tasks in exactly the same way. Shared standards for cleanliness and safety matter more than identical personal routines.

    17. How Can You Reduce Household Waste and Use Resources Wisely?

    Reducing waste begins with paying attention to what your household buys, uses, stores, and throws away. Small changes can help reduce unnecessary spending while making household management more efficient.

    Plan purchases around actual needs

    Check existing supplies before shopping. Buying another cleaning product or pantry ingredient when you already have enough creates unnecessary storage demands and increases the risk of products expiring before use.

    Keep a short list of essential supplies that need replacing and distinguish them from optional purchases.

    Use water and energy thoughtfully

    Turn off lights when they are unnecessary, use appliances according to their instructions, and select suitable energy-saving settings where appropriate.

    Address dripping taps and report persistent plumbing problems. Use water-efficient methods when they suit the task, but do not compromise hygiene or manufacturer requirements.

    Heating and cooling settings should reflect household comfort, health needs, weather conditions, and the capabilities of the equipment.

    Handle unwanted belongings responsibly

    Donate usable items when appropriate, recycle materials accepted by your local service, and dispose of hazardous products according to local requirements.

    Do not put batteries, chemicals, electronics, or other restricted materials into ordinary waste when special handling is required.

    These habits make household routines more intentional without demanding major lifestyle changes.

    18. What Are the Most Common Household Management Mistakes?

    Even well-intentioned household routines can become inefficient when they rely on unrealistic expectations or complicated systems.

    Understanding common mistakes helps you choose methods that remain useful over time.

    Trying to clean the entire home at once

    Why it happens: A large cleaning session can seem like the fastest way to restore order.

    Why it becomes a problem: The workload may be too demanding to finish, leaving several areas partially completed.

    How to avoid it: Divide the work into rooms or specific tasks. Complete essential areas first and schedule less urgent tasks separately.

    Creating storage systems that are difficult to use

    Why it happens: Attractive containers and elaborate labels can make organizing seem more effective than it really is.

    Why it becomes a problem: If returning an item takes too many steps, people are more likely to leave it out.

    How to avoid it: Keep frequently used items accessible, reduce unnecessary sorting steps, and evaluate whether the system works during ordinary daily activities.

    Purchasing products before identifying the problem

    Why it happens: New cleaning products, furniture, and organizers promise quick improvements.

    Why it becomes a problem: The underlying issue may be poor planning, excess belongings, or an inconvenient arrangement rather than a lack of equipment.

    How to avoid it: Identify the specific difficulty first. Try rearranging existing items or changing a routine before spending money.

    Ignoring maintenance until something fails

    Why it happens: Maintenance tasks may not appear urgent while equipment is working.

    Why it becomes a problem: Small defects can develop into more disruptive or expensive problems.

    How to avoid it: Schedule suitable inspections and follow manufacturer guidance. Arrange qualified help for problems that require specialist knowledge.


    Making routines too ambitious

    Why it happens: People often design schedules around an ideal day rather than their actual commitments.

    Why it becomes a problem: Missed tasks create frustration and make the entire system seem unsuccessful.

    How to avoid it: Begin with a few high-value habits, allow flexibility, and add responsibilities only when the existing routine feels manageable.

    19. What Household Management Advice Do Professionals Recommend?

    Effective household management relies on practical observation, suitable tools, realistic scheduling, and consistent follow-through. The following principles can help you build a routine that works beyond the first few days.

    Start with the problems that cause the most disruption

    Identify the three household issues that repeatedly waste time or create stress. These might include misplaced keys, overflowing laundry, crowded kitchen counters, or forgotten maintenance tasks.

    Choose one issue and create a specific solution. Evaluate whether the change actually reduces the problem before adding more systems.

    Keep routines simple and visible

    A short checklist is often more useful than an elaborate household planner. Place reminders where they are relevant, such as a shopping list near the place where groceries are checked or a maintenance record with household documents.

    Avoid creating duplicate tracking systems that require additional work to update.

    Match tools to the task

    Use equipment designed for the job, follow operating instructions, and maintain it appropriately. A cleaning tool that is unsuitable for a delicate surface may cause damage instead of improving the result.

    The same principle applies to ladders, power tools, household chemicals, and electrical equipment. Choose safe methods and seek professional assistance when a task exceeds your knowledge or capability.

    Review results rather than chasing perfection

    A successful routine should make the home more functional. If a new system requires constant correction, simplify it.

    For example, if a complicated wardrobe arrangement is difficult to maintain, group clothing into fewer categories. If a cleaning schedule consistently takes longer than expected, reduce its scope or divide the work across additional days.

    Build flexibility into the system

    Household routines must accommodate unexpected visitors, busy workdays, illness, changing weather, and other interruptions.

    Prioritize essential hygiene, safety, food preparation, and urgent maintenance when time is limited. Less urgent tasks can wait until the schedule allows.

    Expert Tip: The best household system is the one you can return to after a busy week without starting from scratch. Build routines around consistency, not perfection.

    20. How Can You Build a Household Routine That Lasts?

    A lasting routine develops gradually through repetition, observation, and adjustment. Rather than trying to change every household habit immediately, establish a few useful actions and make them part of your normal day.

    Step 1: Identify your biggest daily difficulties

    Observe your household for several days. Notice where clutter accumulates, which chores take the longest, and what regularly gets forgotten.

    Write down the problems that cause the most inconvenience instead of listing every possible improvement.

    Step 2: Select three manageable habits

    Choose habits that directly address those difficulties.

    For example:

    • Return essential belongings to designated places.
    • Reset the kitchen after preparing meals.
    • Spend a few minutes preparing for the following day.

    Keep the habits small enough to complete on ordinary days.

    Step 3: Connect each habit to an existing activity

    A new habit is easier to remember when it follows something you already do.

    You might tidy the kitchen after dinner, review your shopping list before leaving home, or prepare tomorrow’s essentials after checking your calendar.

    This reduces the need to remember an entirely separate task.

    Step 4: Review the results after two weeks

    Ask whether the routine has reduced mess, saved time, or made an area easier to use.

    If a habit is difficult to maintain, determine whether the problem is its timing, complexity, or lack of practical benefit. Adjust it instead of assuming that you need more discipline.

    Step 5: Add new habits gradually

    Once the first few habits feel natural, introduce another routine if it solves a genuine problem.

    This gradual approach creates a household system that can grow with your needs without making every day feel like a checklist.

    What Are the Best Everyday Household Tips and Tricks for Keeping a Home Organized?

    The best everyday household tips and tricks focus on making daily tasks easier rather than trying to keep every room perfectly arranged. Start by giving frequently used belongings a designated place, putting items away after use, and spending a few minutes each day resetting the rooms you use most. These simple habits help prevent clutter from accumulating and reduce the time needed for larger cleaning sessions.
    A practical household organization routine should include:
    Create designated storage areas: Keep keys, shoes, bags, chargers, and other daily essentials in convenient locations.
    Follow a daily reset routine: Return misplaced belongings, clear frequently used surfaces, and manage dishes before the mess becomes overwhelming.
    Organize by frequency of use: Store everyday items within easy reach and keep seasonal or rarely used belongings in appropriate secondary storage.
    Review clutter regularly: Check drawers, cupboards, and shelves to identify items that no longer serve a useful purpose.
    The most important principle is consistency. A simple system that fits your daily routine is more effective than a complicated organizing method that becomes difficult to maintain.

    How Can I Keep My House Clean Every Day Without Spending Too Much Time on Chores?

    Maintaining a clean home becomes more manageable when you divide household chores into smaller tasks instead of leaving everything until the weekend. Daily cleaning should focus on essential activities, such as managing dishes, wiping appropriate kitchen surfaces, removing rubbish, and keeping frequently used rooms functional. More detailed cleaning can be scheduled throughout the week according to your household’s needs.
    A practical approach is to connect small cleaning tasks with activities you already perform. For example, tidy the kitchen after preparing dinner, put dirty clothes in the hamper when changing, and return living room items to their proper places before bedtime.
    To make your routine more efficient:
    Prioritize high-use areas: Focus on the kitchen, bathroom, and frequently used living spaces.
    Clean small messes promptly: Address suitable spills and food residue before they become harder to remove.
    Use a weekly schedule: Assign different cleaning tasks to different days rather than attempting everything at once.
    Keep suitable supplies accessible: Store essential cleaning tools safely so you can start a task without unnecessary preparation.
    Adjust your expectations: Some days require more attention than others, and less urgent tasks can wait.
    The goal is to prevent cleaning from becoming an overwhelming project. A realistic routine that you can maintain consistently will generally serve your household better than an ambitious schedule that is difficult to follow.

    What Are the Most Effective Ways to Save Money on Everyday Household Expenses?

    One of the most effective ways to reduce household expenses is to manage what you already own before buying additional products. Disorganized cupboards, forgotten pantry ingredients, duplicate cleaning supplies, and unnecessary home accessories can lead to avoidable spending. Reviewing existing supplies before shopping helps you make more informed decisions and use available resources efficiently.
    You can also reduce unnecessary costs by addressing minor maintenance concerns promptly and following the recommended care instructions for household appliances, furniture, and other belongings.
    Consider these practical strategies:
    Plan purchases in advance: Check your kitchen cupboards, refrigerator, and household supplies before preparing a shopping list.
    Reduce food waste: Plan meals around suitable ingredients you already have and store food according to safety guidance.
    Repair when appropriate: Compare the cost, safety, and expected lifespan of repairing an item with the cost of replacing it.
    Avoid unnecessary organizers: Rearrange existing storage before purchasing new containers, shelves, or accessories.
    Use household resources thoughtfully: Turn off unnecessary lights and use water and energy efficiently without compromising hygiene or comfort.
    Maintain essential equipment: Follow manufacturer recommendations to help keep appliances and fixtures in suitable working condition.
    Saving money does not mean choosing the cheapest option every time. Durable products, appropriate maintenance, and careful purchasing decisions can provide better long-term value than repeatedly buying inexpensive items that do not solve the original problem.

    How Can I Organize a Small Home and Make the Most of Limited Space?

    Organizing a small home requires a balance between practical storage and comfortable movement. The objective is not to fill every available corner with belongings but to make essential items accessible while keeping rooms functional. Start by identifying what you use regularly, removing unnecessary clutter, and arranging furniture around the activities that take place in each room.
    Vertical storage, multifunctional furniture, and clearly defined storage areas can help make limited space more useful. However, every solution should suit the room’s dimensions and the weight and type of items being stored.
    Use these methods to improve a small home’s functionality:
    Use vertical space safely: Consider suitable wall shelves and tall storage units, using appropriate fixings and respecting weight limits.
    Choose multifunctional furniture: Furniture with built-in storage or more than one practical use can reduce the need for separate pieces.
    Keep pathways clear: Avoid overcrowding entrances, doorways, and frequently used areas with furniture or storage containers.
    Store items near where they are used: Keep kitchen essentials near preparation areas and everyday belongings close to their normal activity zones.
    Review belongings before buying storage: Reducing unnecessary items often creates more useful space than adding another container.
    Measure before purchasing furniture: Check room dimensions, drawer access, door swings, and walking space to avoid unsuitable purchases.
    A small home does not need to feel crowded. When storage reflects your daily habits and every room has a clear purpose, even limited space can become easier to maintain and more comfortable to use.

    How Can I Create a Simple Household Routine That Is Easy to Maintain Long-Term?

    A successful household routine should fit your actual schedule, available energy, and living arrangements. Many routines fail because they include too many tasks, rely on unrealistic expectations, or leave one person responsible for remembering everything. A more practical approach is to begin with a few habits that solve recurring problems and gradually add responsibilities when the original routine becomes manageable.
    Start by observing which household tasks cause the most inconvenience. You might notice that laundry regularly piles up, kitchen counters become cluttered, or essential belongings are difficult to find. Choose one or two problems and establish a specific action to address each one.
    Follow these steps to build a sustainable routine:
    Choose three manageable habits: For example, reset the kitchen after dinner, return daily essentials to their designated places, and prepare necessary belongings for the following morning.
    Connect tasks to existing activities: Use familiar parts of your day as reminders to complete household responsibilities.
    Create a short checklist: Record essential cleaning, laundry, shopping, and maintenance tasks without making the list unnecessarily complicated.
    Share responsibilities clearly: Agree on who handles specific tasks and adjust the arrangement according to household members’ abilities and schedules.
    Review progress regularly: Identify which habits are helping and which need to be simplified or rescheduled.
    Allow flexibility: Prioritize safety, hygiene, and urgent maintenance when time is limited, and postpone less important tasks when necessary.
    The best household routine is not the one that includes the most tasks. It is the one that helps you maintain a functional, comfortable home without creating unnecessary stress. Small, repeatable habits are more likely to become lasting improvements than major changes that are difficult to sustain.

    Conclusion

    Managing a home becomes much easier when you focus on practical habits rather than trying to make everything perfect. The most effective everyday household tips and tricks involve keeping frequently used items organized, maintaining a simple cleaning routine, managing laundry efficiently, reducing unnecessary clutter, and taking care of basic home maintenance before small problems become bigger concerns.

    You do not need expensive products or complicated schedules to create a more comfortable living environment. Small changes, such as planning household purchases, organizing storage according to your daily needs, and sharing responsibilities fairly, can save time, reduce unnecessary expenses, and make everyday tasks less stressful.

    Start by identifying the household problems that affect your daily routine most. Introduce one or two manageable improvements, evaluate their results, and gradually build habits that work for your household. Consistency matters more than perfection, and a realistic routine is easier to maintain over the long term.

    For more practical guidance on cleaning, organization, storage, decorating, and home maintenance, explore the helpful resources available at Heartomenal. With thoughtful planning and simple daily habits, you can create a home that is organized, functional, welcoming, and easier to enjoy every day.

  • Home Comfort Tips

    Home Comfort Tips

    Introduction

    Home Comfort Tips | A home should be the place where you can relax after a busy day, enjoy time with your family, and feel comfortable in every season. However, everyday problems can make even a beautiful home feel less inviting. A living room may feel cold in winter, a bedroom may become uncomfortable at night, or clutter may make simple household tasks more stressful than they need to be.

    The good news is that improving your home does not always require expensive furniture, major renovations, or professional decorating services. With the right Home Comfort Tips, you can improve temperature control, create a relaxing atmosphere, organize everyday belongings, and make your rooms more practical for your lifestyle.

    At Heartomenal, the goal is to make everyday home improvement easier with practical ideas that suit different spaces, preferences, and budgets.

    This guide explains how to make your home warmer in winter, cooler in summer, cleaner, quieter, and more comfortable throughout the year. You will also learn how to improve indoor air quality, choose suitable lighting, organize small spaces, avoid common mistakes, and prioritize improvements that provide lasting value.

    Whether you live in a small apartment, a rented property, or a family house, these ideas can help you create a home that looks welcoming and works well for everyday life.

    What Are the Most Important Home Comfort Tips?

    The most important home comfort tips focus on temperature, ventilation, lighting, cleanliness, noise control, furniture arrangement, and organization. These factors influence how a home feels and functions every day. Start by identifying the problems that affect your comfort most, then make practical improvements before spending money on decorative accessories.

    A comfortable home is not necessarily the largest or most expensive one. It is a space where you can move around easily, sleep comfortably, prepare meals without unnecessary difficulty, and relax without constantly noticing problems.

    For example, a room with expensive furniture may still feel uncomfortable if the lighting is harsh, the temperature is inconsistent, or the furniture blocks the natural walking space. In contrast, a modest room with suitable lighting, comfortable seating, and a practical layout can feel much more inviting.

    Before starting a home improvement project, consider these six areas:

    • Temperature: Does the room become too hot or too cold?
    • Air quality: Is the space adequately ventilated and free from persistent odors?
    • Lighting: Can you see comfortably during different activities?
    • Organization: Are everyday items easy to find and put away?
    • Noise: Can you relax, sleep, study, or work without unnecessary disturbance?
    • Functionality: Does the room support the activities you perform there?

    These questions help you identify where your efforts will make the biggest difference.

    Which Home Improvements Should You Prioritize First?

    Start with safety, health, and practical problems. Address heating faults, leaks, persistent dampness, poor ventilation, and unsafe electrical equipment before focusing on appearance. Once these concerns are under control, improve comfort through better lighting, organization, furniture placement, and seasonal adjustments.

    Home comfort problemRecommended first stepBudget level
    Cold roomsCheck drafts, heating controls, and insulationLow to high
    OverheatingManage sunlight and improve suitable ventilationFree to moderate
    ClutterSort belongings and create practical storage zonesFree to low
    Poor lightingAdjust existing lights and add suitable task lightingFree to moderate
    Unpleasant indoor odorsIdentify and remove the sourceFree to moderate
    Excessive noiseIdentify the noise source and reduce echoesLow to high
    Uncomfortable bedroomReview bedding, temperature, light, and noiseFree to moderate
    Difficult cleaning routineSimplify storage and establish a realistic scheduleFree to low

    Costs depend on the property, the materials required, and whether professional work is necessary.

    Pro Tip: Do not try to improve every room at once. Choose the area that causes the most frustration and complete a few meaningful changes before moving on to another space.

    1. How Can You Make Your Home More Comfortable Without Spending Too Much?

    You can improve home comfort on a limited budget by rearranging furniture, reducing clutter, making better use of daylight, checking unwanted drafts, and using existing household items more effectively. These simple changes often improve everyday comfort without requiring major purchases or permanent alterations.

    Rearrange Furniture to Improve Everyday Movement

    Furniture placement affects how easily you move around a room and how comfortable it feels.

    Start by examining the main walking routes. You should be able to move between doorways, seating areas, and frequently used furniture without squeezing through narrow gaps.

    In a living room, arrange seating so people can talk comfortably. In a bedroom, keep enough space around the bed for safe movement and easy access to everyday belongings.

    Avoid placing furniture directly in front of radiators, ventilation openings, or windows when doing so interferes with heating, airflow, or daylight.

    A simple rearrangement can also help a room feel more balanced. For instance, moving a bulky chair away from the entrance may make a small living room easier to navigate.

    For more practical layout inspiration, explore Living Room Home Tips.

    Use Existing Items in More Useful Ways

    Before buying new accessories, look at what you already own.

    A spare cushion might make a reading chair more comfortable. A tray could keep frequently used items together, while an existing lamp might work better beside your favorite chair than on a rarely used table.

    You can also move seasonal bedding, blankets, and curtains between rooms according to changing needs, provided the items suit their new purpose.

    The aim is not to fill every empty corner. It is to make the items you already have work harder for you.

    Improve the Areas You Use Most

    Think about your daily routine.

    If you spend most evenings on the sofa, improve the seating, lighting, and nearby storage. If you work from home, pay attention to your desk, chair, screen position, and lighting.

    If the kitchen feels stressful, make frequently used utensils and ingredients easier to reach.

    These improvements often provide more everyday value than decorating an area that receives little use.

    For additional inspiration, visit Home Tips & Ideas.

    2. How Can You Keep Your Home Warm and Comfortable in Winter?

    Keeping a home warm involves reducing unwanted heat loss, using heating controls sensibly, managing window coverings, and maintaining the heating system. Suitable insulation and draft reduction can improve comfort, but ventilation must remain adequate to control moisture and indoor pollutants.

    Identify and Reduce Unwanted Drafts

    Cold air entering through gaps around doors and windows can make rooms feel uncomfortable, particularly during windy weather.

    Check exterior doors, window frames, and other areas where unwanted airflow may occur. Suitable weatherstripping and door seals can help reduce drafts when installed correctly.

    Do not seal designed ventilation openings or block air supplies required by fuel-burning appliances. If you are unsure whether an opening is intentional, seek qualified advice before changing it.

    If your home has cold floors, suitable rugs may improve how the surface feels underfoot. However, persistent coldness may indicate a need to investigate insulation, heating performance, or building defects.

    Use Curtains to Reduce Heat Loss

    Open curtains during daylight when sunlight can warm your rooms. Close them after sunset to help reduce heat loss through windows.

    Thermal curtains may be useful in rooms with older windows or noticeable heat loss. Choose a suitable size and fit so they cover the intended area without creating unnecessary gaps.

    Keep curtains clear of radiators and other heat sources. Heavy fabric covering a radiator can interfere with heat distribution and may create a safety concern.

    Make Better Use of Heating Controls

    Heating schedules can help match indoor temperatures to your routine.

    For example, you might prefer a comfortable living room during the evening while keeping unused spaces at a suitable temperature. Thermostatic radiator valves can help manage individual rooms where the heating system supports them.

    Avoid turning the thermostat up unnecessarily when a room is slow to warm. A high setting will not necessarily make the heating system warm the room faster.

    Instead, check whether radiators are unobstructed, heating controls are working correctly, and drafts or insulation problems are contributing to the discomfort.

    Expert Tip: If one room remains cold while others are comfortable, investigate the specific room rather than changing the entire heating schedule. Uneven temperatures can have several causes, including airflow, insulation, radiator performance, and the room’s position within the building.

    When Should You Consider Insulation Improvements?

    If your home loses heat quickly, insulation may provide a more lasting improvement than relying on portable heaters or additional blankets.

    Potential areas to investigate include loft insulation, suitable wall insulation, floor insulation, and inefficient windows. The right solution depends on the building’s construction, condition, ventilation, and existing insulation.

    For older properties, inappropriate insulation or sealing can sometimes create moisture problems. Seek qualified advice before making substantial changes to a building’s fabric.

    Regular maintenance is equally important. Learn more through Basic Home Maintenance Tips.

    3. How Can You Keep Your Home Cool During Summer?

    To keep your home cooler during hot weather, reduce direct sunlight, ventilate when outdoor air is cooler, and limit unnecessary indoor heat. Suitable blinds, curtains, external shading, and thoughtful appliance use can make rooms more comfortable without requiring a major cooling system.

    Control Sunlight Before Rooms Overheat

    Sunlight entering through windows can warm a room quickly, especially when the sun shines directly onto large glass surfaces.

    Close suitable curtains or blinds before the room becomes too hot. External shading can be particularly effective because it blocks sunlight before it passes through the glass.

    When choosing window coverings, consider their ability to control light, preserve privacy, and support ventilation.

    Darkening a room completely may not always be necessary. The objective is to reduce unwanted heat while maintaining a comfortable environment for the activities taking place there.

    Ventilate at Suitable Times

    Opening windows can help remove warm indoor air when outdoor air is cooler. Early morning and evening may provide suitable opportunities, depending on local weather.

    During very hot periods, keeping windows closed and using shading may help prevent additional heat from entering. However, the best approach depends on outdoor temperatures, air quality, humidity, and the building’s ventilation needs.

    Never leave windows unsecured if doing so creates a security risk.

    Reduce Heat from Household Appliances

    Ovens, tumble dryers, and other appliances can contribute to indoor heat.

    During hot weather, consider preparing simpler meals, using suitable cooking appliances that release less heat into the room, or running heat-producing appliances during cooler periods.

    Switch off unnecessary electrical equipment, but do not disconnect devices that need to remain operating for safety or essential functions.

    Fans can improve comfort by moving air across your skin. They do not lower the room temperature in the same way as air conditioning, so use them alongside shading and other appropriate cooling measures.

    During extreme heat, follow local public-health guidance and seek a cooler location if indoor temperatures become unsafe.

    4. How Can You Improve Indoor Air Quality and Freshness?

    Indoor air quality infographic showing a fresh modern living room, indoor plants, ventilation, moisture control, dust reduction, and an air purifier.
    Improve indoor air quality with practical tips for controlling moisture, reducing dust, improving ventilation, and choosing a suitable air purifier. Discover how to address persistent odors and create a fresher, more comfortable home.

    Good indoor air quality depends on adequate ventilation, moisture control, regular cleaning, and reducing indoor pollutants. A fresh-smelling home should not rely on fragrances to disguise persistent odors, because the underlying cause may need attention.

    Keep Moisture Under Control

    Cooking, showering, drying clothes, and everyday household activities release moisture into the air.

    Use kitchen and bathroom extractor fans where available. Dry wet surfaces promptly, repair leaks, and avoid allowing condensation to remain on windows or walls for extended periods.

    If you dry clothes indoors, choose a suitable ventilated area and avoid placing wet laundry in a room with poor airflow.

    Persistent condensation, damp patches, or recurring mold require further investigation. Painting over affected areas without addressing the moisture source is unlikely to provide a lasting solution.

    Reduce Dust and Everyday Pollutants

    Regular cleaning helps manage dust, pet hair, and other particles that accumulate indoors.

    Pay particular attention to frequently used surfaces, bedding, upholstery, and areas that collect dust. Vacuum according to your flooring and household needs, and maintain filters as directed by the manufacturer.

    If household members experience allergy or asthma symptoms, consider whether cleaning products, fragrances, smoke, pets, or other indoor sources may be contributing.

    Use suitable products according to their instructions, and never mix cleaning chemicals unless the manufacturer explicitly confirms that doing so is safe.

    Are Air Purifiers Worth Considering?

    An air purifier with a suitable particle filter may help reduce certain airborne particles in an appropriately sized room.

    Its effectiveness depends on the filter, airflow, room size, and the type of pollution being addressed.

    However, an air purifier will not repair a leaking pipe, remove the source of dampness, or replace necessary ventilation. Avoid devices that intentionally generate ozone.

    Common Mistake: Trying to eliminate a musty smell with air fresheners while ignoring the possibility of dampness. Find the source of persistent odors before choosing a solution.

    5. How Can You Make Your Bedroom More Comfortable for Better Rest?

    A comfortable bedroom combines suitable bedding, appropriate temperature, darkness, reduced noise, and good ventilation. You can improve the room by making it easier to relax, keeping the sleeping area organized, and adjusting the environment to your personal needs.

    Choose Bedding According to the Season

    Your bedding should help you stay comfortable without becoming excessively hot or cold.

    Lightweight, breathable bedding may work well during warm weather, while a warmer duvet or additional blanket may be more suitable during colder months.

    Consider how the bedroom temperature changes overnight. A room that feels comfortable in the evening may become warmer or colder before morning.

    Wash bedding regularly and follow care instructions to keep fabrics fresh and in good condition.

    Reduce Light and Noise

    Outdoor lighting, streetlights, and early morning sunlight can disturb sleep for some people.

    Blackout curtains or a suitable eye mask may help if light is the problem. For noise, consider soft furnishings, suitable window improvements, or changing the bed’s position when practical.

    If household noise is the main issue, agree on quieter periods and reduce unnecessary disturbances during sleeping hours.

    Persistent mechanical noise may indicate a maintenance problem. Investigate unusual sounds from plumbing, heating equipment, or electrical devices rather than relying only on sound-blocking products.

    Make the Bedroom Easier to Maintain

    Keep frequently used items accessible and remove objects that create unnecessary clutter.

    A practical bedroom may need only a comfortable bed, suitable lighting, useful storage, and a place for laundry.

    Avoid overcrowding the bedside table with items you rarely use. Keep walking areas clear, particularly if you need to move around during the night.

    Explore Bedroom Organization Tips for more ideas on maintaining a practical and relaxing sleeping space.

    6. How Can Lighting Improve Everyday Home Comfort?

    Good lighting combines general illumination, task lighting, and softer lighting for relaxation. The right combination makes household activities easier while helping rooms feel more welcoming at different times of day.

    Understand the Different Types of Lighting

    Ambient lighting provides general illumination for moving around and using a room.

    Task lighting supports activities such as reading, preparing food, studying, or working at a desk.

    Accent lighting draws attention to selected features, such as artwork or shelving, and can create visual interest.

    Night lighting can improve visibility in hallways and other areas used after dark.

    A room does not necessarily need several new fixtures. Sometimes, moving an existing lamp or replacing an unsuitable bulb can make a meaningful difference.

    Choose Suitable Bulb Brightness and Color

    Different activities benefit from different lighting conditions.

    Warm-white light often creates a relaxed atmosphere in living rooms and bedrooms. Brighter, more neutral lighting may be helpful for kitchen tasks, reading, and detailed work.

    Consider the room’s natural light, wall colors, and the activities performed there before choosing bulbs.

    Use adequate lighting on stairs, entrances, and walkways to reduce the risk of trips and falls.

    Make Better Use of Daylight

    Keep windows reasonably clear of unnecessary obstructions and consider placing mirrors where they can reflect existing daylight.

    Mirrors can help distribute light visually, but they do not generate additional light. Avoid positioning them where reflections create uncomfortable glare.

    When planning lighting changes, assess the room during daylight and after dark so the final arrangement works at different times.

    7. How Can You Reduce Noise and Make Your Home More Peaceful?

    You can make your home quieter by identifying the source of noise, reducing unwanted sound entry, and improving room acoustics. Rugs, curtains, upholstered furniture, and bookcases can reduce echoes, although they cannot completely block loud sounds from outside.

    First, determine whether the main problem is external noise or sound reflecting around the room.

    If a room sounds hollow, soft furnishings may make conversation and television sound less harsh. If traffic noise enters through a poorly sealed window, suitable repairs or window improvements may be more effective.

    In shared homes, agree on reasonable quiet periods for sleeping, studying, or working.

    Small adjustments can also help. Soft-close pads on cupboard doors, rugs beneath suitable furniture, and moving noisy appliances away from quiet areas may improve everyday comfort.

    However, do not ignore unusual mechanical sounds. Persistent rattling, buzzing, or unexpected plumbing noises may require professional inspection.

    8. How Can You Organize Your Home to Reduce Everyday Stress?

    A well-organized home is easier to clean, safer to move around in, and more convenient to use. Effective organization means giving everyday belongings practical storage locations rather than trying to keep every surface completely empty.

    Create Storage Zones Around Daily Activities

    Store items near the places where you use them.

    For example, keep keys and bags near the entrance, cooking utensils close to the work area, and laundry baskets where clothes are commonly changed.

    Place frequently used kitchen equipment within easy reach, while keeping occasional-use items in less accessible storage.

    Cleaning products should remain safely stored away from children and pets.

    The best storage arrangement is the one that matches your actual routine. If you repeatedly leave an item in the same place, consider whether that location is the most practical place to store it.

    Declutter Before Buying Organizers

    Storage baskets and boxes can help, but buying them before sorting your belongings may create more storage for things you do not need.

    Start with one drawer, shelf, or countertop. Decide what belongs there, relocate misplaced items, and remove things that no longer serve a useful purpose.

    Once the area is organized, return items to their designated places regularly.

    For more detailed guidance, explore Home Storage Solutions and Home Decluttering Tips.

    Develop a Cleaning Routine You Can Maintain

    A realistic cleaning routine prevents small chores from becoming overwhelming.

    Wipe kitchen surfaces after use, clean spills promptly, and keep frequently used areas reasonably tidy. Divide other tasks into weekly or monthly activities according to how often each area needs attention.

    You do not need to clean every room every day. Focus on hygiene, safety, and the areas that receive the most use.

    For practical routines, visit Easy Home Cleaning Tips.

    9. How Can You Make a Small Home Feel More Comfortable?

    A small home can feel more comfortable when furniture fits the available space, walkways remain clear, and storage makes everyday belongings easy to access. Good lighting, thoughtful furniture placement, and flexible storage can make a room more functional without increasing its size.

    Choose Furniture That Fits the Room

    Oversized furniture can restrict movement and make small rooms feel crowded.

    Measure the room before purchasing furniture, including the space needed to open doors, drawers, and cupboards.

    Consider furniture that serves more than one purpose, such as a bed with storage underneath or a table that can be extended when needed.

    However, multifunctional furniture is useful only when it remains comfortable and easy to use. A complicated piece that requires constant rearranging may create more work than it saves.

    Use Vertical Space Carefully

    Wall-mounted shelves, hooks, and tall storage units can free up floor space.

    Secure shelves and tall furniture properly, following the manufacturer’s instructions and taking account of the wall construction.

    Keep frequently used items at convenient heights, and avoid placing heavy objects where they are difficult or unsafe to retrieve.

    Avoid Overcrowding

    Every available corner does not need a decorative object or a piece of furniture.

    Leave enough open space to move around comfortably. A carefully arranged room with fewer, more useful items often feels better than one packed with accessories.

    For additional ideas, explore Small Space Home Tips.

    10. How Can You Make Your Kitchen More Comfortable to Use?

    Kitchen comfort tips infographic featuring an organized modern kitchen, accessible cooking utensils, task lighting, extractor ventilation, and clutter-free countertops.
    Make everyday cooking easier with practical kitchen comfort tips. Discover how smart organization, effective task lighting, proper ventilation, and simple cleaning routines can create a more functional and welcoming kitchen.

    A comfortable kitchen supports safe food preparation, efficient movement, suitable lighting, and easy cleaning. Organize the space around your cooking habits so frequently used ingredients, utensils, and equipment are accessible without unnecessary movement.

    Arrange Items According to How You Cook

    Keep everyday cooking utensils close to the preparation area. Store frequently used ingredients where they are easy to find, while keeping heavier equipment in suitable, accessible locations.

    Avoid overcrowding worktops with appliances you rarely use. A clear preparation surface makes cooking and cleaning easier.

    Group similar items together, such as baking supplies, breakfast ingredients, and food-storage containers.

    Improve Lighting and Ventilation

    Good task lighting helps you see food clearly and work safely.

    Kitchen extractor fans can help remove cooking moisture, odors, and airborne particles. Use them appropriately and maintain filters according to the manufacturer’s instructions.

    Keep ventilation openings unobstructed, and make sure lighting and electrical equipment are suitable for their location.

    Make Cleaning Part of the Routine

    Cleaning becomes easier when spills and food residue are handled promptly.

    Wipe work surfaces after food preparation, clean appliances as required, and return utensils to their storage areas after use.

    Avoid storing unnecessary items on the worktop because they make cleaning more difficult.

    For more detailed guidance, visit Kitchen Organization Tips.

    11. How Can You Make Your Bathroom More Comfortable and Practical?

    A comfortable bathroom needs suitable lighting, privacy, adequate ventilation, safe surfaces, and convenient storage. Small improvements to everyday routines can make the room easier to use while helping prevent moisture problems and unnecessary clutter.

    Control Moisture After Showering

    Showering produces moisture that can condense on cooler surfaces.

    Use an extractor fan or suitable ventilation system, and allow it to operate according to its instructions. Wipe down persistently wet surfaces where appropriate and address leaks promptly.

    If mold keeps returning, investigate the underlying moisture problem rather than repeatedly cleaning or repainting the affected area.

    Improve Storage and Accessibility

    Keep everyday toiletries within easy reach, and avoid filling the bathroom with products you rarely use.

    Use storage suitable for damp environments, and ensure shelves and cabinets are securely installed.

    Keep floors clear of unnecessary objects and use suitable non-slip measures where needed.

    Review Lighting and Privacy

    Choose lighting that makes grooming and cleaning tasks easy without creating uncomfortable glare.

    Suitable window coverings can provide privacy while allowing daylight into the room.

    When planning a bathroom improvement, consider ventilation, water exposure, electrical safety, storage, and accessibility together.

    Explore Bathroom Planning Tips for further practical ideas.

    12. How Can You Create a Cozy Home Without Overdecorating?

    A cozy home feels welcoming because the lighting, textures, furniture, and personal details work together. You do not need matching furniture or an expensive decorating style. Focus on comfortable seating, suitable colors, useful lighting, and a few meaningful accessories.

    Choose Colors That Suit Your Space

    Soft neutrals, earthy shades, muted greens, and gentle blues can create a relaxed atmosphere, but there is no single palette that works for everyone.

    Consider the amount of natural light in each room. Lighter surfaces may help a darker space feel brighter, while deeper colors can create a more intimate atmosphere in rooms with suitable lighting.

    Test paint samples under daylight and artificial lighting before committing to a large area.

    Use Textures for Comfort

    Curtains, cushions, blankets, and rugs can make a room feel softer and more welcoming.

    Choose materials that suit your household, cleaning routine, and seasonal needs. Washable covers may be particularly useful in homes with children or pets.

    Keep fabrics away from heaters, open flames, and other heat sources.

    Display Items That Matter to You

    Photographs, artwork, books, and meaningful keepsakes can make a room feel personal.

    Choose objects you genuinely enjoy rather than buying decorations simply because they are fashionable.

    Grouping a few accessories together can create a more intentional arrangement than spreading many small items across every surface.

    For additional inspiration, explore Home Decorating Tips.

    13. How Can You Make Household Chores Easier?

    Household chores become more manageable when cleaning, laundry, and maintenance fit naturally into your routine. Rather than waiting until every task becomes urgent, use small, repeatable habits to keep your home in good condition.

    Create a Practical Laundry System

    Keep laundry baskets in convenient locations and separate items according to the washing requirements indicated on their care labels.

    Avoid overloading the washing machine, because doing so can affect cleaning performance. Use the recommended detergent quantity and the appropriate cycle for the load.

    Dry laundry in a suitable location with adequate ventilation to limit moisture buildup indoors.

    Clean the washing machine and its filters according to the manufacturer’s guidance.

    For more practical advice, explore Laundry Tips and Tricks.

    Keep Cleaning Supplies Accessible but Safe

    Store appropriate cleaning supplies where they are easy for adults to access but safely out of reach of children and pets.

    Use each product according to its label and never mix cleaning chemicals without explicit manufacturer guidance.

    A small, well-organized cleaning kit can make quick tasks easier, but avoid buying duplicate products that perform the same function without providing additional value.

    Divide Maintenance into Manageable Tasks

    Some household tasks need frequent attention, while others can be checked less often.

    A simple maintenance plan might include:

    • Weekly: Check high-use areas for cleaning needs.
    • Monthly: Inspect accessible areas for small leaks, damaged seals, or developing maintenance problems.
    • Seasonally: Review heating, cooling, window coverings, and weatherproofing.
    • As needed: Arrange qualified repairs for faults involving electrical systems, gas appliances, structural defects, or persistent dampness.

    The exact schedule depends on the property and the manufacturer’s instructions for individual systems.

    14. What Are the Most Common Home Comfort Mistakes?

    The most common home comfort mistakes include treating symptoms instead of causes, blocking ventilation, buying unnecessary accessories, ignoring maintenance, and attempting too many projects at once. Avoiding these mistakes helps you spend money more carefully and achieve improvements that last.

    Mistake 1: Decorating Before Solving Practical Problems

    A cold room may look more inviting with cushions and blankets, but these additions will not resolve a serious insulation problem.

    Why it happens: Decorative improvements are visible and often feel easier than investigating a building issue.

    How to avoid it: Address temperature, moisture, safety, and ventilation problems before investing heavily in appearance.

    Mistake 2: Blocking Ventilation to Keep Heat Inside

    Sealing every opening can reduce necessary airflow and contribute to moisture or indoor air-quality problems.

    Why it happens: People may assume that every gap serves the same purpose.

    How to avoid it: Reduce unwanted drafts without blocking designed ventilation openings or required combustion-air supplies.

    Mistake 3: Buying Storage Before Sorting Belongings

    New organizers may simply give unused belongings more places to accumulate.

    Why it happens: Storage products appear to offer an immediate solution to clutter.

    How to avoid it: Declutter first, measure the remaining items, and choose storage that fits the available space.

    Mistake 4: Ignoring Small Maintenance Problems

    A minor leak, damaged seal, or unusual noise can become more expensive if left unresolved.

    Why it happens: Small problems may appear harmless when they first occur.

    How to avoid it: Investigate recurring problems early and arrange appropriate repairs before the damage spreads.

    Mistake 5: Following Trends Without Considering Your Routine

    A popular furniture arrangement may not work for your household or available space.

    Why it happens: Inspiration photographs often prioritize appearance rather than everyday use.

    How to avoid it: Choose furniture, storage, and decor according to your needs, cleaning habits, budget, and room dimensions.

    Mistake 6: Trying to Change the Entire Home at Once

    Large projects can become overwhelming and expensive before you understand which changes will help.

    Why it happens: People may feel that a complete makeover is the only way to create a meaningful improvement.

    How to avoid it: Select one priority, test a practical solution, and assess the results before starting another project.

    15. What Do Home Improvement Professionals Recommend for Lasting Comfort?

    A practical professional approach starts with understanding the problem, checking the condition of the property, and choosing improvements that address the cause. Heating, insulation, ventilation, lighting, and room layout should work together rather than being treated as completely separate concerns.

    Investigate Problems Before Buying Solutions

    Write down what feels uncomfortable, when it happens, and which conditions might contribute.

    For example, a room that becomes cold only during windy evenings may have unwanted drafts or window-related heat loss. A bathroom that repeatedly develops condensation may need better moisture control or ventilation.

    Observing the pattern helps you choose a more suitable response.

    Measure Before Making Purchases

    Measure rooms, windows, furniture, and available storage before ordering replacements.

    Consider how doors open, how much walking space remains, and whether furniture blocks heating or ventilation.

    Checking dimensions in advance helps reduce unnecessary purchases and makes the final arrangement more practical.

    Consider the Whole Room

    A room’s comfort depends on several interacting factors.

    Heavy curtains may reduce heat loss but interfere with a radiator if positioned incorrectly. Closing windows may reduce outdoor heat during a hot afternoon but could also reduce necessary ventilation.

    Consider how each change affects the rest of the room before committing to it.

    Choose Improvements That Are Easy to Maintain

    Durable materials, accessible storage, suitable lighting, and simple controls often provide lasting everyday value.

    Consider not only the purchase price but also cleaning requirements, maintenance needs, compatibility, and expected lifespan.

    Expert Tip: If a comfort problem persists despite simple improvements, seek an appropriate professional assessment. Repeatedly buying products without identifying the cause can cost more than resolving the underlying issue.

    For more practical improvement ideas, explore Budget Friendly Home Improvement Tips.

    16. How Can You Improve Your Home Comfort in One Weekend?

    Weekend home comfort infographic showing a cozy living room, organized furniture, improved lighting, fresh bedding, clutter-free surfaces, and a two-day home improvement checklist.

    You can improve home comfort in one weekend by identifying your biggest problems, completing a few practical tasks, and creating a maintenance plan. Focus on improvements that have an immediate effect on your routine rather than attempting a complete makeover.

    Saturday Morning: Inspect Your Home

    Walk through each room and note problems involving temperature, lighting, ventilation, clutter, and noise.

    Choose two or three priorities based on how frequently the problems affect you.

    For example, you might decide that the bedroom needs better light control, the living room needs a more practical layout, and the kitchen needs clearer work surfaces.

    Saturday Afternoon: Make Practical Changes

    Rearrange furniture where necessary, organize frequently used belongings, and adjust curtains or blinds to improve light control.

    Check for obvious drafts and address them using suitable products without blocking designed ventilation.

    If you discover a significant leak, persistent dampness, or a fault involving electrical or heating equipment, arrange the appropriate professional help instead of attempting an unsuitable repair.

    Sunday Morning: Improve Everyday Comfort

    Refresh bedding, clean key surfaces, and make frequently used rooms easier to maintain.

    Review lighting in the areas where you read, cook, work, or relax. Check that extractor fans and ventilation openings are unobstructed.

    You do not need to purchase new items if existing furniture, lamps, and storage can be used more effectively.

    Sunday Afternoon: Establish a Simple Routine

    Write down the maintenance tasks that need attention and decide which improvements can wait.

    Use the following checklist to track your progress:

    • Identify the main comfort problems in each room.
    • Check for unwanted drafts.
    • Keep ventilation openings unobstructed.
    • Improve lighting in frequently used areas.
    • Refresh bedding and organize the bedroom.
    • Clear and organize a high-use surface.
    • Investigate persistent odors or moisture.
    • Make a short list of future maintenance tasks.
    • Set a realistic weekly cleaning routine.

    Small changes can make a noticeable difference when they address the problems that matter most.

    17. How Can You Maintain a Comfortable Home Throughout the Year?

    Maintaining a comfortable home requires regular attention to seasonal temperature changes, ventilation, cleaning, and the condition of household systems. A few simple checks each season can help prevent small problems from becoming expensive repairs.

    Spring: Refresh and Inspect

    Use spring as an opportunity to review cleaning routines, check window coverings, and inspect accessible areas for signs of moisture or damage.

    Clean suitable ventilation grilles and replace or maintain filters according to the manufacturer’s instructions.

    Review storage and remove items that no longer serve a useful purpose.

    Summer: Manage Heat and Sunlight

    Check which rooms receive the strongest direct sunlight and adjust blinds or curtains accordingly.

    Ventilate when outdoor conditions are suitable, and reduce unnecessary heat from appliances.

    If your home regularly becomes excessively hot, investigate suitable shading, ventilation, and cooling improvements before the next hot period.

    Autumn: Prepare for Colder Weather

    Check suitable door and window seals, heating controls, and accessible areas around windows for signs of damage.

    Arrange necessary heating-system maintenance in accordance with the manufacturer’s recommendations.

    Review bedding and curtains so they suit the changing weather.

    Winter: Monitor Heating and Moisture

    Pay attention to rooms that remain cold, persistent condensation, and changes in indoor air quality.

    Keep heating equipment maintained and use heating controls sensibly.

    If dampness or mold repeatedly appears, investigate the cause rather than relying solely on surface cleaning.

    Keep a Simple Home Maintenance Record

    A small notebook or digital list can help you remember when filters were changed, appliances were serviced, or repairs were completed.

    Record recurring issues, the steps already taken, and any professional recommendations.

    This information can be useful when arranging repairs or deciding whether a previous improvement has solved the problem.

    How Can I Make My Home More Comfortable Without Spending Too Much Money?

    Making your home more comfortable doesn’t require expensive furniture or major renovations. The most effective approach is to identify the everyday problems that affect your comfort and address them using practical, affordable solutions. Improving furniture placement, reducing clutter, adjusting lighting, and managing drafts can make a noticeable difference without stretching your budget.
    Practical ways to improve home comfort on a budget:
    Rearrange furniture to create clear walkways and more usable space.
    Use existing cushions, blankets, and curtains to improve comfort and manage light.
    Reduce unwanted drafts around suitable door and window gaps.
    Organize frequently used belongings to make everyday tasks easier.
    Replace harsh lighting with suitable bulbs or reposition existing lamps.
    Follow a simple cleaning routine to keep rooms fresh and inviting.
    Professional tip: Start with one room and focus on the problem you notice most often. Completing a few targeted improvements is usually more effective than buying several decorative accessories without a clear purpose.

    How Can I Keep My Home Warm in Winter and Cool in Summer?

    Maintaining a comfortable indoor temperature throughout the year requires different strategies for different seasons. During winter, focus on reducing unwanted heat loss and using heating controls efficiently. In summer, prevent excessive sunlight from entering and ventilate when outdoor conditions are suitable.
    For better temperature control throughout the year:
    Winter: Close curtains after sunset, check for unwanted drafts, and keep radiators unobstructed.
    Summer: Use suitable blinds or curtains to limit direct sunlight during hot periods.
    All year: Maintain heating equipment and keep intended ventilation openings clear.
    Cold rooms: Investigate insulation, window seals, and heating performance rather than automatically increasing the thermostat.
    Hot rooms: Reduce unnecessary heat from appliances and use fans appropriately to improve personal comfort.
    Professional tip: If one room consistently feels colder or hotter than the rest of your home, investigate the underlying cause before purchasing additional heating or cooling equipment. Insulation, airflow, window orientation, and heating-system performance can all affect room temperature.

    How Can I Improve Indoor Air Quality and Make My Home Feel Fresher?

    A fresher home starts with good ventilation, effective moisture control, and regular cleaning. Strong fragrances may temporarily cover unpleasant smells, but they won’t resolve problems caused by dampness, leaks, cooking residues, or other pollutant sources. Identifying and removing the cause is the most reliable way to improve indoor comfort.
    Practical ways to maintain healthier indoor air:
    Use kitchen and bathroom extractor fans when cooking or showering.
    Open windows when outdoor weather and air quality make ventilation appropriate.
    Repair leaks promptly and investigate recurring condensation or damp patches.
    Clean frequently used surfaces, bedding, and dust-collecting areas regularly.
    Maintain ventilation equipment and replace filters according to manufacturer guidance.
    Avoid relying on air fresheners to disguise persistent musty odors.
    Professional tip: If mold, condensation, or unpleasant odors keep returning, investigate the source of the moisture or contamination rather than repeatedly treating the visible symptoms. Persistent problems may require a qualified building or ventilation professional.

    What Are the Best Ways to Make a Small Home Feel More Comfortable and Spacious?

    A small home can feel more comfortable when furniture fits the available space, storage is organized around daily routines, and natural light is used effectively. The goal isn’t to remove everything from the room; it’s to make the available space easier to use without unnecessary obstacles.
    Effective ways to improve comfort in small spaces:
    Choose furniture that fits the room and leaves enough space for movement.
    Use wall-mounted shelves and hooks where they can be installed safely.
    Consider multifunctional furniture when it genuinely meets your needs.
    Keep frequently used items accessible and store occasional-use belongings elsewhere.
    Use suitable lighting and mirrors to help darker areas feel brighter.
    Remove unnecessary items before purchasing storage containers or organizers.
    Professional tip: Measure your room and check door openings, walking routes, and furniture dimensions before buying anything new. A well-planned layout with fewer useful pieces often works better than a crowded room filled with storage products.

    How Can I Make My Home Feel Cozy, Relaxing, and Comfortable Every Day?

    A cozy home combines comfortable furnishings, suitable lighting, practical organization, and personal touches that reflect how you live. Rather than following every decorating trend, focus on creating an environment that helps you relax and makes everyday activities easier.
    Simple ways to create a more relaxing home:
    Use warm-white lighting in areas where you unwind during the evening.
    Choose comfortable seating and bedding suited to your preferences.
    Add washable cushions, rugs, or blankets where they improve comfort.
    Keep frequently used rooms organized without trying to make every surface empty.
    Reduce unnecessary noise and address persistent disturbances where possible.
    Display meaningful photographs, books, or artwork without overcrowding the room.
    Maintain a manageable cleaning routine so household chores don’t become overwhelming.
    Professional tip: Make comfort part of your daily routine rather than treating it as a one-time decorating project. Returning belongings to their places, keeping walkways clear, and adjusting lighting and bedding to suit the season can help your home remain inviting without constant spending.

    Conclusion: Make Your Home More Comfortable Every Day

    Creating a comfortable home does not always require expensive renovations or major changes. Often, small improvements such as keeping your space organized, choosing comfortable lighting, maintaining good indoor air quality, and developing simple cleaning routines can make a noticeable difference. The best Home Comfort Tips focus on practical solutions that fit your lifestyle, available space, and budget.

    Start with the areas that affect your daily comfort the most. Declutter busy spaces, improve ventilation, organize essential items, and make each room more functional. Regular home maintenance and thoughtful decorating can also help create a cleaner, calmer, and more welcoming environment over time.

    Remember, a comfortable home is not about having perfect furniture or following every design trend. It is about creating a space where you can relax, feel at ease, and enjoy your everyday routine. With consistent habits and a few thoughtful changes, you can make your home more inviting, functional, and comfortable for everyone who lives there.

  • Home Decorating Tips

    Home Decorating Tips

    Introduction

    Home Decorating Tips | Have you ever looked around your home and felt that something was missing, even though you already have furniture, curtains, and decorative accessories? Perhaps your living room feels crowded, your bedroom lacks warmth, or your walls look unfinished. These problems are common, and they don’t necessarily mean you need to buy expensive furniture or completely renovate your home.

    The right home decorating tips can help you transform ordinary rooms into attractive, comfortable, and functional spaces. By understanding how colors, furniture, lighting, textures, and accessories work together, you can improve your home gradually without wasting money on unnecessary purchases.

    Home decorating is not simply about following trends or copying pictures from magazines. It’s about understanding your personal preferences, considering the practical needs of your household, and creating an environment that feels welcoming every day. A beautifully decorated room should look good, but it should also be easy to use, maintain, and enjoy.

    Whether you’re decorating a new house, refreshing an apartment, or updating a single room, this guide will help you make informed decisions. You’ll learn how to select a decorating style, build a balanced color palette, arrange furniture, improve lighting, decorate on a budget, and avoid common beginner mistakes.

    For more inspiration and practical household guidance, explore Heartomenal and discover ways to make your home more organized, comfortable, and visually appealing.

    1. How Should You Start Decorating Your Home?

    The best way to start decorating your home is to identify what needs improvement, decide how you want each room to function, and create a realistic plan before shopping. Assess your existing furniture, measure the available space, and choose a consistent design direction that suits your lifestyle.

    Starting with these fundamentals helps you avoid expensive mistakes and creates a clear path toward your decorating goals.

    Identify the purpose of each room

    Every room serves a different purpose, so its decoration should support the activities that happen there.

    A living room may need comfortable seating for family conversations, while a bedroom should provide a relaxing environment for rest. A kitchen requires practical work surfaces, and a home office benefits from focused lighting and an efficient furniture arrangement.

    Write down the three most important things you want each room to accomplish. For example, a living room might need to accommodate guests, provide comfortable family seating, and offer storage for everyday belongings.

    This simple exercise helps you prioritize functional improvements before decorative purchases.

    Evaluate what you already own

    Walk through the room and identify the items worth keeping, repairing, relocating, or replacing.

    An existing wooden table might work perfectly after a thorough cleaning. A sofa may look different with new cushion covers, while a lamp from another room might provide the missing light you need.

    Separate your belongings into three categories:

    • Keep: Items that work well and suit your decorating direction.
    • Improve: Furniture or accessories that need cleaning, repair, or a simple update.
    • Replace: Items that are damaged, unsuitable, or no longer meet your needs.

    Avoid discarding useful belongings simply because they don’t match a new trend. Reusing suitable furniture is often the most economical way to begin.

    Set a decorating budget

    Decide how much you can comfortably spend before choosing new products. Include essential furniture, lighting, textiles, delivery charges, and any necessary installation costs.

    Keep a small reserve for unexpected expenses. If the budget is limited, prioritize improvements that affect daily comfort, such as a suitable mattress, practical storage, or adequate lighting.

    Decorative accessories can be purchased later when the main arrangement is working well.

    2. How Do You Choose a Home Decorating Style?

    Choose a decorating style by considering the interiors you naturally enjoy, the architecture of your home, your existing furniture, and the atmosphere you want to create. You don’t need to follow one style strictly; combining compatible elements can produce a more personal and comfortable result.

    A clear style helps you make consistent decisions about furniture, colors, materials, and accessories.

    Modern decorating

    Modern interiors generally emphasize clean lines, simple shapes, practical furniture, and restrained decoration. They can include neutral colors, natural materials, and carefully selected statement pieces.

    This approach works well when you prefer an uncluttered appearance and furniture that serves a clear purpose.

    However, too many hard surfaces or overly minimal arrangements can feel cold. Introduce softer textiles, warm lighting, and natural materials to create balance.

    Traditional decorating

    Traditional interiors often feature classic furniture shapes, decorative details, symmetrical arrangements, and established color combinations.

    You might combine a wooden dining table with upholstered chairs, framed artwork, and coordinated curtains. The result can feel timeless without requiring every piece to come from the same collection.

    Avoid overcrowding the room with too many ornate details. A few well-chosen traditional elements often create a stronger effect than decorating every surface.

    Cozy decorating

    Cozy interiors emphasize comfort through soft textiles, warm lighting, natural materials, and inviting seating.

    Layer a comfortable throw over a sofa, add a textured rug, and use table lamps to create a softer evening atmosphere. Warm neutral colors can support the effect, although muted greens and blues can also feel relaxing.

    Comfort should remain the priority. Avoid filling the room with accessories that interfere with movement or make cleaning difficult.

    Minimalist decorating

    Minimalist decorating focuses on simplicity, functional furniture, and carefully chosen belongings.

    It doesn’t mean a room must be empty or completely neutral. Instead, each item should contribute to the room’s function, appearance, or personal meaning.

    This style works particularly well when you prefer clear surfaces and straightforward storage solutions.

    Preppy and classic decorating

    Preppy interiors often combine stripes, checks, tailored furniture, coordinated colors, and traditional decorative details. Navy, green, cream, and white can form a balanced palette, while patterned cushions or framed prints add character.

    Keep the patterns connected through shared colors. For example, navy striped cushions can work with a cream sofa and a small green accessory without making the room feel overly busy.

    Create a personal style guide

    Collect a few decorating references and identify the features they share. You may discover that you consistently prefer natural wood, simple furniture, botanical details, or warm neutral colors.

    Use these preferences as a practical guide rather than copying an entire room exactly.

    For further inspiration, browse Home Tips and Ideas and identify decorating approaches that suit your home’s needs.

    3. How Can You Choose the Right Colors for Each Room?

    Home color selection guide showing a cream and sage green interior, color palette swatches, warm and cool tones, and the 60-30-10 decorating rule.
    Learn how to choose harmonious colors for every room using warm and cool tones, complementary undertones, and the 60-30-10 rule. Create a balanced interior with colors that complement your furniture, flooring, and natural light.

    Choose colors by considering natural light, existing furniture, room dimensions, and the mood you want to create. Begin with a dominant color, introduce one or two supporting shades, and use accents to add interest without overwhelming the space.

    A coordinated palette makes different materials and decorative elements feel connected.

    Understand warm and cool colors

    Warm colors include shades such as terracotta, warm beige, muted yellow, and some soft whites. They can create an inviting atmosphere and complement natural wood.

    Cool colors include many blues, greens, and gray-based shades. Depending on their undertones and lighting, they can make a room feel calm, fresh, or sophisticated.

    Neither group is automatically better. A warm neutral may work beautifully in a room with limited sunlight, while a soft green can complement a bright space filled with natural materials.

    Use the 60-30-10 rule

    The 60-30-10 rule is a helpful starting point for distributing color.

    • 60% dominant color: Usually appears on walls, large surfaces, or the main furniture.
    • 30% secondary color: Appears on curtains, upholstery, rugs, or other substantial elements.
    • 10% accent color: Appears in smaller decorative details.

    Imagine a bedroom with cream walls, muted green bedding, and small navy accents. The colors create variety while maintaining a consistent appearance.

    These proportions are a guideline rather than a strict requirement. Adjust them according to the room’s size, furniture, and your preferences.

    Consider undertones

    Two shades that appear similar in a store may look noticeably different beside your flooring or furniture.

    A white paint with a cool undertone may clash with warm wooden cabinets, while a warmer white may complement them. Gray can also contain blue, green, or brown undertones.

    Test paint samples on the actual wall and observe them in daylight and artificial lighting before making a final decision.

    Use accent colors carefully

    Accent colors provide personality without requiring major changes.

    If your room is mostly neutral, introduce color through cushions, artwork, a decorative vase, or a small upholstered chair. These elements are relatively easy to replace if your preferences change.

    Common mistake: Selecting paint before considering permanent features such as flooring, countertops, and existing furniture. Start with the elements that are difficult to change, then select colors that complement them.

    4. How Do You Arrange Furniture for a Balanced Room?

    Arrange furniture according to the room’s purpose, focal point, and natural walking routes. Keep entrances accessible, leave enough space to use drawers and doors, and position seating so people can comfortably interact.

    A balanced layout improves the room’s appearance while making everyday activities easier.

    Find the focal point

    A focal point is the feature that naturally attracts attention. It might be a fireplace, a large window, a television, a statement bed, or a piece of artwork.

    Arrange furniture so the focal point feels intentional rather than competing with several unrelated features.

    In a living room, orient the main seating toward the feature that matters most to your household. In a bedroom, position the bed where it can serve as the main visual element without blocking access to wardrobes or windows.

    Measure furniture before buying

    Measure the room, doorways, staircases, and furniture carefully before ordering large items.

    A sofa might fit the available wall but prove impossible to move through the entrance. A dining table might fit on paper but leave too little room for chairs.

    Create a basic floor plan showing:

    • Doors and their opening directions.
    • Windows and radiators.
    • Main walking routes.
    • Existing electrical outlets.
    • Furniture dimensions.
    • Storage doors and drawers.

    When possible, mark the proposed furniture positions on the floor with removable tape. This gives you a better sense of the available space before committing to a purchase.

    Balance furniture sizes

    Large furniture pieces usually need enough surrounding space to avoid overwhelming a room.

    In a compact living room, a streamlined sofa and a modest coffee table may work better than a bulky sectional and several large chairs. In a spacious room, a small rug and tiny accessories may appear disconnected from the scale of the furniture.

    Think about the relationship between each piece and its surroundings rather than considering items individually.

    Create functional zones

    Open-plan rooms often serve several purposes. You can define different zones using furniture placement, rugs, lighting, or shelving.

    For example, a sofa and rug can identify the living area, while a dining table and pendant light establish the eating area. A small desk positioned near a window can form a work zone without requiring a separate room.

    Keep the transitions between these areas open and practical.

    For more ideas about creating a comfortable seating arrangement, explore Living Room Home Tips.

    5. How Can Lighting Improve Your Home Decor?

    Good lighting combines general illumination, task lighting, and accent lighting to make rooms functional and visually comfortable. Instead of relying entirely on a single ceiling fixture, use several suitable light sources that support different activities and create a balanced atmosphere.

    Lighting can change how colors appear, highlight decorative details, and improve the usefulness of a room.

    Use three layers of lighting

    Ambient lighting illuminates the overall room. Ceiling fixtures, recessed lights, and suitable overhead lighting can provide this foundation.

    Task lighting helps with specific activities. Examples include reading lamps, desk lights, and under-cabinet lighting for kitchen preparation.

    Accent lighting draws attention to selected features. Picture lights, decorative lamps, and carefully positioned spotlights can highlight artwork or architectural details.

    Not every room needs all three layers in equal amounts. A hallway may need effective general lighting, while a living room benefits from a more flexible arrangement.

    Make natural light work for you

    Natural light can make rooms feel brighter and reveal the true appearance of colors and materials.

    Keep windows clean, avoid unnecessarily blocking daylight with bulky furniture, and select curtains according to your privacy needs.

    Mirrors can reflect available light when placed thoughtfully. However, consider what the mirror reflects: a pleasant view or a bright window may improve the room, while a cluttered corner may become more noticeable.

    Select suitable bulb characteristics

    Consider both brightness and color appearance when choosing bulbs. Warm-looking light often suits relaxing spaces, while brighter, more focused illumination may help with detailed tasks.

    For work areas, choose lighting that provides sufficient visibility without producing uncomfortable glare. In bathrooms and kitchens, select fixtures and bulbs appropriate for the environment.

    Practical tip: Test lighting during the evening as well as during the day. A room that looks balanced in sunlight may feel too dark or harsh when the sun goes down.

    6. How Can You Decorate Walls Without Overcrowding Them?

    Wall decorating ideas featuring balanced wall art, a stylish gallery wall, decorative mirrors, floating shelves, and elegant minimalist living room decor.
    Create beautifully decorated walls without making your home feel crowded. Discover how to arrange artwork, design a balanced gallery wall, use mirrors strategically, and style floating shelves while preserving visual space.

    Decorate walls by selecting artwork, mirrors, shelves, or other features that suit the wall’s proportions and the surrounding furniture. Use consistent spacing and a clear visual arrangement, and remember that leaving some areas empty can make the entire room feel more balanced.

    Select artwork that suits the space

    Large artwork can work well above a sofa, bed, or dining table, while smaller prints can complement narrow walls or shelves.

    Consider the colors already present in the room. Artwork doesn’t have to match everything exactly, but a few shared tones can help it feel connected to the overall design.

    Before hanging anything, temporarily position the artwork against the wall and assess it from different viewpoints.

    Create a gallery wall

    A gallery wall allows you to combine photographs, illustrations, prints, and personal mementos.

    For a coordinated arrangement:

    1. Select the frames and images you want to display.
    2. Arrange them on the floor before hanging them.
    3. Keep the spacing reasonably consistent.
    4. Balance large pieces with smaller ones.
    5. Check the overall arrangement from across the room.

    You can combine different images successfully when their frames, colors, or subject matter share a visual connection.

    Use mirrors and shelves thoughtfully

    Mirrors can introduce depth and reflect light, especially in entryways and compact living spaces.

    Floating shelves provide a place for books and decorative objects, but they should not become crowded storage areas. Combine a few objects of different heights and leave some space between groups.

    Avoid decorating every available wall simply because it looks empty. A carefully chosen feature often works better than multiple competing displays.

    7. How Can Textiles Make a Room Feel More Comfortable?

    Textiles add softness, warmth, color, and texture to a room. Curtains, rugs, cushions, bedding, and throws can connect furniture and decorative accessories while improving everyday comfort.

    They are also among the easiest decorating elements to update when you want a change without replacing major furniture.

    Combine different textures

    A room can look flat when every surface has a similar finish. Introducing a few different textures adds depth without requiring a complicated color scheme.

    Consider combining:

    • Cotton cushions with a woven throw.
    • Smooth wooden furniture with textured upholstery.
    • Linen curtains with a soft rug.
    • Ceramic accessories with natural woven baskets.
    • Structured bedding with a softer blanket.

    The goal is to create contrast without making the room feel disorganized.

    Choose the right rug

    A rug should relate to the size and arrangement of the furniture. A rug that is too small can make a seating area feel disconnected, while an appropriately sized rug can help unify the room.

    Consider the practical requirements as well. A frequently used hallway needs a durable, easy-to-clean option, while a bedroom may benefit from a softer surface beside the bed.

    Measure the intended area before purchasing, and check how the rug will interact with doors and furniture legs.

    Select curtains for appearance and function

    Curtains influence privacy, daylight, and the perceived proportions of a window.

    Lightweight fabrics can preserve brightness, while thicker curtains may help reduce unwanted light and improve privacy. The appropriate choice depends on the room’s orientation, climate, and daily use.

    Measure the window and decide how you want the curtains to sit before ordering them.

    Refresh cushions and bedding

    Cushions and bedding can introduce seasonal or personal colors without changing the room’s foundation.

    Instead of buying many matching pieces, choose a few complementary shades and textures. A cream bedspread, muted green cushions, and a textured throw can create interest while remaining visually calm.

    Washable, durable materials are particularly useful in busy households.

    8. How Can You Decorate Your Home on a Budget?

    Decorate on a budget by reusing suitable furniture, making small cosmetic improvements, shopping selectively, and focusing on changes that have a noticeable effect. A thoughtful arrangement of existing belongings can often improve a room more than purchasing numerous inexpensive accessories.

    Rearrange before replacing

    Try moving a chair, relocating a lamp, or changing the position of artwork before buying anything new.

    Furniture that appears unsuitable in one location may work well elsewhere. An occasional table might serve as a bedside surface, while a bookshelf could provide useful storage in a home office.

    Make changes one at a time so you can identify what genuinely improves the room.

    Update small details

    Affordable changes can make familiar furniture feel more current.

    Consider replacing worn cushion covers, updating suitable cabinet handles, refreshing a lampshade, or repainting a piece of furniture when its material and condition make that practical.

    Check whether the proposed finish is appropriate for the surface and follow product instructions. Some furniture requires sanding, preparation, or specialist coatings for a durable result.

    Shop secondhand carefully

    Secondhand shops and local resale listings may offer solid wood tables, bookshelves, mirrors, and other useful pieces at lower prices.

    Inspect each item before purchasing. Check its stability, dimensions, condition, odors, and signs of moisture damage. Upholstered furniture deserves particular attention because its condition may be difficult to assess from photographs alone.

    Calculate transport and repair costs before deciding whether the item offers genuine value.

    Prioritize spending

    PriorityExamplesReason
    EssentialFunctional furniture and suitable lightingSupports everyday use
    ImportantCurtains, bedding, practical rugsImproves comfort and usability
    OptionalArtwork, plants, decorative accessoriesAdds personality
    LaterTrend-driven purchases and extra ornamentsCan wait until needs are clear

    This order isn’t absolute, but it helps keep essential improvements ahead of impulse purchases.

    For practical projects that make a visible difference without a complete renovation, explore Budget-Friendly Home Improvement Tips.

    9. What Are the Best Decorating Tips for Small Homes?

    Small home decorating tips featuring compact furniture, vertical shelving, smart storage baskets, natural lighting, and clutter-free interior design.
    Make the most of every corner with practical small home decorating tips. Discover how compact furniture, vertical storage, accessible organization, and thoughtful styling can create a comfortable, functional, and inviting home.

    Small homes benefit from appropriately sized furniture, efficient storage, clear walking routes, and a thoughtful use of color and lighting. Rather than trying to make every room appear empty, focus on using available space efficiently while preserving comfort and personality.

    Select furniture carefully

    Measure the room before choosing a sofa, dining table, or wardrobe. A compact piece that fits your needs is often more useful than oversized furniture with features you rarely use.

    Consider nesting tables, extendable dining tables, and furniture with built-in storage where these options suit your household.

    Avoid buying multifunctional furniture simply because it offers several features. It should still be comfortable, durable, and practical for its main purpose.

    Use vertical space

    Wall-mounted shelves, hooks, and tall storage units can free up valuable floor space.

    Place frequently used belongings where they’re easy to reach, and reserve higher shelves for items you need less often. Make sure heavy items are stored safely and that wall-mounted furniture is installed using suitable fixings.

    Keep storage accessible

    Good storage should match the way you use your belongings.

    A basket near the sofa can hold everyday items, while a dedicated drawer can keep small accessories organized. In an entryway, hooks and a narrow shoe cabinet may prevent belongings from spreading across the floor.

    For more detailed ideas, read Small Space Home Tips.

    Control visual clutter

    Open surfaces can help a small room feel more spacious, but you don’t need to eliminate every decorative object.

    Group accessories together, keep useful surfaces available, and use closed storage for items that don’t need to remain visible.

    If belongings are making rooms difficult to use, Home Decluttering Tips can help you decide what to keep, donate, or relocate.

    10. How Should You Decorate Different Rooms?

    Each room needs a different balance of comfort, storage, lighting, and decoration. A coordinated home doesn’t require every room to look identical; it requires each room to function well while sharing a few visual elements with the rest of the house.

    Living room decorating

    Start with comfortable seating and a practical arrangement. Choose a focal point, position the main furniture, and select a rug that connects the seating area.

    Introduce layered lighting, then add cushions, artwork, and a small number of personal accessories.

    Leave enough room for everyday movement and consider where household members naturally place drinks, books, remote controls, and other frequently used belongings.

    Bedroom decorating

    A bedroom should support rest and make everyday routines convenient.

    Choose suitable bedding, bedside lighting, and accessible storage. Coordinate the main colors and introduce texture through curtains, cushions, or a throw.

    Avoid overcrowding the bedside tables and make sure wardrobes and drawers remain easy to open.

    You can find practical ideas for keeping sleeping spaces organized in Bedroom Organization Tips.

    Kitchen decorating

    Kitchen decoration should complement the way you cook, prepare food, and clean.

    Keep frequently used utensils accessible, maintain clear preparation surfaces, and choose accessories that tolerate the kitchen environment. A coordinated set of containers, a suitable lamp or fixture, and a few carefully selected decorative items can improve the appearance without sacrificing function.

    Avoid placing decorations where they interfere with cooking, cleaning, ventilation, or food safety.

    For ideas focused on practical kitchen storage and everyday usability, visit Kitchen Organization Tips.

    Bathroom decorating

    Bathrooms need materials and accessories that suit moisture and frequent cleaning.

    Choose coordinated towels, practical storage, and suitable lighting. Use materials designed for humid environments, and avoid placing decorative items where they obstruct surfaces or make cleaning difficult.

    Check that rugs and mats are appropriate for wet areas and do not create a slipping hazard.

    When planning a bathroom update, Bathroom Planning Tips can help you think through the layout and practical requirements.

    Entryway decorating

    The entrance should feel welcoming without becoming a storage obstacle.

    A mirror, a small surface for keys, wall hooks, and a practical shoe solution can make the area more useful. In narrow hallways, select slim furniture and keep the main route clear.

    Choose durable finishes because entryways often experience frequent movement, dirt, and moisture.

    11. How Can You Make Your Home Feel Organized Without Changing Its Style?

    An organized home is easier to decorate because furniture, artwork, and accessories remain visible instead of competing with everyday clutter. Use storage that fits your routines, assign belongings specific places, and keep frequently used surfaces practical.

    Match storage to everyday habits

    Think about where clutter appears most often. If shoes gather near the entrance, create a convenient shoe-storage area. If books and blankets collect around the sofa, provide a nearby basket or cabinet.

    Storage is most effective when it is easy to use consistently.

    For a broader approach to practical household systems, explore Smart Home Organization Tips.

    Use decorative storage

    Baskets, boxes, storage ottomans, and cabinets can hold belongings while contributing to the room’s appearance.

    Choose containers that fit the available space and the items they need to hold. Oversized baskets can become awkward, while very small containers may require several separate pieces.

    Use labels when they make shared storage easier to understand.

    Keep surfaces functional

    A coffee table needs enough space for everyday use. A kitchen counter should support food preparation, and a bedside table should accommodate the items you regularly need.

    Decorate these surfaces with restraint. One or two accessories can add personality without making the area difficult to use.

    Build simple household routines

    Return items to their designated places after use, review crowded shelves periodically, and avoid bringing home decorative items without considering where they’ll go.

    These habits help preserve the appearance of your home without requiring a complete reorganization every few weeks.

    12. What Common Decorating Mistakes Should You Avoid?

    Common home decorating mistakes illustrated with oversized furniture, clashing colors, poor lighting, cluttered shelves, and practical interior design solutions.
    Avoid common decorating mistakes by measuring furniture, coordinating colors, layering lighting, reducing clutter, and choosing practical materials. Create a beautiful home that balances style, comfort, and everyday functionality.

    The most common decorating mistakes involve poor planning, unsuitable proportions, excessive accessories, inconsistent colors, and decisions based entirely on trends. These problems often arise when people focus on individual products instead of considering how the entire room will function.

    Buying furniture without measuring

    Why it happens: A product looks attractive in a showroom or online.

    Why it’s harmful: It may overwhelm the room, block movement, or fail to fit through the entrance.

    How to avoid it: Measure the space, check product dimensions, and plan furniture placement before purchasing.

    Choosing too many colors and patterns

    Why it happens: Individual patterns and colors look appealing on their own.

    Why it’s harmful: Too many unrelated elements compete for attention.

    How to avoid it: Establish a main palette and repeat selected colors across furniture, textiles, and accessories.

    Relying on one light source

    Why it happens: A ceiling fixture seems sufficient.

    Why it’s harmful: Certain areas may remain dark, and the room may feel less comfortable in the evening.

    How to avoid it: Add task or accent lighting where it serves a clear purpose.

    Decorating every surface

    Why it happens: Empty shelves or walls may appear unfinished.

    Why it’s harmful: Too many objects create visual clutter and make cleaning harder.

    How to avoid it: Group accessories, leave some empty space, and keep practical surfaces available.

    Following trends without considering daily life

    Why it happens: Popular decorating ideas can be persuasive.

    Why it’s harmful: A trendy piece may not suit the room’s dimensions, maintenance needs, or long-term preferences.

    How to avoid it: Use trends selectively in changeable details and make major purchases according to comfort, durability, and function.

    Ignoring cleaning and maintenance

    Why it happens: The focus remains on the room’s appearance immediately after decorating.

    Why it’s harmful: Dust, stains, and disorganization can gradually reduce the effect of the design.

    How to avoid it: Choose manageable materials, allow access for cleaning, and establish routines using Easy Home Cleaning Tips.

    13. What Do Interior Design Professionals Recommend?

    Professional-looking rooms generally depend on proportion, thoughtful editing, consistent materials, and a clear relationship between furniture and the room’s purpose. You can apply these principles without hiring a designer or buying luxury products.

    Repeat materials and finishes

    Repeated elements help create continuity. For example, you might use a similar wood tone in a side table and picture frame, or repeat a metal finish across a lamp and cabinet handles.

    Avoid making every item identical. A little variation keeps the room interesting while maintaining a visual connection.

    Balance visual weight

    Large, dark, or heavily patterned objects often attract more attention than smaller, lighter pieces.

    If one side of the room feels visually heavy, consider balancing it with artwork, a lamp, or another suitable feature on the opposite side. The objects don’t need to match exactly; they simply need to work together.

    Edit before adding

    When a room feels unfinished, adding another accessory isn’t always the answer.

    Try removing objects that compete with the focal point, rearranging existing pieces, or changing the position of a lamp. Editing can reveal which elements actually contribute to the design.

    Consider maintenance from the beginning

    Choose furniture and textiles that suit the household’s routines. Families with children or pets may benefit from durable upholstery and washable covers, while frequently used areas may need hard-wearing flooring and easy-to-clean surfaces.

    The best decorating choice is not necessarily the most fashionable one. It is the option that balances appearance, comfort, cost, and long-term use.

    Review the room from different viewpoints

    Look at the room from the doorway, the main seating position, and other frequently used areas.

    Notice whether the focal point is clear, the furniture arrangement feels balanced, and the lighting supports the room’s activities.

    Small adjustments at this stage can make a meaningful difference.

    14. How Can You Maintain a Beautiful Home Over Time?

    Maintaining a decorated home means caring for surfaces, keeping storage practical, and reviewing the arrangement when household needs change. Regular attention helps preserve the appearance of your furniture and prevents minor problems from becoming larger ones.

    Keep textiles and surfaces clean

    Follow the care instructions for curtains, rugs, bedding, and upholstery. Different materials require different cleaning methods, so avoid using products that could damage the finish.

    Dust shelves and decorative objects regularly, and clean spills promptly using an appropriate method.

    Check furniture and fixtures

    Look for loose handles, unstable furniture, damaged finishes, and other issues that affect safety or usability.

    Address small problems when practical, and use qualified professionals for electrical work, plumbing, or repairs that require specialist skills.

    For general household upkeep, explore Basic Home Maintenance Tips.

    Keep laundry and household supplies manageable

    Laundry routines can affect how organized bedrooms, bathrooms, and shared spaces feel.

    Use practical storage for clean towels, bedding, and laundry supplies. Keep frequently used products accessible without allowing them to occupy valuable decorative surfaces.

    For help developing a smoother household routine, read Laundry Tips and Tricks.

    Refresh without starting over

    You don’t need to redecorate an entire room whenever your preferences change.

    Move artwork, rearrange accessories, introduce a new cushion cover, or relocate a lamp. These small changes can refresh the room while preserving the elements that already work well.

    For additional home inspiration and practical guidance, visit Heartomenal and continue improving your space according to your needs.

    15. Home Decorating Checklist for Beginners

    Home decorating checklist for beginners featuring room measurements, color palettes, furniture placement, layered lighting, budget planning, and practical storage.
    Plan your decorating project with this beginner-friendly home decorating checklist. Follow 15 essential steps to coordinate colors, arrange furniture, improve lighting, manage your budget, and create a comfortable, functional home.

    Before completing a decorating project, review the following checklist to make sure the room looks coordinated and remains practical.

    • Identify the room’s main purpose.
    • Choose a decorating style that suits your preferences.
    • Measure the room and existing furniture.
    • Consider natural light and permanent finishes.
    • Select a manageable color palette.
    • Arrange furniture around a clear focal point.
    • Keep doors, drawers, and walking routes accessible.
    • Combine general, task, and accent lighting where appropriate.
    • Choose suitable rugs, curtains, and textiles.
    • Set a realistic budget before shopping.
    • Reuse furniture and accessories whenever practical.
    • Introduce artwork and decorative objects gradually.
    • Provide convenient storage for everyday belongings.
    • Consider cleaning requirements and long-term durability.
    • Review the finished room from different viewpoints.

    Following these steps helps you make decisions in a sensible order. It also reduces the likelihood of buying accessories that don’t suit the finished arrangement.

    What Are the Best Home Decorating Tips for Beginners?

    The best home decorating tips for beginners focus on creating a practical plan, choosing a coordinated color palette, arranging furniture correctly, and adding decorative elements gradually. You don’t need expensive furniture or professional design experience to create a beautiful home. Understanding how colors, lighting, textures, and furniture work together can help you achieve a balanced appearance while avoiding unnecessary expenses.
    Start by identifying the purpose of each room and deciding what you want to improve. Evaluate your existing furniture before purchasing new items, and select colors that complement your flooring, walls, and larger furnishings. Once the essential elements are in place, introduce artwork, cushions, rugs, and accessories that reflect your personal style.
    Practical tips to follow:
    Choose a decorating style that suits your lifestyle and preferences.
    Measure your room before buying furniture or rugs.
    Use a consistent color palette to create visual harmony.
    Combine different lighting sources for comfort and functionality.
    Avoid filling every wall, shelf, and surface with decorations.

    How Can I Decorate My Home on a Budget Without Compromising Style?

    Decorating your home on a budget becomes easier when you focus on improvements that create a noticeable difference without requiring major purchases. Rearranging furniture, updating cushion covers, refreshing suitable furniture finishes, improving lighting, and organizing existing accessories can transform a room at a relatively low cost.
    Before shopping, establish a budget and identify the areas that genuinely need attention. For example, a living room may benefit more from better lighting and a suitable rug than from an expensive new sofa. Similarly, changing bedding and adding coordinated curtains can refresh a bedroom without replacing its main furniture.
    Secondhand furniture can also offer good value when you inspect its condition, dimensions, and repair requirements carefully. Prioritize durability and practical use rather than buying inexpensive decorative products that may need frequent replacement.
    Budget-friendly decorating ideas:
    Repurpose furniture and accessories you already own.
    Update small details, such as cabinet handles or lampshades.
    Shop secondhand for suitable, well-maintained furniture.
    Use artwork and textiles to introduce color affordably.
    Purchase essential items first and decorative extras later.

    What Colors Make a Home Look Modern, Elegant, and Inviting?

    A modern, elegant, and inviting home usually benefits from a coordinated color palette that balances the dominant shades with complementary colors and carefully selected accents. Warm white, cream, beige, muted green, soft blue, and natural wood tones are versatile options, but the best combination depends on the room’s lighting, existing finishes, and intended atmosphere.
    Begin with the elements that are expensive or difficult to replace, such as flooring, kitchen cabinets, and major furniture. Select wall colors that complement these features rather than choosing paint in isolation. If you prefer a more expressive interior, introduce stronger colors through artwork, cushions, decorative objects, or a feature wall.
    Lighting also affects color perception. A shade that looks neutral in a store may appear warmer or cooler at home, so test samples in the actual room before committing to a final choice.
    Professional color-selection tips:
    Use two or three main colors as a starting point.
    Apply the 60-30-10 rule as a flexible color-balancing guide.
    Consider the undertones of paint, flooring, and furniture.
    Test colors in both daylight and artificial lighting.
    Repeat selected colors through textiles and accessories for consistency.

    How Can I Make a Small Home Look Bigger and More Beautiful?

    A small home can feel more spacious when furniture fits the available area, walking routes remain clear, and storage is planned around everyday needs. The goal is not to eliminate personality or make every room minimalist. Instead, create a functional arrangement that reduces unnecessary visual clutter while keeping the space comfortable.
    Choose furniture according to the room’s dimensions and avoid oversized pieces that restrict movement. Multifunctional furniture, wall-mounted shelves, storage ottomans, and compact tables can improve usability when they suit your household. Mirrors may also help reflect available light, particularly when positioned opposite a bright window or another attractive feature.
    Color and lighting contribute to the overall effect. Coordinated shades can create continuity, while layered lighting helps prevent dark corners from making the room feel closed in. Keep decorative accessories selective, but retain meaningful items that make your home feel personal.
    Small-space decorating strategies:
    Measure furniture before purchasing it.
    Use vertical storage to free up floor space.
    Keep frequently used items accessible.
    Select appropriately sized rugs and curtains.
    Leave some open surfaces and wall space.
    Use mirrors and suitable lighting to improve brightness.

    What Are the Most Common Home Decorating Mistakes to Avoid?

    The most common home decorating mistakes include buying furniture without measuring, combining too many unrelated colors, relying on a single light source, overcrowding decorative surfaces, and following trends without considering personal needs. These mistakes can make a room feel unbalanced and lead to unnecessary spending, even when individual products look attractive.
    One of the most effective ways to avoid these problems is to plan the room as a complete space rather than selecting items separately. Consider how the sofa relates to the rug, how artwork complements the wall color, and how lighting supports the room’s activities. Before buying something new, check whether rearranging existing furniture or removing unnecessary accessories could solve the problem.
    It’s also important to consider maintenance. Delicate fabrics, difficult-to-clean surfaces, and excessive ornaments may look appealing initially but can become impractical in busy households. Select materials and decorative elements that suit your daily routine and long-term budget.
    Mistakes worth avoiding:
    Purchasing furniture before measuring the room.
    Choosing paint without considering existing finishes.
    Using too many competing patterns and accent colors.
    Blocking natural light or essential walking routes.
    Buying accessories simply to fill empty spaces.
    Prioritizing trends over comfort, durability, and function.
    Ignoring storage and regular cleaning requirements.

    Conclusion: Home Decorating Tips for a Beautiful and Comfortable Home

    Creating a beautiful home does not require expensive furniture, luxury accessories, or a complete renovation. The most effective home decorating tips focus on understanding your space, choosing colors that complement one another, arranging furniture thoughtfully, improving lighting, and adding personal details that make every room feel welcoming. Small, carefully planned changes can transform the atmosphere of your home while helping you stay within your budget.

    Start by identifying your decorating priorities and selecting a style that reflects your personality and everyday needs. Use a balanced color palette, combine different textures, choose appropriately sized furniture, and avoid filling every available space with decorative items. Pay attention to practical details such as storage, cleanliness, organization, and routine maintenance to keep your home attractive and functional over time.

    Remember that successful decorating is a gradual process rather than a one-time project. You can explore more practical inspiration through Home Tips and Ideas and discover additional ways to improve your living environment at Heartomenal. By making thoughtful decisions, prioritizing comfort, and working with what you already own, you can create a home that looks inviting, supports your lifestyle, and remains enjoyable for years to come.

  • Budget Friendly Home Improvement Tips

    Budget Friendly Home Improvement Tips

    Introduction

    Budget Friendly Home Improvement Tips | Improving your home can feel expensive when you start thinking about fresh paint, better furniture, kitchen upgrades, bathroom repairs, and additional storage. You might want your living space to look more attractive and function better, but a limited budget can make it difficult to decide where to begin. The good news is that you don’t need a complete renovation to make meaningful improvements.

    Budget friendly home improvement tips help you identify affordable ways to refresh your living space, solve everyday household problems, and make your home more comfortable without unnecessary spending. The secret is to focus on practical changes, reuse what you already own, plan purchases carefully, and understand which projects deserve professional attention.

    Whether you’re living in a small apartment, maintaining an older house, decorating your first home, or updating rooms that have started to look tired, a sensible approach can help you achieve better results with less money.

    In this guide, you’ll learn how to improve individual rooms, plan affordable DIY projects, choose materials, reduce renovation expenses, avoid common mistakes, and create a realistic home improvement budget. You’ll also discover how regular maintenance and better organization can protect your investment over time.

    For more practical inspiration, Heartomenal offers ideas for creating a more beautiful, organized, and comfortable home.

    1. How Can You Improve Your Home on a Small Budget?

    You can improve your home on a small budget by starting with the problems that affect your daily comfort. Simple changes such as repainting suitable surfaces, repairing damaged fittings, rearranging furniture, improving lighting, and organizing storage can make a noticeable difference without requiring major renovation work.

    The most effective improvements are not always the most expensive. A room may feel uncomfortable because furniture blocks the walkway, storage is poorly arranged, or lighting is inadequate. Solving these problems can be more valuable than buying new decorations.

    Identify what needs improvement

    Walk through your home and make a list of the things you would like to change. Separate practical problems from cosmetic preferences so you can prioritize spending.

    For example, a dripping tap deserves attention before a decorative kitchen accessory. A loose handrail should be repaired before purchasing a new hallway rug. Once essential issues are addressed, you can focus on improvements that make your home more attractive.

    Use these questions to evaluate each project:

    • Does this change solve a real household problem?
    • Can I improve the existing item instead of replacing it?
    • Will the improvement be easy to maintain?
    • Do I have the tools and skills to complete the work safely?
    • Is the cost reasonable compared with the benefit?

    Start with a manageable project

    Choose one room or one specific problem rather than trying to renovate the entire property. If your bedroom feels cluttered, begin with storage and furniture placement. If the kitchen looks dated, consider cleaning, suitable cabinet refinishing, or replacing worn handles.

    Pro Tip: Complete a project before starting another. This keeps materials organized, makes spending easier to track, and reduces the frustration of having several unfinished areas around the home.

    2. What Are the Best Low-Cost Home Improvement Ideas?

    The best low-cost home improvement ideas improve appearance, comfort, or functionality without requiring expensive structural changes. Painting, updating hardware, repairing minor defects, improving storage, and reusing suitable furniture are useful starting points for many households.

    Refresh walls with paint

    Paint can transform a room when the existing walls are structurally sound and suitable for repainting. Light, neutral colors can help a room feel brighter, while carefully chosen accent colors can introduce personality without requiring extensive decoration.

    Before buying paint, measure the wall area and check the product’s coverage information. Include primer, rollers, brushes, masking materials, and preparation supplies in your estimate.

    Clean the surface, repair suitable minor defects, and allow repairs to dry before painting. If you notice persistent dampness, peeling associated with moisture, or unusual staining, investigate the cause instead of simply covering it.

    Replace worn hardware

    Cabinet handles, drawer pulls, hooks, and other small fittings can influence the appearance of a room. Replacing worn or damaged hardware is often simpler than replacing the furniture itself.

    Measure existing screw spacing before purchasing replacements. Matching the original dimensions may allow you to avoid filling holes, drilling new ones, or damaging the finish.

    Rearrange furniture

    Furniture rearrangement is one of the most affordable ways to improve a room because it uses items you already own.

    Try moving a chair closer to a window, positioning seating around a shared activity, or removing a small table that blocks movement. Keep entrances, electrical outlets, and important walking routes accessible.

    Refresh existing textiles

    Curtains, cushions, bedding, throws, and rugs can change the atmosphere of a room. You don’t need to replace everything. Select a few items that complement the colors and materials already present.

    Wash or clean existing textiles according to their care instructions before deciding whether they need replacement.

    Repair before replacing

    A loose cabinet hinge, squeaky door, damaged drawer runner, or unstable furniture fitting may be repairable. Inspect the problem carefully and use suitable replacement parts rather than purchasing a completely new item unnecessarily.

    Expert Tip: Before buying anything, spend fifteen minutes identifying items that could be cleaned, repaired, moved, or reused. This simple exercise often reveals improvements you can make without additional purchases.

    3. How Can You Improve Your Living Room Without Spending Much?

    Budget-friendly living room improvement ideas featuring smart furniture placement, layered lighting, organized surfaces, and creative decor reuse.
    Refresh your living room without overspending by improving furniture placement, making better use of lighting, reducing clutter, and creatively reusing existing decorations.

    A living room can feel more welcoming through better furniture placement, balanced lighting, organized surfaces, and coordinated accessories. These changes can improve the room’s appearance while preserving your existing sofa, tables, chairs, and other useful furniture.

    Create a practical furniture layout

    Begin by identifying the room’s main purpose. A family living room may need open floor space, comfortable seating, and accessible storage. A room used for conversation may benefit from seating arranged to make talking easier.

    Avoid pushing furniture into every available corner simply because space is available. Leave enough room for comfortable movement and ensure doors can open fully.

    Make lighting work harder

    Clean windows and lampshades, remove obstructions from natural light sources, and replace failed bulbs with compatible energy-efficient alternatives.

    Consider whether different activities need different lighting. A reading corner may benefit from a suitable task lamp, while general room lighting can provide broader illumination.

    Check bulb specifications, fixture limits, and manufacturer instructions before making changes. Electrical installation work should be handled by a qualified professional when required.

    Reduce visual clutter

    A living room can feel crowded when every shelf and table is covered with objects. Keep frequently used items accessible and group decorative pieces thoughtfully.

    A tray can organize small objects on a coffee table, while a basket may provide a convenient place for blankets. These solutions work best when they genuinely support your routine.

    Reuse decorations creatively

    Move suitable accessories from one room to another instead of purchasing new decorations immediately. A small lamp, framed print, or storage basket may work better in a different location.

    For more ideas, explore Living Room Home Tips.

    Common Mistake: Buying accessories before measuring the available space can create more clutter. Decide where each item will go and whether it serves a practical or decorative purpose before spending money.

    4. What Are the Best Budget-Friendly Kitchen Improvements?

    Budget-friendly kitchen improvements should make cooking, cleaning, and storage easier while preserving useful cabinets and appliances. Organizing drawers, improving cabinet interiors, refreshing suitable surfaces, and repairing minor defects can help an existing kitchen work better without the expense of a full renovation.

    Organize cabinets and drawers

    Remove expired products, unused utensils, and items that belong elsewhere. Group the remaining supplies according to how you use them.

    Keep everyday dishes near the washing area, place frequently used cooking tools near the preparation space, and store heavy items where they can be accessed safely.

    Before buying drawer dividers or shelf organizers, measure the available space. Reuse suitable containers if they are clean, durable, and appropriate for the items being stored.

    Refresh existing cabinet doors

    If the cabinets are structurally sound, cleaning, suitable refinishing, or replacing handles may offer better value than installing new units.

    Kitchen surfaces often collect grease, so preparation is particularly important. Use a suitable cleaner, follow the coating manufacturer’s instructions, and check whether the existing surface needs sanding or a compatible primer.

    Test the proposed finish in an inconspicuous area before treating every cabinet.

    Improve the sink area

    Check the sink, faucet, visible pipework, and surrounding surfaces for signs of leaking or deterioration. Clean the area regularly and remove unnecessary products that occupy valuable counter space.

    A persistent leak should be investigated promptly. Cosmetic changes cannot solve damaged plumbing or moisture affecting the cabinetry.

    Improve lighting and working space

    Good lighting helps you prepare food and clean surfaces more effectively. Replace failed bulbs with compatible options and keep preparation areas as clear as possible.

    For additional ideas, read Kitchen Organization Tips.

    A practical kitchen upgrade should solve a specific problem. If you constantly struggle to find cooking utensils, better drawer organization may help more than buying new decorative containers.

    5. How Can You Upgrade a Bathroom on a Tight Budget?

    You can upgrade a bathroom affordably by improving storage, replacing worn accessories, maintaining seals, refreshing suitable surfaces, and improving ventilation. These changes can make the room feel cleaner and more functional without replacing every tile, fixture, or cabinet.

    Improve everyday storage

    Keep toiletries, cleaning products, and towels in suitable locations. Use existing shelves and cabinets efficiently before purchasing additional storage.

    If the bathroom is small, choose organizers that fit the available space without obstructing movement or access to plumbing fixtures.

    Replace worn accessories

    A damaged towel hook, deteriorating shower curtain, or worn toilet-roll holder may be relatively inexpensive to replace. Measure the available space and select products suitable for the bathroom’s moisture levels.

    Check permission requirements before drilling into walls if you rent your property.

    Maintain grout and sealant

    Inspect accessible grout lines and sealant around sinks, baths, and showers. Cracks or failed seals may allow water to reach surfaces behind them.

    Repair methods depend on the materials and the extent of damage. Persistent dampness, loose tiles, or recurring mold may indicate a problem that needs professional assessment.

    Improve ventilation

    Use the existing ventilation system as intended and keep suitable vents clear. If condensation remains excessive, investigate whether ventilation is adequate.

    For more planning ideas, explore Bathroom Planning Tips.

    Quick Tip: Make a list of the bathroom problems you encounter every day. Prioritize improvements that solve those problems rather than buying a matching set of accessories simply because they look attractive.

    6. What Are the Cheapest Ways to Refresh a Bedroom?

    Cheapest ways to refresh a bedroom with clean bedding, smart furniture placement, organized clothing, and affordable bedroom decor ideas.
    Give your bedroom a fresh, comfortable look without overspending by rearranging furniture, refreshing bedding, organizing clothing, and repairing existing furniture.

    The cheapest ways to refresh a bedroom include decluttering, improving furniture placement, organizing clothing, cleaning existing furnishings, and updating a few textiles. A comfortable bedroom does not require matching furniture or expensive decorative pieces.

    Improve the furniture arrangement

    Make sure the bed, wardrobe, and bedside furniture allow you to move around comfortably. Avoid blocking drawers, windows, or doors.

    In a small bedroom, consider whether a large piece of furniture is being used efficiently. A compact bedside table or suitable under-bed storage may improve the available space.

    Refresh the bedding

    Clean bedding and coordinated pillow covers can improve the room’s appearance without changing the bed or mattress. Choose washable fabrics appropriate for your climate and household needs.

    Reuse suitable curtains and cushions if they still function well. Replacing only the items that are worn or damaged can keep the project affordable.

    Organize clothing and accessories

    Separate frequently worn clothing from seasonal items and belongings you no longer use. Keep everyday essentials accessible and store less frequently used items in suitable containers.

    Avoid buying storage boxes before measuring the wardrobe or under-bed space. A container that does not fit properly may create another organizational problem.

    Repair existing furniture

    Tighten loose handles, check drawer runners, and clean furniture using suitable products. If repainting or refinishing is appropriate, check the material and existing coating before beginning.

    For more practical ideas, read Bedroom Organization Tips.

    7. How Can You Make a Small Home Feel Bigger Without Renovating?

    You can make a small home feel more spacious by improving storage, reducing unnecessary furniture, using natural light effectively, and maintaining clear walking routes. These changes help you use the available space more efficiently without the expense of extending the property.

    Use vertical storage

    Wall-mounted shelves, hooks, and tall storage units can make better use of unused wall space. Choose a storage solution appropriate for the wall construction and secure it using suitable fixings.

    Heavy objects should never be placed on shelves that are not designed or installed to support them.

    Choose furniture that fits

    Measure rooms and doorways before purchasing furniture. Consider how the furniture will be delivered, assembled, and moved through the home.

    Furniture with built-in storage can be useful when it replaces a separate storage item. However, multifunctional furniture is only worthwhile if you will genuinely use its additional features.

    Keep pathways clear

    Move unnecessary items away from entrances and frequently used routes. Position furniture so that doors, windows, and important household equipment remain accessible.

    Create visual consistency

    Using a limited color palette and coordinating a few textiles can help rooms feel more connected. This does not mean every room must look identical; consistent finishes can simply reduce visual distraction.

    For more space-saving ideas, explore Small Space Home Tips.

    8. How Can Better Organization Reduce Home Improvement Costs?

    Better organization can reduce home improvement costs by helping you identify what you already own, prevent duplicate purchases, and use available storage more effectively. Before purchasing furniture or containers, assess how belongings are used and where they should be kept.

    Declutter before buying storage

    Many households purchase storage products because cupboards and shelves feel overcrowded. However, storing unnecessary belongings simply moves the problem from one location to another.

    Review each category of belongings and decide what should remain accessible, what can be stored elsewhere, and what is no longer needed.

    Create a simple storage system

    Assign practical locations to frequently used items. Keep cleaning products in appropriate secure storage, place paperwork in a designated area, and organize everyday essentials where they are easiest to reach.

    Labeling can help when several people share the same storage areas.

    Use existing containers first

    Shoeboxes, suitable baskets, and containers you already own may help organize small belongings. Reuse them only when they are clean, safe, and appropriate for the intended purpose.

    For additional strategies, visit Smart Home Organization Tips.

    You can also explore Home Storage Solutions for ideas that make better use of cupboards, shelves, and underused spaces.

    9. How Can Decluttering Improve a Home Without Costly Upgrades?

    Decluttering tips for an organized home featuring tidy shelves, sorted household items, clear surfaces, and practical storage solutions.
    Create a cleaner, more organized home without costly upgrades by decluttering one area at a time, grouping similar belongings, and reusing storage you already own.

    Decluttering improves a home by reducing unnecessary belongings, freeing useful surfaces, and making rooms easier to clean and maintain. It can also reveal whether a storage problem requires a new product or simply a better arrangement of existing items.

    Work in small sections

    Choose one drawer, shelf, or cupboard at a time. Remove everything, clean the area, and return only the items that belong there.

    Small sections are easier to finish and less likely to leave the home in a state of disorder.

    Establish practical categories

    Group similar items together, such as stationery, kitchen utensils, personal care products, or cleaning supplies. This makes it easier to identify duplicates and locate items later.

    Dispose of unwanted belongings responsibly, and donate suitable usable items where appropriate.

    Avoid replacing clutter with decorative storage

    A beautiful basket is not automatically a useful purchase. Buy storage only when you understand what it will contain and where it will be placed.

    For more guidance, read Home Decluttering Tips.

    10. How Do You Create a Realistic Home Improvement Budget?

    A realistic home improvement budget includes materials, labor, tools, delivery, disposal, and a reserve for unexpected costs. Setting a spending limit before shopping helps you make decisions based on priorities rather than impulse.

    Step 1: Define the project

    Write down the exact result you want. Instead of planning to renovate the kitchen, specify whether you intend to organize cabinets, refresh suitable surfaces, or replace damaged handles.

    A clearly defined project is easier to estimate and complete.

    Step 2: Measure accurately

    Measure wall areas, furniture dimensions, shelf lengths, or the number of fittings required. Check product coverage and package quantities before calculating how much to buy.

    Follow manufacturer recommendations for additional material needed to account for cutting or waste.

    Step 3: Compare complete costs

    Compare products with similar specifications, durability, and intended uses. Include delivery, accessories, installation, and any required equipment.

    The cheapest item may not be the least expensive option over its useful life.

    Step 4: Set aside a contingency

    Where practical, reserve around 10–20% of the estimated cost for minor unexpected expenses. Older properties and projects involving concealed damage may need a larger reserve.

    Do not treat the contingency as money available for extra decorations.

    Step 5: Track spending

    Record purchases and compare them with the original estimate. If costs begin to rise, reconsider optional parts of the project before reducing the budget for essential repairs.

    Example of a small improvement budget

    The following figures are illustrative and do not represent current supplier quotations.

    ExpenseExample allocation
    Paint and preparation supplies$60
    Replacement cabinet handles$25
    Storage organizers$30
    Compatible lighting accessories$35
    Miscellaneous supplies$20
    Estimated project total$170

    Actual costs vary according to local prices, product quality, room dimensions, and existing conditions. Adapt the categories and amounts to your own budget.

    11. How Can You Save Money on Home Improvement Materials?

    You can save money on materials by comparing equivalent products, reusing suitable items, purchasing accurate quantities, and planning projects before shopping. Material savings are most effective when they do not compromise safety, durability, or suitability.

    Reuse before replacing

    Inspect furniture, shelving, fittings, and accessories before deciding to buy new ones. Cleaning, tightening, repairing, or refinishing a sound item may provide the result you need.

    However, reuse only materials that remain safe and suitable for their intended purpose.

    Compare unit prices

    A larger package is not always better value if you only need a small quantity. Compare the price per litre, square metre, or individual item where appropriate.

    Check product specifications and coverage rather than comparing prices alone.

    Consider clearance products carefully

    Clearance sales may offer savings on suitable materials, but confirm that the products are undamaged and appropriate for the project. If multiple matching items are required, check that enough stock is available.

    Keep purchase records and review applicable return conditions.

    Borrow or rent occasional-use tools

    If a tool is required for only one small project, borrowing or renting it may be more economical than purchasing it.

    Make sure you know how to use the tool safely and have the necessary protective equipment.

    Plan purchases together

    Prepare a complete shopping list before visiting suppliers. Combining suitable purchases can reduce repeated delivery charges and unnecessary trips.

    For broader household routines that help you use resources efficiently, explore Easy Home Cleaning Tips.

    12. How Can Regular Maintenance Prevent Expensive Repairs?

    Regular home maintenance tips featuring plumbing inspections, ventilation cleaning, moisture checks, seasonal inspections, and preventive repairs.
    Protect your home with a practical maintenance routine that helps identify small problems early, supports household safety, and reduces the risk of more extensive repairs.

    Regular maintenance helps identify developing problems before they cause more extensive damage. Checking visible plumbing, keeping ventilation clear, monitoring moisture, and maintaining equipment according to manufacturer instructions can help protect your home and control long-term costs.

    Follow a practical maintenance schedule

    Monthly checks

    • Look for visible plumbing leaks.
    • Clean accessible ventilation grilles.
    • Check for unusual moisture or musty odors.
    • Test smoke alarms according to manufacturer instructions.
    • Inspect frequently used doors, handles, and fittings.

    Seasonal checks

    • Inspect accessible window and door seals.
    • Review visible drainage and gutter conditions where safely accessible.
    • Check outdoor areas for deterioration.
    • Look for signs of water entering the property.
    • Prepare suitable equipment for seasonal weather conditions.

    Annual checks

    • Arrange required servicing for heating, cooling, and other equipment.
    • Review recurring maintenance issues.
    • Check whether damaged finishes or fittings require repair.
    • Review household safety equipment and replacement schedules.

    Adapt the schedule to your property, climate, and equipment. Tasks involving heights, electrical hazards, or specialist systems should be handled by appropriately qualified people.

    Repair small problems promptly

    A dripping tap, deteriorating seal, or damaged fitting may appear minor, but ignoring it can allow the problem to worsen.

    If a defect continues after a basic appropriate repair, investigate its underlying cause rather than repeatedly treating the visible symptoms.

    For a more detailed routine, read Basic Home Maintenance Tips.

    13. How Can Laundry Improvements Make a Home More Efficient?

    Affordable laundry improvements focus on making washing, drying, folding, and storing clothes easier. Better organization can reduce wasted time, protect clothing, and make even a small laundry area more practical.

    Organize the laundry area

    Keep detergents, fabric-care products, and cleaning tools in suitable storage away from children and pets. Use clearly defined locations for laundry baskets and frequently used supplies.

    If space is limited, choose a compact arrangement that does not obstruct ventilation, appliance access, or safe movement.

    Improve clothing care

    Read garment care labels before washing or drying clothes. Using appropriate settings and avoiding unnecessary high-temperature cycles can help protect suitable fabrics and reduce avoidable wear.

    Clean appliance filters and maintain equipment according to the manufacturer’s instructions.

    Create a simple folding station

    A clear counter or suitable folding surface can make laundry easier to manage. If a permanent counter is not practical, consider an existing table or another safe surface that can be used when needed.

    For additional practical ideas, visit Laundry Tips and Tricks.

    14. Should You Choose DIY Home Improvements or Hire a Professional?

    DIY improvements can save labor costs when the task is straightforward, low-risk, and within your abilities. Professional help is appropriate when the work involves structural changes, complex plumbing, electrical systems, hazardous materials, or specialist equipment.

    ProjectUsually suitable approachMain consideration
    Painting a suitable interior wallDIYSurface preparation
    Organizing drawersDIYMeasurements and storage needs
    Replacing compatible cabinet handlesDIYCorrect dimensions
    Assembling simple furnitureDIY when instructions are clearStability and safe assembly
    Persistent plumbing leaksProfessional assessment may be neededFind the underlying cause
    Electrical wiring changesQualified electricianSafety and regulations
    Structural wall alterationsQualified structural professionalsLoad-bearing requirements
    Major roof repairsQualified roofing professionalHeight and weather hazards

    Before deciding, estimate the complete cost of each option. DIY projects can require tools, equipment rental, transport, waste disposal, and time that would otherwise be spent elsewhere.

    A professional quotation may initially look expensive but can offer better value when a job requires specialist knowledge or carries significant risks.

    Expert Tip: Ask for a written scope of work and a breakdown of major costs when comparing professional quotations. Make sure you’re comparing equivalent materials, responsibilities, and services rather than choosing solely by the lowest price.

    15. What Home Improvement Mistakes Should Beginners Avoid?

    Home improvement mistakes beginners should avoid, including poor planning, unsuitable materials, skipped preparation, safety risks, and overspending.
    Avoid costly home improvement mistakes by planning projects carefully, selecting suitable materials, preparing surfaces properly, prioritizing safety, and keeping a contingency budget.

    Beginners commonly overspend by shopping without a plan, choosing unsuitable materials, underestimating preparation, and starting more projects than they can finish. Understanding these mistakes helps you protect your budget and achieve more reliable results.

    Mistake 1: Starting without a clear plan

    When a project is poorly defined, it becomes easier to buy unnecessary products or change direction halfway through the work.

    How to avoid it: Write down the desired outcome, measure the area, prepare a materials list, and decide how much you can spend.

    Mistake 2: Choosing materials based on price alone

    A product that is unsuitable for moisture, heavy use, or outdoor conditions may fail earlier than expected.

    How to avoid it: Check compatibility, durability, maintenance requirements, installation instructions, and warranty information before purchasing.

    Mistake 3: Skipping preparation

    Paint and other finishes may fail when applied over dirt, grease, loose material, or damp surfaces.

    How to avoid it: Prepare the surface according to the product instructions and investigate underlying defects before applying a new finish.

    Mistake 4: Ignoring safety

    Unfamiliar electrical, plumbing, structural, or hazardous-material work can cause serious problems.

    How to avoid it: Recognize the limits of your skills and seek appropriately qualified assistance when needed.

    Mistake 5: Buying too much material

    Excess materials waste money and can create storage problems. Underestimating quantities can also cause delays if matching products become unavailable.

    How to avoid it: Measure carefully, calculate quantities, account for reasonable waste, and confirm package coverage before purchasing.

    Mistake 6: Spending the entire budget immediately

    Unexpected problems can leave essential work unfinished if no money remains.

    How to avoid it: Keep a contingency reserve and complete improvements in stages.

    Mistake 7: Forgetting long-term maintenance

    A low-cost finish may require frequent cleaning, repairs, or replacement.

    How to avoid it: Consider the expected lifespan, maintenance requirements, and repairability of the product before making a decision.

    Mistake 8: Following trends without considering household needs

    A popular design may not suit your room dimensions, lifestyle, or existing furniture.

    How to avoid it: Choose improvements that support the way you actually use your home.

    16. What Do Home Improvement Professionals Recommend for a Limited Budget?

    A sensible professional approach is to protect the property’s condition first, improve functionality second, and focus on appearance third. This order helps prevent money being spent on decorative changes that later need to be removed to complete essential repairs.

    Inspect before improving

    Look for visible water damage, deteriorating finishes, loose fittings, and other problems that could affect the success of the project.

    For example, repainting a wall without addressing persistent moisture may lead to another repair expense.

    Choose appropriate materials

    Select products that suit the intended location and expected use. A material suitable for a dry bedroom may not be appropriate for a damp bathroom or exposed outdoor surface.

    Check the manufacturer’s recommendations and follow the specified installation method.

    Complete one project properly

    Finishing one useful improvement is often better than beginning several projects that remain incomplete.

    Prepare the area, gather the necessary materials, and allow enough time for the work and drying or curing periods where applicable.

    Keep product records

    Save receipts, product specifications, warranties, and maintenance instructions. These records can help you identify compatible replacements and understand how to care for newly installed materials.

    Consider the future

    Think about how the improvement will affect cleaning, storage, accessibility, and future repairs. A practical upgrade should continue to serve your household after the initial excitement has passed.

    Maintain a realistic standard

    Not every room needs a complete makeover. A clean, functional room with sound surfaces and suitable storage may be more useful than an expensive redesign.

    For more ideas that support a comfortable, organized home, explore Home Tips & Ideas.

    What Are the Best Budget Friendly Home Improvement Tips for Homeowners?

    The best budget friendly home improvement tips focus on practical changes that improve your home’s appearance, comfort, and functionality without requiring a major renovation. Painting suitable surfaces, updating cabinet handles, improving lighting, organizing storage, and repairing minor defects are excellent starting points. Before purchasing new items, evaluate what you already own and determine whether cleaning, repairing, or rearranging it could achieve the desired result.
    Practical ways to improve your home affordably:
    Refresh walls or suitable furniture with an appropriate paint finish.
    Rearrange existing furniture to improve movement and use of space.
    Replace worn hardware instead of replacing entire cabinets.
    Improve storage by organizing cupboards and drawers.
    Repair minor maintenance issues before they become more expensive.
    The most effective approach is to prioritize improvements according to their practical value. Address safety concerns and essential repairs first, then spend your remaining budget on upgrades that make everyday living easier.

    How Can I Renovate My Home on a Very Small Budget?

    Renovating a home on a very small budget requires careful planning, realistic expectations, and a willingness to reuse suitable materials. Instead of attempting a complete makeover, divide your renovation into smaller projects and complete the most important ones first. Free improvements, such as decluttering and rearranging furniture, can create a useful starting point before you spend money on materials.
    Ways to control renovation expenses:
    Prepare a detailed list of required materials before shopping.
    Compare prices, product specifications, and durability.
    Reuse existing furniture, shelves, and accessories when practical.
    Borrow or rent tools that you will only need occasionally.
    Reserve part of your budget for unexpected expenses.
    Avoid cosmetic upgrades until essential repairs are complete.
    For example, refreshing sound kitchen cabinets and improving their internal organization may be more economical than replacing the entire kitchen. However, if cabinets are damaged by persistent moisture, investigate and resolve the underlying problem first. A small renovation budget works best when every purchase has a clear purpose.

    Which Home Improvements Add the Most Value Without Costing Too Much?

    Home improvements that address maintenance problems, improve functionality, and make a property easier to maintain can offer meaningful value without requiring extensive renovation. The best investment depends on the property’s current condition, local market expectations, and the needs of the people living there. No improvement guarantees a particular increase in resale value.
    Improvements worth considering include:
    Repairing visible damage and addressing water leaks.
    Refreshing worn but structurally sound walls and finishes.
    Improving storage and making better use of existing space.
    Replacing damaged or inefficient fittings with suitable alternatives.
    Maintaining bathrooms, kitchens, doors, and windows.
    Improving lighting where existing illumination is inadequate.
    Before spending money, compare the total project cost with the practical benefit you expect. A repair that prevents further damage may be more valuable than an expensive decorative upgrade. If you intend to sell the property, consider the local housing market rather than assuming that every renovation will produce a financial return.

    Is DIY Home Improvement Cheaper Than Hiring a Professional?

    DIY home improvement can be cheaper when the project is straightforward, low-risk, and within your abilities. Tasks such as painting suitable walls, organizing cupboards, assembling furniture, and replacing compatible cabinet handles can often be completed without paying for professional labor. However, the lowest initial cost does not always mean the lowest overall expense.
    Consider these factors before choosing DIY:
    The cost of materials, tools, and equipment rental.
    The time needed to complete the project properly.
    Your experience with the specific task.
    The risk of damaging existing surfaces or fittings.
    The cost of correcting mistakes or repeating the work.
    Electrical wiring, structural alterations, complex plumbing, and hazardous-material removal require appropriate professional expertise. For these projects, the potential consequences of incorrect work can outweigh any savings on labor. Request a clear quotation, compare the proposed materials and scope of work, and choose a qualified professional when the task requires specialist skills.

    How Can I Make My Home Look More Expensive Without Spending More Money?

    You can give your home a more polished appearance by improving cleanliness, organization, lighting, and consistency rather than purchasing expensive furniture or decorations. Rooms often look more finished when surfaces are maintained, furniture is arranged thoughtfully, and colors and accessories work together. The aim is to create a cohesive space that suits your home, not to imitate an expensive interior at any cost.
    Affordable ways to create a polished appearance:
    Clean windows, lampshades, mirrors, and visible surfaces.
    Keep countertops and frequently used tables organized.
    Coordinate a few existing accessories through color or material.
    Repair chipped paint and damaged hardware where appropriate.
    Arrange furniture to maintain clear walking routes.
    Use suitable lighting to make rooms more comfortable.
    Choose a few useful decorations instead of filling every surface.
    Avoid purchasing decorative products before addressing clutter or maintenance problems. A well-organized room with clean finishes and functional furniture can look more inviting than a room filled with expensive but poorly coordinated items. Start with what you already own, identify the changes that matter most, and spend only where a purchase provides a clear improvement.

    Conclusion: Budget Friendly Home Improvement Tips

    Improving your home does not have to involve expensive renovations, costly materials, or a large financial investment. With thoughtful planning, practical decisions, and a little creativity, you can make your living space more attractive, comfortable, organized, and functional while staying within your budget. The most effective budget friendly home improvement tips focus on identifying your home’s real needs, prioritizing high-impact changes, and making the most of the resources you already have.

    Start with manageable projects such as refreshing walls with paint, rearranging furniture, improving lighting, organizing storage, updating cabinet hardware, and repairing minor maintenance issues. These simple improvements can create noticeable results without requiring a complete room makeover. Before purchasing anything, compare prices, prepare a realistic budget, and consider whether an existing item can be repaired, reused, or repurposed.

    Remember that affordable home improvement is not just about saving money today. Regular maintenance, durable materials, energy-conscious choices, and well-planned upgrades can also help reduce future expenses. While DIY projects are useful for many cosmetic tasks, electrical work, major plumbing changes, and structural repairs should be handled by qualified professionals when necessary.

    Most importantly, improve your home gradually instead of trying to change everything at once. Choose projects that suit your lifestyle, available space, and financial priorities. For more practical inspiration, explore Heartomenal and discover ideas for creating a cleaner, more organized, and more comfortable home. A beautiful home is not defined by how much money you spend, but by how wisely you use the space, materials, and budget you have.

  • Bathroom Planning Tips

    Bathroom Planning Tips

    Introduction

    Bathroom Planning Tips | A bathroom may look beautiful in photographs, but everyday use can reveal problems that were overlooked during planning. A vanity might block the doorway, the shower may leave water across the floor, or there may be nowhere convenient to store towels and toiletries. These issues can make an otherwise attractive bathroom difficult to use.

    The best bathroom planning tips focus on more than appearance. They help you make informed decisions about layout, measurements, plumbing, lighting, ventilation, storage, materials, and renovation costs before construction begins. Whether you’re updating a compact bathroom, renovating a family home, or designing a completely new space, careful preparation can save time, reduce unnecessary expenses, and improve everyday comfort.

    A well-planned bathroom should suit the people who use it, fit the available space, and remain practical to maintain. You don’t necessarily need expensive fixtures or luxury finishes to achieve these goals. You need a clear plan, suitable materials, and a realistic understanding of your home’s requirements. For more practical advice on creating a comfortable, organized, and beautiful home, explore Heartomenal.

    In this guide, you’ll discover how to measure your bathroom, choose the right layout, compare fixtures, organize storage, plan lighting, prevent moisture problems, manage your budget, and avoid common renovation mistakes. You’ll also find a practical checklist and answers to frequently asked questions to help you prepare for your project.

    1. What Should You Consider Before Planning a Bathroom?

    Before selecting tiles, mirrors, or bathroom furniture, determine how the room needs to function. Good bathroom planning starts with the household’s routines, the available floor area, the existing building services, and the budget. These factors help you make decisions that are practical rather than purely decorative.

    Identify the Main Purpose of Your Bathroom

    Different bathrooms serve different purposes, so their layouts and features should reflect their intended use.

    Family bathrooms usually need durable surfaces, accessible storage, convenient towel hooks, and fixtures that are easy to clean. A bath and shower combination may be useful when household members have different bathing preferences.

    Guest bathrooms can be simpler. A comfortable toilet, a practical basin, a well-lit mirror, and somewhere to hang a towel may be all that’s necessary.

    Primary bathrooms may benefit from additional storage, a larger shower, a double vanity, or a separate bathtub if space and budget allow.

    Small ensuite bathrooms require careful use of every available area. Compact fixtures, recessed storage, and a clear walking route can make a significant difference.

    Accessible bathrooms should consider the user’s mobility, comfortable reach, suitable turning space, safe flooring, and appropriate support features.

    Think about who uses the room most often, what they need within easy reach, and whether those requirements might change in the future.

    List Your Existing Bathroom Problems

    If you’re renovating an existing bathroom, write down the issues that make it inconvenient.

    For example, you might have insufficient cabinet space, poor mirror lighting, an awkward shower entrance, or a fan that doesn’t remove moisture effectively.

    Divide your list into three categories:

    • Essential repairs: Leaks, damaged waterproofing, unsafe electrical work, or deteriorating materials.
    • Functional improvements: Better storage, improved ventilation, more convenient fixtures, or a better layout.
    • Optional upgrades: Decorative lighting, premium fittings, statement tiles, or additional design features.

    This simple exercise helps you prioritize spending and prevents attractive but unnecessary upgrades from consuming the budget.

    For broader ideas about creating a comfortable home, explore Home Tips & Ideas, where practical improvements can be considered alongside your bathroom project.

    2. How Do You Measure a Bathroom Before Renovation?

    Accurate measurements help you determine which fixtures will fit, how much flooring you need, and whether doors, drawers, and shower screens can open comfortably. Measure the actual room rather than relying entirely on an old floor plan, particularly when renovating an older property.

    Measure the Entire Room

    Use a tape measure and record the following details:

    1. Room dimensions: Measure the length and width of the floor.
    2. Ceiling height: Record the height and note any sloping ceilings or lowered sections.
    3. Doors: Measure the opening and mark the direction in which the door swings.
    4. Windows: Record their dimensions, positions, and opening arrangements.
    5. Existing fixtures: Measure the toilet, basin, vanity, bathtub, and shower enclosure.
    6. Fixed obstacles: Include columns, boxed-in pipes, radiators, and built-in cupboards.
    7. Service locations: Mark visible water supplies, drains, and electrical points.

    Draw a basic floor plan and label every measurement. Photographs can also help you explain the existing conditions to a designer or contractor.

    Check Clearances Before Choosing Fixtures

    A fixture may fit physically while leaving insufficient room for comfortable use. For example, a deep vanity can restrict the walking route, while an incorrectly positioned shower door may collide with the toilet.

    Check the manufacturer’s installation drawings and the applicable building requirements for fixture clearances, door movement, and accessibility.

    Remember to account for the finished wall and floor surfaces. Tile thickness, wall panels, and construction changes can affect the final dimensions.

    Common mistake: Measuring only the floor area and forgetting doors, drawers, plumbing connections, and the space needed to use each fixture.

    Make a Simple Planning Sketch

    Your drawing doesn’t need professional drafting software. A clearly labeled sketch is often sufficient for an initial discussion.

    Mark the entrance, toilet, basin, shower, storage, and existing services. Then try alternative arrangements on paper before committing to a particular layout.

    If a proposed fixture arrangement looks crowded on the drawing, it may feel even more uncomfortable once the bathroom is finished.

    3. Which Bathroom Layout Is Best for Your Space?

    Bathroom layout planning infographic showing compact bathroom fixtures, family bathroom design, spacious layouts, and smart plumbing placement.
    Explore practical bathroom layout ideas for compact spaces, busy family homes, and spacious interiors. Learn how to position fixtures, improve movement, and make informed plumbing decisions.

    The best bathroom layout makes daily activities convenient while preserving enough room to move safely. The ideal arrangement depends on room dimensions, door positions, plumbing locations, privacy, and the needs of the household.

    Plan a Compact Bathroom Layout

    Small bathrooms benefit from carefully selected fixtures and a simple arrangement.

    Consider a compact vanity, a suitable toilet, and a shower enclosure that doesn’t obstruct the main walking route. A wall-mounted cabinet can provide storage without making the floor appear crowded.

    Sliding or outward-opening doors may be worth considering where permitted and practical, provided they don’t create hazards in adjoining spaces.

    Avoid adding too many separate storage units. A single well-organized vanity and a mirrored cabinet may provide more useful storage than several bulky shelves.

    Plan a Family Bathroom Layout

    A family bathroom should support different routines without becoming difficult to maintain.

    A bath and shower combination may be practical when children use the room or household members prefer different bathing options. Durable surfaces, conveniently positioned towel rails, and clearly organized storage can reduce daily inconvenience.

    If several people use the bathroom in the morning, consider whether the basin area can be used without blocking access to the shower or toilet.

    Plan a Spacious Bathroom Layout

    A larger room may accommodate a separate shower, bathtub, and double vanity. However, additional floor space doesn’t mean every area needs to be filled.

    Keep the main walking route open and position storage where it supports everyday activities. A spacious bathroom should feel comfortable, not like a collection of unrelated fixtures.

    Should You Keep Existing Plumbing Locations?

    Keeping fixtures close to their existing plumbing connections can reduce the complexity of renovation work. However, an awkward layout shouldn’t automatically be preserved just to avoid moving a pipe.

    Ask a qualified plumber to assess the available options. Drainage gradients, pipe routes, floor construction, and access to existing services may influence what’s feasible.

    Compare the cost of retaining the current layout with the benefits of a more practical arrangement before making the final decision.

    4. How Do You Choose the Right Bathroom Fixtures?

    Bathroom fixtures should fit the room, meet household needs, and remain practical to maintain. Before purchasing anything, compare dimensions, installation requirements, water efficiency, durability, and the availability of replacement parts.

    Choosing a Toilet

    Toilets differ in shape, projection, flushing design, and installation requirements.

    A compact model may be useful in a small bathroom, while a wall-hung toilet can create an open floor appearance. However, wall-hung models require an appropriate support system and a plan for accessing serviceable components.

    Check the waste outlet position, water connection, required clearances, and compatibility with the existing plumbing.

    Don’t choose a toilet based only on its appearance. A model that doesn’t suit the available connections can increase installation costs.

    Choosing a Basin and Vanity

    The vanity is one of the most important bathroom planning decisions because it combines a frequently used fixture with essential storage.

    A floating vanity can make floor cleaning easier and create a lighter appearance. A floor-standing cabinet may offer more storage or suit a bathroom where wall support is limited.

    Consider these factors:

    • Basin depth and comfortable handwashing space.
    • Drawer and cupboard capacity.
    • Resistance to humidity and everyday splashes.
    • Tap placement and compatibility.
    • Mirror height and lighting.
    • Access to plumbing connections.

    Before purchasing a vanity, confirm that the drawers can open fully and won’t collide with the door, toilet, or nearby fixtures.

    Choosing a Shower or Bathtub

    A walk-in shower can create an open, contemporary appearance, but it requires careful drainage, waterproofing, and splash control.

    An enclosed shower may be more practical in a compact bathroom because it helps contain water. A bathtub can be valuable for households that regularly use it, but it occupies space and may increase water use.

    Make the decision according to actual household routines rather than assumptions about what every bathroom should contain.

    FixtureMain benefitImportant consideration
    Wall-hung toiletOpen floor appearanceSupport and service access
    Floating vanityEasier floor cleaningSecure wall installation
    Walk-in showerOpen designDrainage and splash control
    Enclosed showerBetter water containmentDoor movement and cleaning
    BathtubFlexible bathing optionsSpace and water requirements
    Double vanitySeparate basin areasAdditional space and plumbing

    Professional advice: Confirm technical drawings before ordering fixtures. Products that look similar may have different dimensions, connection points, and installation requirements.

    5. How Can You Maximize Bathroom Storage?

    The best bathroom storage makes everyday essentials easy to reach without overcrowding the room. Use vertical space, concealed compartments, and carefully selected furniture instead of filling every available wall with shelves and cabinets.

    Use Vertical Storage

    Tall cabinets can hold spare towels and toiletries, while mirrored cabinets provide convenient storage above the basin.

    Recessed shower niches can hold shampoo and soap without projecting into the shower area. However, they must be incorporated correctly into the waterproofing system.

    Other useful options include:

    • Hooks for towels and dressing gowns.
    • Drawers with removable organizers.
    • Slim cabinets for narrow spaces.
    • Shelves above the toilet where appropriate.
    • Hampers that fit inside suitable cupboards.
    • Small containers for frequently used toiletries.

    Before drilling into walls, check for concealed pipes, electrical cables, and structural components. Use appropriate fixing methods for the wall type and the weight being supported.

    Organize Items According to Their Use

    Keep daily essentials close to the basin and frequently used shower products within easy reach.

    Store spare toiletries, cleaning products, and extra towels separately from everyday items. Cleaning chemicals should be kept safely away from children and should never be stored where they could contaminate personal-care products.

    For a broader approach to organizing household belongings, see Home Storage Solutions.

    If your bathroom counters regularly become cluttered, Home Decluttering Tips can help you decide which items deserve convenient storage and which can be stored elsewhere.

    Avoid Buying Storage Before Measuring

    Storage organizers should fit the actual space available. Measure cabinet depth, drawer height, and shelf width before purchasing baskets or containers.

    This prevents wasted space and avoids the frustration of buying organizers that don’t fit the furniture.

    Quick tip: Plan storage around the products you actually use. A smaller, well-organized cabinet is often more practical than a large cupboard filled with unnecessary items.

    6. How Should You Plan Bathroom Lighting?

    Bathroom lighting infographic featuring ceiling lights, illuminated mirrors, soft accent lighting, and electrical safety for modern bathrooms.
    Discover how to plan bathroom lighting with balanced ceiling illumination, shadow-reducing mirror lights, and subtle accent lighting. Create a comfortable, functional space while prioritizing electrical safety.

    A good bathroom lighting plan combines general illumination, mirror lighting, and optional accent lighting. Each serves a different purpose, helping you move around safely, perform grooming tasks, and create a comfortable atmosphere.

    General Lighting

    General lighting illuminates the main room. Ceiling-mounted fixtures are common, but their position should prevent dark areas around the basin and shower.

    Consider the room’s size, ceiling height, surface finishes, and the amount of natural light available.

    Mirror and Task Lighting

    Mirror lighting should provide clear illumination for shaving, skincare, and other grooming tasks.

    Lights positioned around or beside a mirror can help reduce shadows on the face. Select fixtures suitable for the intended bathroom location and ensure they don’t obstruct cabinets or mirrors.

    Accent Lighting

    Accent lighting can create a softer appearance around a vanity or architectural feature. It may be useful for evening routines, but it shouldn’t replace adequate general and task lighting.

    Keep the lighting design simple. A few well-positioned fixtures are often more effective than numerous decorative lights.

    Follow Electrical Safety Requirements

    Bathrooms contain water, so electrical work needs particular care.

    Have a qualified electrician check fixture suitability, electrical protection, outlet placement, switches, and applicable safety requirements. Lighting near showers and baths must be appropriate for its location.

    Common mistake: Selecting attractive ceiling lights without planning mirror illumination. This can make everyday grooming difficult even when the bathroom looks impressive.

    7. Why Are Bathroom Ventilation and Waterproofing Essential?

    Ventilation removes excess moisture from the air, while waterproofing protects building materials from water penetration. Both are essential because moisture problems can develop behind finished surfaces before visible damage appears.

    Plan Effective Ventilation

    Choose an extractor fan suitable for the room’s size, layout, duct route, and applicable ventilation requirements.

    Check that the fan discharges to an appropriate outdoor location rather than into an enclosed ceiling void. An adequate air supply is also important for effective extraction.

    A practical ventilation plan should consider:

    • Suitable fan capacity.
    • Appropriate ductwork.
    • Noise levels.
    • Convenient controls.
    • Access for cleaning and maintenance.
    • An effective route for replacement air to enter the room.

    Opening a window can help, but it may not provide sufficient moisture removal in every bathroom.

    Understand Waterproofing

    Waterproofing involves more than applying a coating beneath the tiles.

    The membrane, corners, joints, pipe penetrations, shower tray or floor, and drain connection must function as a coordinated system. Installation should follow the manufacturer’s requirements and applicable building standards.

    Arrange necessary inspections before covering the waterproofed surfaces.

    Remember that tiles and grout do not automatically create a waterproof enclosure. A properly installed waterproofing system is essential in areas exposed to regular water.

    Address Moisture Problems Early

    Persistent condensation, recurring damp patches, damaged sealant, or a musty smell may indicate inadequate ventilation or a leak.

    Investigate the underlying cause rather than repeatedly cleaning the surface or covering the affected area with paint.

    For more guidance on keeping household systems in good condition, visit Basic Home Maintenance Tips.

    8. Which Bathroom Materials Are Durable and Easy to Maintain?

    Bathroom materials should tolerate moisture, suit their intended application, and remain practical to clean. Consider water resistance, slip resistance, durability, installation quality, and maintenance requirements before choosing finishes.

    Compare Bathroom Flooring Options

    Porcelain and ceramic tiles are common choices because they come in a wide range of sizes, textures, and designs.

    Natural stone can provide a distinctive appearance, but some products require sealing and specialized maintenance. Certain resilient flooring products may also be suitable when specifically approved for bathroom use.

    MaterialAdvantagesConsiderations
    Porcelain tileDurable and widely availableInstallation quality and grout maintenance
    Ceramic tileVersatile design optionsProduct suitability for the intended area
    Natural stoneDistinctive natural appearanceSealing and specialized care may be necessary
    Approved resilient flooringCan feel comfortable underfootMust be suitable for the specific wet area
    Mosaic tileUseful for some sloped surfacesMore grout joints to maintain

    For shower floors, choose a product with suitable slip-resistance performance for wet conditions. A glossy appearance alone doesn’t establish whether a surface is safe when wet.

    Select Wall Finishes and Worktops Carefully

    Large-format tiles can reduce the number of grout joints, although they require appropriate substrate preparation and skilled installation.

    Water-resistant wall panels may be another option when the product is designed for the intended wet area.

    For vanity worktops, compare porcelain, solid-surface materials, natural stone, and other suitable products. Consider stain resistance, joint placement, repair requirements, and cleaning instructions.

    Cabinet materials also matter. Choose furniture designed for humid environments and protect exposed edges from water damage.

    Coordinate Finishes Before Ordering

    Request physical samples of the flooring, wall tiles, cabinet finish, and worktop. View them together under the planned lighting before making a final decision.

    This helps you assess color differences, texture, and how the materials work together.

    Professional tip: Prioritize performance in areas exposed to frequent water. Decorative appearance matters, but unsuitable materials can increase maintenance and replacement costs.

    9. How Should You Plan Bathroom Plumbing and Electrical Work?

    Bathroom plumbing and electrical planning infographic showing water pipes, drainage, wiring, ventilation, waterproofing, inspections, and concealed service records.
    Plan bathroom plumbing and electrical work before installing finished surfaces. Coordinate water supplies, drainage, lighting, ventilation, inspections, and waterproofing to support a smoother renovation.

    Plan plumbing and electrical installations before walls are closed or finished surfaces are installed. Coordinating these systems early reduces the risk of having to remove completed work to correct misplaced pipes, cables, or fittings.

    Prepare a Services Plan

    Mark the planned positions of:

    • Hot and cold water supplies.
    • Toilet waste connections.
    • Basin and shower drains.
    • Extractor fans and duct routes.
    • Lighting and mirror power supplies.
    • Approved outlets and switches.
    • Heating equipment, if included.

    Have qualified tradespeople review the plan. Existing pipe routes, drainage gradients, structural elements, and concealed services can affect what is possible.

    Follow a Suitable Construction Sequence

    A typical bathroom renovation involves several coordinated stages:

    1. Confirm the layout, measurements, and product specifications.
    2. Check permits, approvals, and specialist requirements.
    3. Remove old fixtures and finishes.
    4. Complete necessary structural and rough-in work.
    5. Inspect plumbing and electrical installations.
    6. Install and test the waterproofing system.
    7. Complete the approved wall and floor finishes.
    8. Fit the fixtures, furniture, and accessories.
    9. Test drainage, water supplies, ventilation, and electrical systems.
    10. Resolve defects and complete the final inspection.

    The precise sequence may vary according to the construction method and the products being installed.

    Don’t close walls or cover critical components before required inspections have taken place.

    Keep Records of Concealed Services

    Photograph pipe routes and other concealed installations before they’re covered.

    Keep the photographs with product specifications and maintenance records. This information can be valuable if you later need to drill into a wall, repair a leak, or replace a fixture.

    10. How Do You Create a Realistic Bathroom Renovation Budget?

    A realistic bathroom budget includes materials, labor, preparation, plumbing, electrical work, waterproofing, waste removal, and a reserve for unexpected problems.

    The cheapest visible products don’t always produce the lowest total cost. Difficult installation requirements or concealed damage can increase the final expense.

    Divide the Budget Into Categories

    CategoryTypical items to consider
    DemolitionRemoval, disposal, and site protection
    PlumbingPipes, drains, connections, and labor
    Electrical workWiring, lighting, fans, and protection
    WaterproofingPreparation, materials, and installation
    FinishesTiles, flooring, paint, and grout
    FixturesToilet, basin, shower, bathtub, and taps
    FurnitureVanity, cabinets, mirrors, and storage
    LaborInstallation and specialist trades
    ContingencyUnexpected repairs and necessary changes

    Request itemized quotations so you can compare equivalent work. One contractor might include waste removal and waterproofing, while another may charge for them separately.

    Decide Where to Spend and Save

    Spend appropriately on concealed systems, safe electrical work, reliable plumbing, and correctly installed waterproofing. These components are expensive to correct after the bathroom is completed.

    You may save money by retaining suitable plumbing locations, choosing readily available tiles, reusing sound fixtures, or selecting standard product sizes.

    Avoid unnecessary changes that don’t improve the bathroom’s function.

    Keep a Contingency Reserve

    Older bathrooms may reveal damaged substrates, corroded pipes, or other problems after demolition.

    The appropriate reserve depends on the property’s condition, project complexity, and uncertainty about concealed components. Discuss likely risks with your contractor before work begins.

    Common mistake: Spending most of the budget on decorative fittings before confirming the cost of installation and essential repairs.

    11. How Can You Make a Bathroom Safer and More Accessible?

    A safer bathroom provides secure footing, convenient controls, suitable lighting, and enough space to use fixtures comfortably. Accessibility should be considered during the initial design rather than added only after problems arise.

    Include Practical Safety Features

    Consider the following improvements:

    • Flooring suitable for wet conditions.
    • Bright, even lighting with limited glare.
    • Conveniently positioned controls.
    • A handheld shower where useful.
    • Securely installed grab bars when needed.
    • Clear walking routes.
    • Appropriate access through doors and shower entrances.
    • Storage positioned within comfortable reach.

    Grab bars require suitable structural support. Ordinary towel rails aren’t substitutes for properly installed support equipment.

    Consider Future Requirements

    A bathroom should be practical for its intended users over time.

    A wider doorway, a suitably designed shower without a raised threshold, or wall reinforcement for future grab bars may provide greater flexibility.

    However, these changes must be compatible with the building’s structure, drainage, waterproofing, and other technical requirements.

    Where specific accessibility dimensions or standards apply, confirm them with a qualified professional or the relevant building authority.

    12. How Do You Choose a Bathroom Style and Color Scheme?

    Bathroom style and color scheme infographic featuring warm neutrals, modern minimalism, classic fixtures, natural textures, and coordinated finishes.
    Explore bathroom style and color scheme ideas, from warm neutral interiors and modern minimal designs to classic finishes and nature-inspired colors. Create a cohesive bathroom with complementary materials, lighting, and accessories.

    Choose a bathroom style by combining a limited palette of complementary colors, coordinated finishes, and materials suitable for the room. Light colors can help a compact bathroom feel more open, while darker accents and textured finishes can introduce contrast.

    Warm and Neutral Bathrooms

    Cream, beige, soft white, and natural wood create a relaxed appearance.

    This approach works well when you want a bathroom that feels welcoming without relying on strong decorative patterns. Different textures can prevent a neutral design from looking flat.

    Modern Minimal Bathrooms

    Modern minimal bathrooms use simple shapes, restrained colors, and practical storage.

    Concealed cabinets and coordinated fittings help reduce visual clutter. The goal isn’t to remove every accessory but to keep the room organized and easy to maintain.

    Classic Bathrooms

    Classic bathrooms may combine white tiles, traditional fittings, and carefully selected metal finishes.

    Choose a consistent style rather than mixing too many unrelated decorative details.

    Natural-Inspired Bathrooms

    Muted green, stone-inspired finishes, and wood-look materials can create a connection with nature.

    When selecting these materials, consider how they respond to moisture and whether their maintenance requirements suit your household.

    Keep the Design Consistent

    Choose the main wall finish and vanity color first. Then coordinate the mirror, taps, lighting, and accessories.

    A compact bathroom doesn’t need to be entirely white. Consistent colors, adequate lighting, and an uncluttered layout often matter more than a particular shade.

    For ideas on creating a coordinated home interior, explore Living Room Home Tips.

    13. What Bathroom Planning Mistakes Should Beginners Avoid?

    Many renovation problems happen because individual decisions are made without considering how the entire room works together.

    A vanity may be ordered before plumbing is checked, the lighting may be selected after the mirror is installed, or the flooring may be chosen without considering drainage.

    Avoid These Common Mistakes

    Ignoring measurements: Incorrect measurements can lead to fixtures that don’t fit or doors that cannot open properly. Measure the complete room and check the dimensions of every selected product.

    Choosing fixtures too early: A product may look suitable but require different plumbing connections or installation space. Confirm technical drawings before ordering.

    Underestimating ventilation: Poor moisture removal can contribute to condensation, mold, and deterioration. Plan suitable ventilation before finishing the room.

    Treating grout as waterproofing: Water can reach concealed building materials if the waterproofing system is inadequate. Use a suitable system and arrange inspections before covering it.

    Overcrowding the room: Filling every corner with cabinets or decorative features can make a bathroom difficult to navigate. Protect the main walking route.

    Forgetting storage: Without a storage plan, counters can quickly become cluttered. Measure your belongings and assign convenient storage locations.

    Ignoring maintenance: Some finishes need specialized cleaning or regular sealing. Check maintenance requirements before choosing materials.

    Underestimating the budget: Unexpected repairs and installation costs can disrupt the project. Compare detailed quotations and maintain a suitable contingency.

    Review the Complete Design Before Ordering

    Imagine entering the room and using each fixture.

    Check whether drawers open fully, towels are within reach, shower doors move freely, and essential plumbing remains accessible for maintenance.

    A contractor or designer should review the complete plan before major orders are placed.

    14. What Professional Advice Makes Bathroom Planning Easier?

    Professional bathroom planning coordinates the layout, fixture specifications, building services, materials, and construction sequence. This approach helps prevent problems that might be missed when decisions are made separately.

    Confirm Product Specifications Early

    Select the actual toilet, basin, vanity, taps, shower fittings, and enclosure before finalizing installation details.

    Manufacturer drawings help installers identify mounting points, connection positions, and clearance requirements.

    If a selected product becomes unavailable, check that any replacement has compatible dimensions and installation requirements before approving the change.

    Inspect Work Before It Becomes Hidden

    Arrange required inspections for plumbing, electrical work, drainage, and waterproofing before covering these installations.

    Keep photographs of concealed services and record the products used. These records may help with future maintenance.

    Prioritize Repairability

    Choose fixtures with accessible service points and replacement parts that are reasonably available.

    Avoid decorative installations that make essential valves, drains, or plumbing connections difficult to reach.

    Coordinate the Finishing Details

    Confirm that the mirror aligns with the basin, lights don’t obstruct cabinets, shower doors open correctly, and accessories are positioned conveniently.

    These details may seem small, but they influence everyday comfort.

    Maintain a Project Record

    Keep receipts, warranties, product specifications, installation photographs, and maintenance instructions together.

    A simple record makes it easier to identify replacement parts and understand how the bathroom was installed.

    For wider organizational ideas that can support a more manageable household, see Smart Home Organization Tips.

    15. How Can You Keep Your Bathroom Organized After Renovation?

    Bathroom organization infographic featuring tidy vanity storage, towel hooks, cleaning routines, laundry hampers, and practical bathroom supplies.
    Discover practical bathroom organization tips for maintaining a clean, comfortable, and clutter-free space after renovation. Create designated storage areas, establish simple cleaning routines, and keep everyday essentials neatly arranged.

    Good bathroom organization depends on creating simple routines that prevent clutter from returning. Even a well-designed bathroom can become inconvenient when counters fill with toiletries or towels have no designated place.

    Give Everyday Items a Permanent Home

    Keep frequently used products in accessible drawers, cabinets, or organizers.

    Store spare supplies separately and avoid keeping multiple open containers of the same product unless necessary.

    Use hooks and towel rails where they can be reached comfortably without obstructing doors or walking routes.

    Establish a Simple Cleaning Routine

    Regular maintenance helps prevent soap residue, limescale, and moisture problems from becoming harder to manage.

    A practical routine may include:

    • Wiping the basin and vanity after use when necessary.
    • Cleaning the toilet and shower regularly.
    • Removing soap residue from suitable surfaces.
    • Checking drains for slow water flow.
    • Cleaning the extractor fan according to its instructions.
    • Inspecting sealant and visible plumbing for deterioration.

    Use cleaning products that are appropriate for the materials installed. Abrasive cleaners or unsuitable chemicals can damage certain finishes.

    For more detailed household cleaning guidance, read Easy Home Cleaning Tips.

    Keep Laundry and Bathroom Supplies Separate

    If the bathroom also serves as a laundry area, plan the arrangement carefully.

    A hamper should be easy to access without blocking the shower or vanity. Provide suitable ventilation and avoid storing damp clothing in a closed space for extended periods.

    If your household needs a more consistent washing routine, Laundry Tips and Tricks offers additional ideas for managing clothing and household fabrics.

    Review Storage as Your Needs Change

    The products you use may change over time, and storage should adapt accordingly.

    Periodically remove expired or unused items, check that cabinets remain organized, and keep cleaning supplies safely stored.

    For households where several people share the bathroom, assigning separate drawers or baskets can help reduce clutter and make daily routines easier.

    16. Bathroom Planning Checklist: What Should You Complete Before Construction?

    Use this checklist before placing major orders or beginning renovation work.

    Design and Measurements

    • Measure the room, ceiling, doors, and windows.
    • Mark existing pipes, drains, and electrical points.
    • Confirm fixture positions and movement clearances.
    • Choose a layout that suits household routines.
    • Check storage requirements.
    • Consider accessibility and future needs.

    Fixtures and Materials

    • Confirm dimensions and technical drawings.
    • Select suitable flooring and wall finishes.
    • Choose the toilet, basin, vanity, and shower fittings.
    • Coordinate mirrors, lighting, and accessories.
    • Check cleaning and maintenance requirements.
    • Confirm product availability before ordering.

    Safety and Construction

    • Confirm ventilation and waterproofing requirements.
    • Arrange qualified plumbing and electrical work.
    • Check permits and inspections where required.
    • Agree on the construction sequence.
    • Confirm how concealed services will be recorded.
    • Ensure essential access points remain serviceable.

    Budget and Completion

    • Compare itemized contractor quotations.
    • Include labor, materials, and waste removal.
    • Allow for unexpected repairs.
    • Keep receipts, warranties, and product information.
    • Test taps, drainage, ventilation, and lighting.
    • Resolve defects before considering the project complete.

    Use this checklist as a working document. Measurements, safety requirements, and essential installation decisions should be confirmed before work progresses, while decorative accessories can be finalized later if necessary.

    What Should You Consider First When Planning a Bathroom Renovation?

    The first step in bathroom planning is understanding how the space needs to function in everyday life. Before choosing tiles, paint colors, or stylish fixtures, consider the room’s dimensions, the number of people using it, existing plumbing connections, storage requirements, ventilation, and renovation budget. A bathroom designed around practical needs is easier to maintain, more comfortable to use, and less likely to require expensive changes later.
    Start by identifying the main problems with your current bathroom. You may need better storage, a more accessible shower, improved lighting, or a layout that allows several people to get ready comfortably. These priorities will guide decisions about fixtures, materials, and available space.
    Important planning points:
    Measure the bathroom accurately, including doors, windows, and existing plumbing locations.
    Decide which features are essential and which are optional upgrades.
    Establish a realistic budget that includes labor, materials, and a contingency allowance.
    Check ventilation, waterproofing, drainage, and electrical requirements before construction begins.
    Choose fixtures and finishes that suit your household’s daily routine.
    A clear plan helps prevent rushed decisions and makes it easier to coordinate contractors, deliveries, and installation work. For a broader approach to improving your home, consider your bathroom plans alongside other practical Home Tips & Ideas.

    How Can You Make a Small Bathroom Look Bigger and Feel More Functional?

    A small bathroom can feel spacious and comfortable when its layout, lighting, storage, and visual details work together. The objective is not simply to make the room appear larger; it is to ensure that essential fixtures remain easy to access and everyday activities do not feel cramped. Removing unnecessary visual clutter and using the available vertical space can make a significant difference without requiring structural changes.
    Begin with the layout. Ensure the toilet, basin, and shower have enough usable space around them, and check that doors and drawers can open without obstruction. Where appropriate, a wall-mounted basin or vanity can expose more floor area, while a clear shower screen can preserve an uninterrupted view across the room.
    Practical ways to improve a small bathroom:
    Use a large mirror to reflect light and create a greater sense of depth.
    Choose light or softly coordinated colors to maintain a consistent visual appearance.
    Install wall-mounted shelves or a compact vanity with drawers.
    Consider sliding or outward-opening doors where suitable and safe.
    Use recessed niches in shower walls only when they can be properly waterproofed.
    Select appropriately sized fixtures rather than oversized products that overwhelm the room.
    Keep frequently used toiletries organized and remove items that are no longer needed.
    Good organization is just as important as the design itself. Explore these Small Space Home Tips for additional ways to make limited space easier to manage. With thoughtful choices, even a compact bathroom can feel organized, bright, and practical.

    What Is the Best Bathroom Layout for Comfort, Storage, and Everyday Use?

    The best bathroom layout is the one that supports the room’s purpose, accommodates its users, and allows comfortable movement between fixtures. There is no single arrangement that works for every property. A family bathroom may need a bathtub, generous storage, and durable finishes, while an ensuite may benefit from a space-efficient shower and a compact vanity.
    A successful layout creates clear movement paths and prevents the bathroom’s main features from interfering with one another. For example, the shower door should open without hitting the toilet or vanity, and frequently used storage should be accessible without reaching across wet surfaces. Existing plumbing locations also matter because relocating drains and water supplies can increase the cost and complexity of a renovation.
    Key layout considerations:
    Entry and movement: Check that doors open freely and that users can reach fixtures comfortably.
    Shower placement: Position the shower to manage water splashes and provide convenient access.
    Vanity location: Ensure there is enough room to use the basin, open drawers, and reach mirrors.
    Toilet privacy: Consider sightlines from the doorway and the overall arrangement of the room.
    Storage access: Place daily essentials within convenient reach without overcrowding the space.
    Household needs: Consider children, older adults, accessibility requirements, and the number of regular users.
    Before finalizing the design, create a simple floor plan using accurate measurements. Mark the positions of fixtures and the areas required for doors, drawers, and movement. For complex renovations, ask a qualified designer or contractor to review the layout before work begins. Careful planning can prevent expensive adjustments and make the finished bathroom easier to use for years.

    Which Bathroom Materials Are Best for Durability, Water Resistance, and Easy Cleaning?

    The best bathroom materials combine moisture resistance, durability, slip awareness, and manageable maintenance. Bathrooms experience regular humidity, water splashes, temperature changes, and frequent cleaning, so materials should be selected according to where they will be installed rather than appearance alone. A finish that looks attractive in a showroom may not be suitable for a wet shower floor or a poorly ventilated room.
    Porcelain and ceramic tiles are popular choices because they are available in many styles and can be practical when installed correctly. However, the tile surface, grout, installation quality, and waterproofing system all influence long-term performance. For floors, select products with suitable slip resistance for the intended use, especially in shower areas. For walls, consider how easily the finish can be cleaned and whether it is appropriate for repeated moisture exposure.
    What to look for when selecting materials:
    Flooring: Choose a suitable bathroom-rated surface with appropriate slip resistance.
    Wall finishes: Use tiles or other products specifically designed for the relevant moisture conditions.
    Countertops: Select a durable, water-resistant surface that suits your cleaning routine.
    Cabinetry: Prefer moisture-resistant materials and finishes, and protect exposed edges from water.
    Grout and sealants: Use products appropriate for the tile and location, following maintenance instructions.
    Fixtures: Choose finishes that can tolerate regular cleaning without requiring excessive upkeep.
    Remember that waterproofing beneath the visible finishes is essential in wet areas. Tiles and grout alone should not be treated as a complete waterproofing system. Follow local building requirements and manufacturer guidance, and use qualified professionals for critical waterproofing work. For related cleaning routines, see Easy Home Cleaning Tips to help keep bathroom surfaces looking their best.

    How Can You Plan a Bathroom Renovation Budget Without Unexpected Costs?

    A reliable bathroom renovation budget accounts for more than the price of tiles, a vanity, and a shower. Labor, plumbing, electrical work, waterproofing, waste disposal, delivery charges, permits where required, and finishing details can all affect the final cost. Establishing a clear scope before requesting quotes makes it easier to compare contractors and identify where spending will have the greatest practical benefit.
    Start by separating essential work from optional upgrades. Repairing a leaking pipe, correcting inadequate waterproofing, or improving unsafe electrical arrangements should take priority over decorative features. Once essential work is accounted for, you can allocate the remaining budget to fixtures, storage, lighting, and finishes that fit your preferences.
    Budgeting steps to follow:
    Obtain itemized estimates that clearly describe labor, materials, and exclusions.
    Confirm whether plumbing or electrical changes are included in the quoted price.
    Compare the quality, warranties, and maintenance needs of alternative materials.
    Check delivery schedules and availability before arranging installation.
    Set aside a contingency fund for unexpected problems discovered after work begins.
    Keep records of quotes, invoices, receipts, and approved changes to the project.
    Avoid making expensive design changes once installation is underway unless necessary.
    It is also wise to investigate the existing bathroom before finalizing the budget. Hidden moisture damage, deteriorated pipes, or problems with the subfloor may only become apparent during demolition. A contingency allowance helps you respond to these discoveries without immediately compromising essential work.
    The most effective budget is not necessarily the lowest one. It is a budget that balances quality, safety, functionality, and long-term maintenance. Investing in sound installation and suitable materials can reduce the likelihood of avoidable repairs and help your bathroom remain comfortable and dependable.

    Conclusion: Plan a Bathroom That Combines Comfort, Style, and Functionality

    Successful bathroom planning begins with understanding your household’s needs and making thoughtful decisions about layout, storage, lighting, ventilation, materials, and budget. A well-designed bathroom should look beautiful, provide comfortable movement, and make everyday routines easier. By prioritizing practical features before decorative details, you can create a space that remains functional and attractive for years to come.

    Before starting your renovation, measure the available space carefully, compare suitable fixtures, and establish a realistic budget that accounts for labor and unexpected repairs. Pay particular attention to waterproofing, drainage, slip-resistant flooring, and adequate ventilation, as these elements help protect your bathroom and reduce future maintenance problems. Even small bathrooms can feel organized and welcoming when every feature has a clear purpose.

    Remember that a successful bathroom does not depend on expensive materials or the latest design trends. It depends on choosing solutions that suit your lifestyle, available space, and long-term requirements. With careful planning, sensible spending, and quality installation, you can transform your bathroom into a comfortable, practical, and visually appealing part of your home.

    For more inspiration on creating a beautiful, organized, and comfortable living environment, explore Heartomenal and discover practical ideas to support your next home improvement project.

  • Laundry Tips and Tricks

    Laundry Tips and Tricks

    Introduction

    Laundry Tips and Tricks | Laundry is one of those household tasks that seems easy until clothes come out of the washing machine with stubborn stains, unpleasant odors, faded colors, or wrinkles that are difficult to remove. Sorting clothes, choosing the right detergent, managing different fabrics, and finding enough space to dry everything can make the process more complicated than expected.

    The good news is that the right laundry habits can save time, protect your clothes, and make everyday cleaning much easier. With practical Laundry Tips and Tricks, you can improve washing results without buying expensive products or following a complicated routine. The secret is understanding what your clothes need and making small adjustments to how you wash, dry, fold, and store them.

    At Heartomenal, practical household guidance focuses on making everyday home care easier to manage. This guide brings together useful laundry techniques for beginners and experienced households alike, covering everything from sorting and stain removal to fabric care, washing machine maintenance, and laundry organization.

    Whether you live in a small apartment, manage a busy family household, or simply want your clothes to stay fresh for longer, you’ll learn how to build a laundry routine that fits your lifestyle.

    1. What Are the Best Laundry Tips and Tricks for Everyday Washing?

    The best laundry tips and tricks focus on five essentials: sorting clothes properly, checking care labels, treating stains before washing, measuring detergent correctly, and selecting the right wash cycle. These habits help remove everyday dirt while reducing fading, fabric damage, detergent residue, and unpleasant odors.

    You don’t need to change your entire routine at once. Start by improving the steps you already follow.

    Follow a Simple Laundry Routine

    A consistent process makes it easier to avoid missed pockets, forgotten stains, and clothes that need special care.

    1. Check every pocket. Remove tissues, receipts, coins, pens, and other objects before loading the washer.
    2. Separate the laundry. Group garments by color, fabric type, and washing requirements.
    3. Read care labels. Check the recommended temperature, cycle, drying method, and ironing instructions.
    4. Pretreat stains. Use a suitable stain remover before washing when necessary.
    5. Load the machine correctly. Leave enough space for garments to move freely.
    6. Measure detergent. Follow the product instructions for your load and water conditions.
    7. Choose the correct cycle. Match the setting to the clothing and level of soil.
    8. Remove clothes promptly. Transfer the load to a suitable drying area when the cycle finishes.
    9. Check that everything is dry. Pay attention to thick seams, pockets, cuffs, and waistbands before storing clothes.

    Why Does This Routine Work?

    Each step prevents a different problem. Sorting reduces color transfer, pretreating helps tackle stains, and correct loading improves water circulation. Proper drying also prevents damp garments from developing unpleasant smells.

    Pro Tip: Keep a small basket for stained clothing and delicate items. This simple separation prevents special-care garments from accidentally going into a regular wash.

    2. How Should You Sort Laundry Before Washing?

    Sorting laundry means separating garments according to color, fabric, soil level, and care requirements. It helps prevent dye transfer, protects delicate materials, and ensures that each load receives an appropriate wash cycle.

    A practical sorting system doesn’t need numerous baskets. Three or four clearly defined categories are often enough for everyday household laundry.

    Sort Clothes by Color

    Laundry categoryCommon examplesRecommended approach
    WhitesWhite shirts, socks, white towelsWash separately when practical
    Light colorsBeige, pale blue, cream, light grayGroup similar shades
    Dark colorsBlack jeans, navy trousers, dark shirtsUse suitable settings to limit fading
    Bright colorsRed, orange, vivid greenSeparate new items that may release dye
    DelicatesSilk, lace, fine knitsFollow individual care instructions

    New garments with strong dyes deserve special attention. A bright red shirt, for example, may release color during its first few washes. Washing it with white bedding can cause unwanted staining.

    Sort by Fabric Type

    Different fabrics behave differently during washing. Heavy towels can create friction against lightweight garments, while delicate knits may stretch under the weight of heavier clothing.

    Consider separating:

    • Towels and other bulky household linens.
    • Everyday cotton clothing.
    • Lightweight synthetic garments.
    • Wool, silk, and other delicate fabrics.
    • Heavily soiled workwear or sports clothing.

    Should You Wash Heavily Soiled Clothes Separately?

    Yes, when the amount or type of soil makes it sensible. Muddy trousers, greasy work clothes, and heavily soiled sportswear may need pretreatment or a different cycle from lightly worn shirts.

    However, don’t automatically create a separate load for every garment. Combine compatible items when their colors, fabric types, and washing requirements allow it.

    Common Mistake: Putting everything into one load to save time may result in color transfer, lint-covered clothing, or poorly cleaned items. A few minutes spent sorting can prevent much more frustrating problems later.

    For additional ways to organize household routines, explore Home Tips & Ideas.

    3. How Do You Read Laundry Care Labels Correctly?

    Laundry care label guide showing washing, drying, bleaching, ironing, and professional cleaning symbols on clothing tags.
    Learn how to read laundry care labels correctly to choose suitable washing temperatures, drying methods, and ironing settings. Understanding garment symbols helps you care for delicate fabrics and keep everyday clothing in good condition.

    Laundry care labels explain how to wash, dry, bleach, and iron garments safely. They matter because clothing made from similar-looking materials may have different finishes, dyes, linings, or construction details that affect how it should be cleaned.

    Before washing a new garment, check the label instead of relying only on its appearance.

    Understand the Main Care Instructions

    Label instructionMeaningWhat to do
    Washing tub with a temperatureMaximum recommended washing temperatureSelect a suitable setting
    Hand symbolHand washing is required or recommendedFollow the specified hand-washing instructions
    Crossed-out washing tubDo not wash with waterSeek appropriate professional care
    TriangleBleaching instructionsUse only permitted bleaching methods
    Square with a circleTumble-drying instructionsCheck the symbol and any temperature markings
    Iron symbolIroning guidanceUse the indicated temperature restrictions
    CircleProfessional cleaning instructionsFollow the stated cleaning requirements

    Care symbols can include additional lines, dots, and crosses that change their meaning. When in doubt, consult the garment manufacturer’s guidance.

    What If a Garment Has No Care Label?

    Use caution. Identify the likely fabric if possible, examine the garment’s construction, and avoid high heat or aggressive washing until you understand its needs.

    For an expensive, structured, embellished, or particularly delicate item, professional cleaning may be the safest choice.

    Quick Tip: Take a moment to check the labels on frequently worn clothing. Learning the requirements of your favorite garments makes future laundry decisions quicker.

    4. What Is the Best Water Temperature for Laundry?

    The best water temperature depends on the garment’s care instructions, dye stability, soil level, and cleaning requirements. Cold water is suitable for many everyday loads, warm water can help clean certain fabrics, and hot water should be used only when appropriate for the item and purpose.

    Using hotter water does not automatically mean better cleaning.

    Cold Water Washing

    Cold water works well for many colored garments, dark clothing, and everyday items when paired with a suitable detergent.

    Its advantages include:

    • Helping reduce color fading.
    • Lowering energy consumption when less water heating is needed.
    • Reducing the risk of heat-related shrinkage for suitable fabrics.
    • Making frequent washing more economical.

    Cold water is particularly useful when protecting dark jeans and colorful shirts. However, heavily soiled garments may need pretreatment or a different wash program.

    Warm Water Washing

    Warm water can be useful for suitable cotton garments, some synthetic blends, and clothing with moderate everyday soil.

    It may help remove body oils and certain residues, but the garment label and detergent instructions should guide your decision.

    Avoid assuming that warm water is safe for every synthetic or delicate fabric.

    Hot Water Washing

    Hot water may be appropriate for some durable, colorfast household linens and specific cleaning requirements. However, it can cause shrinkage, fading, or damage to elastic and sensitive fabrics.

    TemperatureCommon applicationsMain caution
    ColdDark clothes and many everyday garmentsChoose an effective detergent and suitable cycle
    WarmCompatible fabrics with everyday or moderate soilCheck dye and fabric stability
    HotSuitable durable items and specific hygiene needsAvoid heat-sensitive fabrics

    For laundry associated with illness or a specific hygiene concern, follow appropriate public-health or healthcare guidance. Washing temperature alone does not guarantee that every contamination concern has been addressed.

    Expert Tip: When a garment is unfamiliar, begin with its care label rather than experimenting with a hotter setting.

    5. How Much Laundry Detergent Should You Use?

    Use the amount of detergent recommended for your load size, soil level, water hardness, and washing machine. Too much detergent can leave residue and contribute to buildup, while too little may not clean heavily soiled clothes effectively.

    The goal is to use enough detergent for the job without creating unnecessary residue.

    What Happens When You Use Too Much Detergent?

    Excess detergent can create several problems:

    • Clothes may feel stiff or coated after washing.
    • Towels may lose some of their absorbency.
    • Residue may accumulate inside the washing machine.
    • Rinsing may become less effective.
    • Unpleasant odors may persist despite repeated washing.

    If you notice these symptoms, check the dosage instructions and machine condition before adding more product.

    What Happens When You Use Too Little?

    An insufficient amount may struggle with heavily soiled clothing or loads washed in hard water. Clothes can retain dirt, body oils, and odors if the detergent and cycle are not suitable for the load.

    Use the product manufacturer’s recommendations instead of guessing.

    Liquid, Powder, or Pods: Which Is Better?

    Detergent typeBenefitsLimitations
    Liquid detergentConvenient for many everyday loads and some pretreatment tasksEasy to pour more than necessary
    Powder detergentUseful for many routine loads and can be economicalMay dissolve poorly under unsuitable conditions
    Laundry podsConvenient premeasured portionsLess flexible for small loads and must be stored securely

    Use high-efficiency detergent where required by your washing machine. If you use pods, follow the packaging instructions and keep them in their original container, away from children and pets.

    Pro Tip: If clothes repeatedly smell unpleasant after washing, investigate the washer, load size, drying conditions, and detergent dosage before changing brands.

    6. How Can You Remove Common Laundry Stains Effectively?

    Laundry stain removal infographic showing coffee, grease, blood, mud, makeup, and sweat stains with fabric-safe cleaning techniques.
    Discover practical laundry stain removal tips for treating coffee, grease, blood, mud, makeup, and sweat stains. Learn how to blot, pretreat, wash, and inspect garments carefully before drying.

    Effective stain removal begins with identifying the stain, removing excess material, choosing a compatible treatment, and following the garment’s care instructions. Treating stains before washing is often more effective than expecting a regular cycle to remove every mark.

    Never assume that a stain has disappeared simply because the wash cycle has finished.

    How to Treat Different Stains

    StainRecommended approachAvoid
    Coffee and teaBlot and rinse with cool water, then pretreat with a suitable productAggressive rubbing
    Grease and cooking oilBlot excess oil and use a fabric-safe stain removerApplying heat before checking the stain
    BloodRinse promptly with cold water and pretreat appropriatelyStarting with hot water
    MudAllow excess mud to dry, brush it away, and then pretreatSpreading wet mud across the fabric
    MakeupRemove excess gently and use a compatible treatmentHarsh scrubbing on delicate material
    Sweat and deodorantApply a suitable pretreatment and wash as directedAssuming extra detergent will solve the buildup

    Follow These Stain Removal Steps

    Step 1: Remove excess material. Lift away solid residue carefully. Blot liquids using a clean cloth.

    Step 2: Identify the fabric. Check whether the garment is washable and whether the stain remover is appropriate.

    Step 3: Apply a suitable treatment. Follow the product instructions and test an inconspicuous area when necessary.

    Step 4: Wash the garment. Choose an appropriate temperature and cycle.

    Step 5: Inspect the result. Check the affected area before using a heated dryer. Repeat an appropriate treatment if the stain remains.

    Why Should You Avoid Rubbing Stains Aggressively?

    Aggressive rubbing can push some stains deeper into the fibers, spread the mark, or damage delicate materials. Blotting and careful pretreatment are generally safer starting points.

    Important Safety Rule: Never mix chlorine bleach with vinegar, ammonia, or other cleaning products. Dangerous chemical reactions can occur. Use cleaning products separately and according to their labels.

    7. How Can You Keep Clothes Smelling Fresh After Washing?

    Fresh laundry depends on effective cleaning, appropriate rinsing, prompt drying, and clean storage. Strong fragrance does not necessarily mean clothing is clean. When clothes smell musty, the cause may be moisture, detergent buildup, poor washing conditions, or a dirty washing machine.

    Why Does Laundry Smell Musty?

    Common causes include:

    • Leaving wet clothes in the washer for an extended period.
    • Overloading the drum.
    • Using excessive detergent or fabric softener.
    • Allowing residue to accumulate inside the appliance.
    • Drying clothes in a poorly ventilated space.
    • Folding garments before they are completely dry.
    • Storing clean laundry in damp cupboards or baskets.

    Practical Ways to Prevent Unpleasant Odors

    1. Transfer clothes promptly after the wash cycle.
    2. Follow the manufacturer’s instructions for cleaning the drum and detergent drawer.
    3. Inspect the rubber seal and other areas where moisture can collect.
    4. Leave the washer door open between loads if the manufacturer permits it.
    5. Dry clothes thoroughly before folding.
    6. Keep laundry baskets and storage areas clean and dry.

    If the machine continues to smell despite routine maintenance, check the manual and consider whether the drain, filter, or other components need attention.

    For a more complete household cleaning routine, visit Easy Home Cleaning Tips.

    8. How Can You Make Clothes Last Longer?

    Clothes last longer when you reduce unnecessary friction, excessive heat, stretching, and exposure to unsuitable cleaning products. Appropriate washing cycles, careful drying, and sensible storage help maintain fabric quality and garment shape.

    Turn Suitable Clothes Inside Out

    Turning jeans, printed T-shirts, and many dark garments inside out can reduce friction on their visible surfaces.

    Before washing, empty pockets and close zippers where appropriate. Follow the garment’s instructions if a different treatment is recommended.

    Use Mesh Bags for Delicate Items

    Mesh laundry bags provide an extra layer of protection for suitable delicate garments. They can help prevent snagging and tangling during washing.

    They are useful for:

    • Bras and delicate underwear.
    • Fine knits.
    • Lightweight garments with straps.
    • Small items that might become tangled.
    • Suitable garments with decorative details.

    Choose an appropriate wash cycle and avoid overfilling the bags. Mesh protection does not make every delicate garment machine-washable.

    Reduce Heat Damage

    High drying temperatures can damage elastic, shrink some fabrics, and contribute to unnecessary wear.

    Air-dry garments that require it, and use a suitable dryer setting for other items. Avoid leaving clothes in excessive heat longer than necessary.

    Prevent Pilling and Stretching

    • Avoid overloading the washer.
    • Wash delicate knits according to their care labels.
    • Avoid excessive friction between delicate and heavy garments.
    • Fold heavy sweaters instead of hanging them if hanging may stretch the shoulders.
    • Store clean clothing in a dry place.

    These habits are especially helpful for frequently worn clothing, school uniforms, workwear, and favorite everyday garments.

    9. How Should You Wash Towels and Bedding?

    How to wash towels and bedding infographic featuring fluffy towels, fresh bed sheets, washing tips, detergent guidance, and proper drying.
    Learn how to wash towels and bedding properly with practical tips for detergent use, washing temperatures, machine loading, and thorough drying. Build a simple laundry routine that helps keep towels absorbent and bed sheets fresh.

    Towels and bedding need regular washing because they collect body oils, sweat, dust, and everyday residue. The right frequency depends on use, household conditions, and individual hygiene needs. Use a suitable detergent, avoid overloading, and follow the fabric care instructions.

    Washing Towels Properly

    Towels are bulky and absorbent, so they need enough room to move freely in the machine.

    For better results:

    • Wash towels with compatible items.
    • Avoid excessive detergent and fabric softener.
    • Select an appropriate temperature according to the care label.
    • Dry towels thoroughly.
    • Clean the washer regularly to prevent residue buildup.

    Fabric softener can reduce towel absorbency when overused. If your towels no longer absorb water well, review your product use and washing routine.

    Washing Bed Sheets

    Sheets can collect sweat, body oils, dust, and skincare products. Wash them regularly and more frequently when they become visibly soiled or when household circumstances require it.

    Separate white sheets from colored bedding when necessary, and check the care label before selecting a hot wash.

    Should Towels and Sheets Be Washed Together?

    They can sometimes be washed together if their colors, fabrics, soil levels, and care requirements are compatible. However, separate loads may work better because towels are heavier and produce lint, while sheets can wrap around bulky items.

    The best choice depends on your machine’s capacity and the specific load.

    10. How Can You Dry Clothes Without Shrinking or Wrinkling Them?

    The safest drying method is the one recommended for the garment. Air-drying can help protect heat-sensitive clothing, while a tumble dryer offers convenience for suitable fabrics. Correct loading and timely removal can also reduce wrinkles and uneven drying.

    Tumble Drying vs. Air-Drying

    FactorTumble dryerAir-drying
    SpeedUsually fasterDepends on airflow and humidity
    EnergyRequires appliance energyGenerally uses less direct energy
    Fabric protectionExcess heat may cause damageOften suitable for delicate items
    ConvenienceUseful during wet weatherRequires drying space
    WrinklesCan reduce wrinkles on suitable fabricsGarments may need smoothing or ironing

    How to Air-Dry Clothes Properly

    1. Shake garments gently after washing.
    2. Smooth collars, seams, and hems.
    3. Leave enough space between garments.
    4. Use a well-ventilated drying area.
    5. Turn thicker items when needed to help them dry evenly.
    6. Check pockets, cuffs, and waistbands before folding.

    Indoor drying in a poorly ventilated room can increase humidity and contribute to condensation or mold. Improve airflow and use suitable ventilation or dehumidification when needed.

    How to Reduce Dryer Wrinkles

    Remove garments promptly after the cycle finishes. Shake them gently, smooth them by hand, and fold or hang them immediately.

    Avoid overloading the dryer because tightly packed garments may dry unevenly. Follow the manufacturer’s instructions for cleaning the lint filter and maintaining ventilation.

    Safety Tip: Clean the dryer lint filter according to the appliance instructions and keep the surrounding area clear. Proper maintenance helps the dryer operate safely and efficiently.

    11. How Can You Organize Laundry in a Small Home?

    An effective laundry system doesn’t require a separate laundry room. A few clearly defined places for dirty clothes, stain treatment, clean laundry, and supplies can make the task much easier in apartments and smaller homes.

    Create a Simple Laundry Station

    A compact laundry station can include:

    • A basket for everyday clothes.
    • A separate bag for delicate garments.
    • A small container for approved laundry supplies.
    • A designated place for stain treatment.
    • A folding drying rack.
    • A clean surface for folding and sorting.

    Store laundry products in their original containers and keep them securely away from children and pets.

    Use a Weekly Laundry Schedule

    A simple schedule can prevent clothing from accumulating until laundry becomes difficult to manage.

    DaySuggested laundry task
    MondayEveryday clothing
    WednesdayTowels and suitable household linens
    FridayDark clothing and workwear
    WeekendBedding, delicates, or remaining loads

    Treat this as a flexible example, not a strict rule. Adjust the schedule to your household size, work commitments, available machine capacity, and the amount of laundry you generate.

    Make Folding and Storage Easier

    Sort clean clothes by person, room, or destination before folding. Hang garments that wrinkle easily and fold items that fit neatly into drawers.

    If limited storage space makes laundry difficult to manage, explore Home Storage Solutions for practical ways to organize household belongings.

    12. How Can You Save Time, Water, and Energy on Laundry?

    Laundry efficiency infographic showing full washing machine loads, cold-water washing, measured detergent, air-drying clothes, and appliance maintenance.
    Discover practical ways to save time, water, and energy while doing laundry. From choosing suitable wash cycles to air-drying clothes and maintaining your washing machine, small changes can make your laundry routine more efficient.

    You can make laundry more efficient by washing appropriately sized loads, using suitable cycles, measuring detergent correctly, and avoiding unnecessary rewashing or drying. The aim is to save resources without compromising cleaning quality or appliance safety.

    Use the Washing Machine Efficiently

    Wash suitable full loads. Running full loads can reduce the number of cycles required, but never exceed the machine’s recommended capacity.

    Choose cold water when appropriate. Cold-water cycles can reduce the energy used to heat water, especially when paired with a detergent designed for cold washing.

    Avoid unnecessary extra rinses. Use additional rinsing when required by product instructions, fabric needs, or specific care considerations.

    Air-dry when practical. A clothesline or drying rack can reduce energy use when weather and ventilation permit.

    Maintain your appliances. Follow the manufacturer’s instructions for filters, detergent drawers, drum cleaning, and other routine maintenance.

    Should You Wash Clothes Less Frequently?

    Some garments, such as outer layers worn briefly, may not need washing after every use if they remain clean and odor-free. Underwear, socks, workout clothing, and garments exposed to substantial sweat or dirt generally need more frequent washing.

    Let the garment’s condition, hygiene needs, and care instructions guide your decision. Saving water should not mean wearing clothing that is dirty or unsuitable for reuse.

    13. What Laundry Mistakes Should Beginners Avoid?

    Most laundry problems arise when people use the same method for every garment. Understanding a few common mistakes can improve washing results, protect fabrics, and reduce unnecessary work.

    Mistake 1: Ignoring Care Labels

    Why it happens: People assume all garments made from similar materials can be washed alike.

    Why it matters: Dyes, finishes, linings, and elastic components may react differently to water and heat.

    How to avoid it: Read care labels before washing unfamiliar garments and follow special-care instructions.

    Mistake 2: Overloading the Machine

    Why it happens: Fewer loads seem faster and more economical.

    Why it matters: Garments may not move freely, and cleaning or rinsing can become less effective.

    How to avoid it: Follow the machine’s capacity guidelines and leave enough space for movement.

    Mistake 3: Using Too Much Fabric Softener

    Why it happens: People expect more product to produce softer clothes.

    Why it matters: Excess buildup can reduce towel absorbency or affect performance fabrics.

    How to avoid it: Follow the dosage instructions and skip softener where the manufacturer advises against it.

    Mistake 4: Drying Stained Clothes Immediately

    Why it happens: The washing cycle ends, so the garment is assumed to be clean.

    Why it matters: Heat can make some remaining stains more difficult to remove.

    How to avoid it: Inspect stained garments before using a heated dryer.

    Mistake 5: Leaving Wet Clothes in the Washer

    Why it happens: People become distracted by work, school, or other household tasks.

    Why it matters: Prolonged dampness can contribute to unpleasant odors.

    How to avoid it: Transfer the load promptly and follow the manufacturer’s ventilation instructions.

    Mistake 6: Mixing Cleaning Products

    Why it happens: People assume combining products will improve cleaning.

    Why it matters: Certain combinations can release dangerous gases or trigger harmful chemical reactions.

    How to avoid it: Never mix bleach with vinegar, ammonia, or other cleaning products.

    Mistake 7: Using One Cycle for Everything

    Why it happens: Selecting a familiar setting seems easier than reviewing options.

    Why it matters: Delicate garments may experience unnecessary agitation, while heavily soiled items may not receive the treatment they need.

    How to avoid it: Choose the cycle according to the garment label, soil level, and machine instructions.

    14. What Professional Laundry Habits Make the Biggest Difference?

    Good laundry results come from observing problems, using the correct treatment, and maintaining a consistent process. Rather than relying on complicated hacks, focus on identifying why a particular load isn’t cleaning, drying, or smelling as expected.

    Diagnose Problems Before Changing Products

    If clothes feel stiff, review detergent dosage, water hardness, and rinsing. If colors fade quickly, examine temperature and washing intensity. If laundry smells musty, check drying conditions, machine cleanliness, and storage.

    Change one factor at a time so you can identify what actually improves the result.

    Keep Essential Laundry Supplies Together

    Most households can handle routine washing with a modest collection of useful supplies:

    • A suitable everyday detergent.
    • A compatible stain remover.
    • Mesh laundry bags.
    • A soft brush for appropriate durable fabrics.
    • Clothes hangers or a drying rack.
    • A clean cloth for blotting spills.

    You don’t need a separate specialty product for every garment. Choose products according to your actual needs and read their labels carefully.

    Give Delicate Fabrics Special Attention

    Wool, silk, embellished clothing, and structured garments may need additional care. Follow their specific instructions rather than assuming that a gentle machine cycle is always safe.

    For garments marked dry-clean-only, consult a qualified cleaner when appropriate.

    Create a Routine You Can Maintain

    A laundry routine should fit your household rather than create more work. If five separate baskets are difficult to manage, begin with lights, darks, and special-care garments.

    Add extra categories only when they solve a genuine problem. A simple system that you follow consistently is more useful than a complicated system you abandon after a few days.

    15. How Can You Build a Better Weekly Laundry Routine?

    Weekly laundry routine infographic showing a laundry schedule, sorted clothes, folded towels, stain treatment, and organized clothing storage.
    Build a practical weekly laundry routine with simple habits for sorting clothes, treating stains, washing loads, folding garments, and organizing supplies. A flexible schedule helps keep laundry manageable and your home organized.

    A weekly laundry routine works best when it reflects your household’s actual clothing needs, available time, and machine capacity. Planning a few regular washing sessions helps prevent overflowing baskets and makes it easier to keep clean clothing available.

    Create a Practical Weekly Plan

    Start by estimating how much laundry your household produces during an ordinary week.

    Then decide which categories need separate attention, such as workwear, towels, bedding, or delicate garments. Assign these categories to convenient days rather than forcing every load into a rigid schedule.

    A useful routine might include:

    • Checking laundry baskets every evening.
    • Treating stains as soon as practical.
    • Washing everyday clothes on designated days.
    • Cleaning the washer when required.
    • Folding and putting away dry clothes promptly.
    • Reviewing detergent and supply levels once a week.

    Make the Routine Easier for Everyone

    If several people share the household, give each person a clear responsibility where practical. One person might sort clothing, another might fold clean laundry, and another might manage household linens.

    For families or shared homes, Smart Home Organization Tips can help make everyday responsibilities more manageable.

    You can also connect laundry habits with broader household routines. For example, organizing bedroom storage makes it easier to put away clean clothes, while a tidy kitchen or living room can provide additional space for folding when necessary.

    Explore Bedroom Organization Tips for practical storage ideas and Living Room Home Tips for ways to maintain comfortable, organized shared spaces.

    16. How Do Laundry Habits Fit Into a Cleaner, More Organized Home?

    Laundry is easier to manage when it becomes part of a broader home-care system. Clean clothes need a place to go, laundry supplies need safe storage, and drying areas need enough ventilation to prevent moisture problems.

    Reduce Clutter Around the Laundry Area

    Remove empty product packaging, keep frequently used supplies accessible, and return equipment to its designated place after each load.

    Avoid storing items on top of the washing machine if vibration could make them fall. Keep walkways clear, especially around wet floors and drying racks.

    Connect Laundry With Decluttering

    Clothing that no longer fits your needs can take up valuable storage space and make laundry harder to organize. Review your wardrobe occasionally and decide which garments should remain in regular use.

    Keep donation or recycling decisions separate from the washing process so that clothing needing special treatment doesn’t get mixed with everyday laundry.

    For a more systematic approach, see Home Decluttering Tips.

    Maintain the Laundry Space

    Wipe up spills, clean lint and residue from the appropriate areas, and follow the manufacturer’s appliance maintenance instructions.

    For broader household upkeep, Basic Home Maintenance Tips can help you develop a practical routine for caring for the home and its essential equipment.

    The aim is not to keep every surface perfect. It’s to make the laundry area safe, functional, and easy to maintain.

    What Are the Best Laundry Tips and Tricks for Cleaner, Fresher Clothes?

    The best laundry tips and tricks start with understanding how to wash different fabrics correctly. Sorting clothes by color, checking care labels, choosing the right water temperature, and using the recommended amount of detergent can significantly improve washing results. Clothes should also be removed from the washing machine promptly and dried completely to prevent musty odors. Instead of relying on expensive products, focus on consistent washing habits that protect fabric quality and remove everyday dirt effectively.
    Practical tips to follow:
    Separate whites, darks, and bright-colored garments before washing.
    Pretreat stains with a suitable stain remover instead of relying entirely on the washing cycle.
    Avoid overloading the washing machine so clothes can move freely.
    Use an appropriate detergent and follow its dosage instructions.
    Store clothes only after they are completely dry.

    How Can I Remove Stubborn Stains From Clothes Without Damaging the Fabric?

    Removing stubborn stains requires the right treatment for the type of stain and fabric. Coffee, grease, makeup, mud, and sweat marks respond differently to cleaning methods, so applying the same product to every stain may not produce good results. Treat stains as soon as practical, remove excess material gently, and check the garment’s care label before using any cleaning product. Avoid putting stained clothes in a heated dryer until you have checked whether the mark has disappeared.
    Effective stain-removal practices:
    Use cool water first for blood stains and other stains that may be affected by heat.
    Blot liquid stains instead of rubbing them aggressively.
    Apply a compatible stain remover according to the product instructions.
    Test unfamiliar treatments on an inconspicuous area when appropriate.
    Repeat a suitable treatment if the stain remains, rather than increasing the water temperature without checking the fabric requirements.
    Never mix bleach with vinegar, ammonia, or other cleaning products, as dangerous chemical reactions can occur.

    Why Do Clothes Smell Bad After Washing, and How Can I Keep Laundry Fresh?

    Clothes can develop unpleasant odors after washing because of detergent buildup, an unclean washing machine, insufficient drying, or leaving wet garments in a closed drum for too long. Adding more detergent or fabric fragrance may only mask the problem rather than solve it. The most effective approach is to identify the cause, maintain the washing machine, use the correct detergent dosage, and ensure that every garment dries completely before storage.
    Ways to prevent laundry odors:
    Remove wet clothes promptly after the washing cycle finishes.
    Clean the washing machine’s drum, drawer, and door seal according to the manufacturer’s instructions.
    Avoid using excessive detergent or fabric softener.
    Leave the machine ventilated between loads if the manufacturer permits it.
    Dry clothes in a well-ventilated area and avoid storing damp garments.
    If musty smells continue despite these steps, check the machine’s maintenance instructions and consider whether drainage or other appliance problems need attention.

    How Can I Make My Clothes Last Longer and Prevent Fading or Shrinking?

    Clothing lasts longer when it is washed, dried, and stored according to its fabric requirements. Excessive heat, aggressive washing cycles, repeated friction, and unsuitable cleaning products can contribute to fading, shrinkage, stretching, and premature wear. Turning suitable dark garments inside out, selecting the correct cycle, and avoiding unnecessary high-temperature drying can help preserve their appearance. Delicate fabrics such as wool and silk may require special treatment, so always follow their individual care labels.
    Habits that protect clothing:
    Wash dark and brightly colored garments using suitable settings.
    Turn printed shirts and appropriate dark clothing inside out.
    Use mesh laundry bags for suitable delicate garments.
    Avoid overloading the washer and dryer.
    Fold heavy knitwear when hanging could stretch its shape.
    Follow the recommended drying temperature and method.
    These practices are especially useful for frequently worn clothes, workwear, school uniforms, and favorite garments that you want to keep in good condition.

    What Is the Most Efficient Way to Organize Laundry and Save Time at Home?

    An efficient laundry routine combines a simple sorting system, regular washing days, organized supplies, and a practical method for folding and storing clean clothes. Without a routine, laundry can accumulate, stain treatment may be forgotten, and clean garments may remain in baskets for days. You can make the process easier by separating everyday clothing from delicate items, keeping essential products together, and assigning manageable laundry tasks to specific days.
    Simple ways to improve laundry organization:
    Use separate baskets for everyday clothes and special-care garments.
    Establish a flexible weekly schedule for clothing, towels, and bedding.
    Keep detergent, stain remover, and mesh bags in one designated location.
    Fold or hang clothes soon after drying to reduce wrinkles.
    Put clean garments away promptly to prevent clutter.
    Maintain a clean, dry, and well-ventilated laundry area.
    The most effective system is one that fits your household size, available storage, and daily schedule. A consistent routine helps reduce unnecessary work and makes laundry easier to manage over time.

    Conclusion: Make Laundry Easier With Practical Laundry Tips and Tricks

    Following the right laundry tips and tricks can make everyday clothing care easier, more efficient, and less stressful. From sorting clothes and choosing the correct washing temperature to treating stains promptly and drying garments properly, small changes in your routine can help keep fabrics clean, fresh, and comfortable for longer. A consistent approach also reduces common problems such as fading, shrinking, unpleasant odors, and unnecessary wear.

    The key to successful laundry is understanding your fabrics and building habits that suit your household. Use the recommended amount of detergent, avoid overcrowding the washing machine, check care labels, and make sure clothes are completely dry before putting them away. Keeping laundry supplies organized and following a simple weekly schedule can also save time and prevent laundry from becoming an overwhelming chore.

    Remember that effective laundry care does not require expensive products or complicated methods. Simple, consistent practices often deliver the best results while helping you protect your favorite clothes and manage household tasks more confidently. Start with one or two improvements, maintain them regularly, and gradually create a laundry routine that works for your home. With these practical laundry tips and tricks, you can enjoy cleaner clothes, fresher fabrics, better organization, and a more comfortable everyday living environment.

  • Basic Home Maintenance Tips

    Basic Home Maintenance Tips

    Introduction

    Basic Home Maintenance Tips | A home can look perfectly fine on the surface while small problems develop behind cabinets, beneath sinks, around windows, or inside everyday appliances. A loose fitting, a minor water leak, or a damaged seal may seem unimportant at first. However, leaving these issues unattended can lead to unnecessary repair costs, reduced comfort, and avoidable damage to your property.

    Following practical Basic Home Maintenance Tips helps you recognize these problems early and keep your home safe, functional, and comfortable. You don’t need professional repair skills for every task. Many routine maintenance activities involve simple inspections, appropriate cleaning, and knowing when to ask a qualified professional for help.

    Regular maintenance also makes it easier to understand your home’s condition, plan future expenses, and avoid the stress of dealing with unexpected breakdowns. Instead of waiting for something to stop working, you can develop a routine that keeps essential household systems in good condition throughout the year.

    In this comprehensive guide, you’ll learn how to inspect your home, maintain plumbing and appliances, identify warning signs, organize a realistic maintenance schedule, avoid common mistakes, and decide which jobs are suitable for DIY care. You’ll also find a practical checklist that you can adapt to your property.

    For more practical ideas about creating a comfortable and well-managed living environment, explore Heartomenal.

    1. What Is Basic Home Maintenance?

    Basic home maintenance is the regular process of inspecting, cleaning, monitoring, and caring for the different parts of a property to keep them working properly. It includes checking visible plumbing, maintaining household appliances, monitoring walls and ceilings, inspecting doors and windows, and addressing small defects before they become more serious.

    Unlike renovation, which changes or upgrades a property, maintenance focuses on preserving its existing condition.

    For example, replacing damaged weatherstripping around a window is maintenance because it helps the window perform as intended. Installing an entirely new window system as part of a larger redesign is generally considered an improvement.

    Why does routine maintenance matter?

    A home contains many connected systems. Water, electricity, ventilation, drainage, appliances, and structural components all contribute to everyday comfort and safety.

    When one component develops a problem, other areas may be affected. A leaking pipe can damage a cabinet, while poor ventilation can contribute to persistent condensation and deterioration of interior finishes.

    Routine maintenance helps homeowners and renters identify developing problems and decide what action is appropriate.

    The main benefits include:

    • Early problem detection: Regular checks help reveal leaks, damaged seals, and unusual equipment behavior.
    • Better household safety: Inspections can identify damaged cords, loose handrails, and malfunctioning safety devices.
    • Reduced repair costs: Correcting some minor problems early may prevent more extensive damage.
    • Improved comfort: Properly maintained fixtures, doors, windows, and appliances are easier to use.
    • Better planning: Maintenance records help you anticipate servicing requirements and future replacements.
    • Protection of property condition: Preventive care helps preserve finishes, fixtures, and building materials.

    The goal isn’t to make your home completely maintenance-free. Every property experiences normal wear and tear. The goal is to manage that wear before it creates avoidable difficulties.

    2. Which Home Maintenance Tasks Should You Prioritize?

    When starting a home maintenance routine, prioritize safety, active leaks, moisture problems, and defects that could damage the property. Cosmetic issues, such as faded paint or minor scratches, generally come later unless they conceal a more serious problem.

    A priority-based approach prevents you from spending time on low-impact jobs while overlooking important warning signs.

    Start with these essential checks

    1. Look for water leaks. Check visible pipes, faucets, toilets, and the areas around water-using appliances. Investigate unexplained dampness promptly.

    2. Check safety equipment. Test smoke alarms and carbon monoxide alarms where appropriate, following the manufacturer’s instructions.

    3. Inspect accessible electrical equipment. Look for damaged plugs, frayed cords, scorch marks, or other visible warning signs. Leave electrical repairs to qualified professionals.

    4. Monitor walls and ceilings. New stains, persistent damp patches, and unusual cracks may indicate problems that need further investigation.

    5. Check doors and windows. Make sure they open, close, and secure properly. Look for deteriorated seals and visible damage.

    6. Review appliance condition. Pay attention to unfamiliar sounds, unusual smells, leaks, and changes in normal performance.

    Use a practical maintenance priority table

    PriorityTypical examplesRecommended response
    Urgent safety concernSuspected gas leak, exposed live wiring, unstable ceilingKeep people away and contact the appropriate emergency or qualified service
    High priorityActive water leak, significant roof leak, damaged safety alarmArrange prompt assessment and corrective action
    Routine maintenanceDirty filter, deteriorated sealant, loose suitable fixtureSchedule the task according to its condition and instructions
    Cosmetic maintenanceMinor paint scuffs, decorative wear, small surface scratchesAddress when practical, after checking that no underlying issue exists

    Not every defect fits neatly into one category. A small stain, for example, may be cosmetic if its cause has been resolved, but it may require urgent attention if it continues to spread because of an active leak.

    Pro Tip: When you discover a problem, record what you observed and when it happened. A dated photograph stored in your private maintenance records can help you compare changes over time without turning the issue into a guessing game.

    3. How Can You Prevent Plumbing Problems?

    How to prevent plumbing problems with under-sink leak inspections, clear drains, toilet checks, and safe water shutoff maintenance.
    Learn how to prevent common plumbing problems by inspecting visible pipe connections, keeping drains clear, checking toilets, and knowing where to find the main water shutoff.

    Plumbing maintenance involves monitoring visible pipes, faucets, drains, toilets, and water connections for leaks, blockages, and unusual changes.

    Water damage can affect several materials at once. Even when a leak appears small, continued moisture can damage cabinetry, flooring, paint, and other nearby surfaces.

    Inspect pipes and connections beneath sinks

    Check the cabinets beneath kitchen and bathroom sinks periodically. Look for damp patches, water marks, corrosion, loose visible connections, and unpleasant odors.

    Run the faucet briefly while observing accessible plumbing. If moisture appears, try to identify where it originates without dismantling unfamiliar fittings.

    A drip may come from a supply connection, a drain joint, or the faucet itself. Knowing the general location helps you explain the problem accurately when arranging a repair.

    If a significant leak develops, use the appropriate shutoff valve only if you can access and operate it safely. Do not attempt repairs on pressurized or unfamiliar plumbing systems.

    Keep drains clear

    Kitchen and bathroom drains can become restricted by grease, food particles, hair, soap residue, and other debris.

    Reduce the risk of blockages by following these habits:

    • Use suitable strainers where practical.
    • Remove visible debris from accessible drain covers.
    • Avoid pouring cooking grease into the kitchen sink.
    • Clean sink areas regularly to prevent residue accumulation.
    • Investigate recurring slow drainage rather than repeatedly ignoring it.

    Avoid mixing drain-cleaning chemicals. Certain combinations can release hazardous fumes or cause dangerous reactions. If a blockage persists, contact a qualified plumber.

    Check toilets for hidden problems

    A toilet that runs continuously may waste water and indicate a faulty internal component. Water around the base, recurring drainage problems, or persistent sewage odors can signal a more serious issue.

    Listen for unusual sounds after flushing and observe whether the toilet returns to its normal condition.

    Do not assume that moisture around the base is simply spilled water. If it returns or is accompanied by an odor, arrange an appropriate inspection.

    Know the location of your main water shutoff

    Every household should know where its main water shutoff is located and how to access it safely.

    This knowledge can help limit damage if a major leak occurs. If the valve is difficult to operate, inaccessible, or not functioning correctly, ask a plumber to assess it before an emergency happens.

    Common Mistake: Placing a container beneath a leaking pipe and treating it as a permanent solution. A container may temporarily collect dripping water, but it doesn’t correct the source of the leak.

    4. How Should You Maintain Kitchen Fixtures and Appliances?

    The kitchen combines plumbing, heat, electrical equipment, food preparation, and frequent cleaning. Keeping its fixtures and appliances in good condition helps prevent everyday problems and supports a more functional household.

    Maintain refrigerator seals

    A refrigerator door should close securely. Dirt, cracks, or damaged sections in the door gasket can interfere with the seal.

    Inspect the gasket and clean it using a method approved by the manufacturer. Avoid harsh products that could damage the material.

    If the seal is torn or the appliance cannot maintain its expected temperature, arrange appropriate servicing.

    Clean filters according to instructions

    Range hoods, dishwashers, refrigerators, and other appliances may have filters that require cleaning or replacement.

    The correct maintenance interval depends on the model, the filter type, and how frequently the appliance is used.

    Before cleaning, identify which parts are designed for homeowner maintenance. Disconnect the appliance from power when the manufacturer’s instructions require it, and never remove electrical panels or work on energized components.

    Check the area beneath the kitchen sink

    Kitchen cabinets often conceal minor plumbing leaks because water may collect behind stored items.

    Keep the area reasonably organized so you can see the pipes and connections. Check for dampness, swelling, peeling cabinet surfaces, or unusual odors.

    If you discover moisture, remove nearby stored items where safe and investigate the source promptly.

    Inspect faucets and sink sealant

    Dripping faucets may waste water, while deteriorated sealant around a sink can allow moisture to enter the countertop or cabinet below.

    Clean faucet aerators when necessary, following the manufacturer’s guidance. Inspect the seal around the sink for gaps or deterioration.

    Replace unsuitable or damaged sealant with a product intended for the surface and wet conditions involved. The underlying area should be prepared properly before application.

    Keep cooking areas safe

    Remove grease and food residue from accessible surfaces using suitable cleaning products. Keep flammable materials away from cooking equipment and avoid leaving cooking appliances unattended.

    If you smell gas, do not operate electrical switches or create flames. Leave the affected area and contact the relevant emergency service or gas provider from a safe location.

    For help making your kitchen easier to manage, visit Kitchen Organization Tips.

    5. What Bathroom Maintenance Prevents Moisture Damage?

    Bathrooms need particular attention because frequent water use, warm air, and limited ventilation can create conditions that damage surfaces.

    The most useful maintenance habits involve checking sealant, monitoring ventilation, inspecting plumbing, and responding to persistent moisture.

    Inspect shower and bathtub sealant

    Look around the edges of bathtubs, shower trays, sinks, and other wet areas.

    Warning signs include cracked sealant, missing sections, peeling material, or water escaping beyond the intended wet area.

    Damaged sealant should be replaced using a product suitable for the surface and location. Follow the product instructions for removing old material, preparing the surface, and allowing the new sealant to cure.

    Do not simply apply a fresh layer over deteriorated material without preparing the joint properly.

    Control bathroom humidity

    Use an exhaust fan where available and follow its operating instructions. Appropriate window ventilation can also help remove moisture.

    Persistent condensation, musty odors, and recurring mold patches may indicate inadequate ventilation or an unresolved moisture source.

    Cleaning visible surface mold does not correct a leaking pipe or persistent condensation problem. If the affected area is extensive, keeps returning, or involves concealed materials, obtain professional advice.

    Check fixtures and fittings

    Inspect towel rails, cabinet handles, toilet fittings, and other frequently used fixtures for looseness or damage.

    A fitting that moves repeatedly may have a damaged mounting point. Tightening it without addressing the underlying problem may not provide a lasting solution.

    Be especially careful when drilling or fastening items near concealed plumbing or electrical services.

    Look for flooring and wall damage

    Soft flooring, swollen door frames, loose tiles, and persistent discoloration can indicate moisture problems.

    Avoid covering these warning signs with fresh paint or decorative materials. Identify the cause first and repair damaged components appropriately.

    6. How Can You Maintain Walls, Ceilings, and Floors?

    Wall, ceiling and floor maintenance tips showing crack inspection, ceiling water stains, floor protection, and interior paint care.
    Keep your home looking its best with practical wall, ceiling, and floor maintenance tips, from monitoring cracks and investigating stains to protecting flooring and refreshing interior finishes.

    Walls, ceilings, and floors experience regular contact, cleaning, temperature changes, and general wear. Their condition can also reveal problems originating elsewhere in the property.

    Monitor cracks in walls

    Small surface cracks may result from normal material movement or changes in paint and plaster. However, cracks that grow quickly, appear alongside other movement, or affect structural components require professional assessment.

    Pay attention to changes rather than judging a crack by appearance alone.

    If doors suddenly become difficult to close, floors appear uneven, or significant cracks develop, seek an appropriate inspection.

    Investigate ceiling stains

    Water stains, bubbling paint, and discolored plaster can indicate a roof leak, plumbing problem, or condensation.

    Check whether the affected area changes after rainfall or water use in an upstairs bathroom. This information may help a professional identify the likely source.

    Never ignore a sagging or bulging ceiling. Keep people away from the area and arrange urgent professional assistance because the material may be unstable.

    Protect floors from water and scratches

    Different flooring materials require different cleaning methods.

    Use appropriate products, avoid excessive water on moisture-sensitive surfaces, and clean spills promptly. Furniture pads can reduce scratching, while suitable entrance mats can help limit the dirt and grit brought indoors.

    Inspect grout and sealant where applicable. Deterioration near wet areas may allow water to reach underlying materials.

    Maintain paint and interior finishes

    Paint can improve appearance and protect suitable surfaces, but it shouldn’t be used to conceal unresolved dampness.

    Before repainting a damaged area, identify the source of the problem, address it, and allow affected materials to dry appropriately.

    Choose products suited to the surface and follow preparation instructions carefully.

    For practical ideas about maintaining comfortable shared spaces, explore Living Room Home Tips.

    7. What Electrical Checks Can You Safely Perform?

    Homeowners can perform visual checks and maintain suitable safety devices, but electrical wiring, damaged outlets, electrical panels, and uncertain faults require qualified professionals.

    Electrical problems can create serious hazards even when the visible damage appears small.

    Inspect cords and plugs

    Look for fraying, cracked insulation, damaged plugs, scorch marks, or unusual heat.

    Stop using damaged equipment and seek appropriate assistance. Never touch exposed wiring or attempt to repair a live outlet.

    Keep electrical cords away from water, hot surfaces, and areas where furniture may crush them.

    Test smoke and carbon monoxide alarms

    Test alarms according to the manufacturer’s instructions and replace batteries or units when required.

    Where carbon monoxide alarms are appropriate, ensure they are installed and maintained according to local requirements and manufacturer guidance.

    Never assume an alarm is functioning simply because it looks intact.

    Avoid overloading sockets

    Avoid connecting too many high-demand devices to one outlet or relying on multiple adaptors to expand capacity.

    Use extension leads only as intended and keep them in good condition. Do not conceal damaged cords beneath rugs.

    Respond correctly to electrical warning signs

    Burning smells, buzzing outlets, repeated circuit-breaker trips, and scorch marks require attention.

    Do not repeatedly reset a tripping breaker without investigating the cause. A qualified electrician can determine whether the issue involves the circuit, connected equipment, or another fault.

    Expert Tip: Include electrical safety in your routine visual checks, but do not remove covers or dismantle electrical components as part of ordinary DIY maintenance.

    8. How Do You Maintain Heating, Cooling, and Ventilation?

    Heating and cooling equipment requires care suited to its model, usage, and environment. Regular maintenance can help identify restricted airflow, unusual sounds, and performance changes.

    Clean or replace filters

    Air conditioners and other ventilation systems may use filters that collect dust and particles.

    Check the owner’s manual for the correct cleaning method and replacement interval. Conditions such as heavy use, dust, and indoor activities may affect how frequently maintenance is needed.

    A clogged filter can restrict airflow and reduce system performance.

    Keep vents unobstructed

    Avoid placing furniture, curtains, or stored items directly over supply vents or return-air grilles.

    Clean accessible surfaces using a suitable method without damaging the vent or pushing debris into the system.

    If airflow remains weak despite an appropriate filter and unobstructed vents, arrange professional assessment.

    Watch for unusual equipment behavior

    Contact a qualified technician if equipment develops unfamiliar noises, persistent odors, recurring shutdowns, unusual leaks, or unexplained performance changes.

    Fuel-burning appliances require appropriate servicing and safety inspections according to manufacturer recommendations and local requirements.

    Do not attempt to dismantle gas equipment or service refrigerant systems without the necessary qualifications and authorization.

    9. What Outdoor Maintenance Protects Your Property?

    Exterior maintenance helps protect the building from rain, wind, temperature changes, and drainage problems.

    Even if you don’t have a large garden, inspecting accessible outdoor areas can help identify issues that affect the property’s condition.

    Inspect visible roof conditions

    From a safe position on the ground, look for displaced roofing materials, visible damage, sagging gutters, and debris.

    Avoid climbing onto the roof or using unstable ladders. Arrange an inspection by a qualified professional if you suspect roof damage.

    Maintain gutters and downpipes

    Blocked gutters can prevent rainwater from draining properly and may contribute to overflow near walls or entrances.

    Inspect accessible areas and arrange safe cleaning when necessary. Pay attention to whether downpipes discharge water appropriately and whether the surrounding ground becomes unusually wet.

    Check exterior drainage

    After rainfall, observe where water collects.

    Persistent pooling near the building may indicate blocked drains, poor grading, or another drainage issue. Clear accessible surface grates and seek professional advice if the problem continues.

    Do not make drainage changes that direct water onto neighboring property or conflict with local requirements.

    Inspect doors and windows

    Look for damaged weatherstripping, cracked glass, deteriorated sealant, loose handles, and sticking frames.

    Address problems that affect security, weather resistance, or safe operation.

    If a window is cracked, unstable, or difficult to secure, prioritize safety rather than postponing the repair for cosmetic reasons.

    10. How Should You Adjust Home Maintenance to the Seasons?

    Seasonal home maintenance tips featuring rainy-season roof checks, summer cooling maintenance, cold-weather pipe protection, and post-storm inspections.
    Prepare your home for changing weather with seasonal maintenance tasks that help identify roof damage, maintain cooling systems, protect plumbing, and inspect your property after severe weather.

    A seasonal maintenance routine helps you prepare for changing weather rather than responding only after damage occurs.

    The exact tasks depend on your location, climate, building type, and equipment.

    Before the rainy season

    • Inspect visible roof conditions from the ground.
    • Check gutters and accessible drainage points.
    • Look for gaps in suitable exterior sealant.
    • Check for damp patches around windows and ceilings.
    • Arrange repairs for known roof or plumbing problems.

    During hot weather

    • Maintain cooling filters as directed.
    • Keep ventilation openings unobstructed.
    • Monitor unusual appliance behavior.
    • Check exterior surfaces for visible deterioration.
    • Look for signs of heat affecting equipment or stored materials.

    Before cold weather

    In places where temperatures can fall below freezing, inspect exposed plumbing and follow appropriate pipe-protection guidance.

    Check heating equipment servicing requirements and ensure relevant safety alarms function properly.

    In warmer climates, use the same seasonal review to prepare for local rainfall, humidity, dust, or other conditions rather than following a cold-weather checklist that does not apply.

    After severe weather

    Inspect accessible areas for damaged seals, fallen debris, blocked drainage, water entry, and visible exterior damage.

    Do not approach fallen electrical wires, enter flooded areas containing electrical equipment, or climb onto a damaged roof.

    Arrange professional inspections when the condition of the property is uncertain.

    11. Which Basic Tools Should Every Homeowner Have?

    A small collection of suitable tools can make ordinary maintenance easier. You don’t need to purchase specialist equipment before knowing which tasks your home actually requires.

    Tool or supplyUseful purpose
    Tape measureChecking dimensions and planning suitable repairs
    Screwdriver setTightening appropriate loose screws
    FlashlightInspecting dark cabinets and accessible corners
    Cleaning clothsWiping surfaces and checking for moisture
    Small bucketTemporarily collecting water from a minor leak
    Work glovesProtecting hands during appropriate cleaning tasks
    Safety glassesProtecting eyes during suitable maintenance activities
    Suitable cleaning suppliesMaintaining surfaces without damaging finishes
    Maintenance notebookRecording problems, inspections, and completed work
    Caulk suitable for the applicationRepairing appropriate joints after correct preparation

    Store tools safely and keep hazardous supplies away from children.

    Before purchasing anything, consider the tasks you can perform safely. A basic toolkit is not a substitute for professional training or equipment required for electrical, gas, structural, or pressurized plumbing work.

    12. How Can You Build a Realistic Home Maintenance Schedule?

    A useful maintenance schedule is simple enough to follow consistently. Divide tasks by frequency, combine appropriate checks with existing routines, and adjust the schedule when your home needs additional attention.

    Weekly maintenance

    Spend a few minutes observing the condition of high-use areas.

    • Look beneath sinks for visible moisture.
    • Notice unfamiliar sounds or odors.
    • Clean kitchen and bathroom surfaces.
    • Remove debris from accessible drain strainers.
    • Check that entrances and walkways remain clear.

    Monthly maintenance

    Set aside time for more deliberate checks.

    • Test safety alarms according to their instructions.
    • Inspect visible plumbing connections.
    • Check accessible electrical cords and plugs.
    • Look for ceiling stains and persistent damp patches.
    • Review appliance filter requirements.
    • Record repairs that need attention.

    Seasonal maintenance

    Review weather-related and equipment-specific needs.

    • Inspect accessible exterior areas.
    • Check door and window seals.
    • Review drainage performance.
    • Arrange recommended equipment servicing.
    • Look for visible pest activity.
    • Reassess repairs that have been postponed.

    Annual maintenance

    Arrange appropriate professional inspections and review the condition of major systems.

    Depending on the property, this may include roof assessments, servicing fuel-burning appliances, checking older plumbing, or obtaining professional advice about electrical systems.

    Use the annual review to organize warranties, service records, repair invoices, and future replacement plans.

    Make the schedule work for your household

    Not every property needs the same routine. A newer apartment may have fewer exterior responsibilities than an older detached house.

    Start with essential safety and water-damage checks. Add tasks based on actual equipment, local conditions, and manufacturer instructions.

    The best schedule is one you can maintain throughout the year.

    13. What Home Maintenance Mistakes Should You Avoid?

    Many avoidable repair problems begin with overlooked warning signs, unsuitable materials, or attempts to fix unfamiliar systems without adequate knowledge.

    Ignoring a small leak

    Why it happens: The leak appears manageable or occurs in an area that is rarely used.

    Why it matters: Continued moisture can damage nearby materials and encourage mold growth.

    Better approach: Investigate the source promptly and arrange a suitable repair.

    Painting over dampness

    Why it happens: Repainting offers a quick way to improve appearance.

    Why it matters: Moisture may continue damaging the underlying material.

    Better approach: Identify the moisture source, correct it, and prepare the surface properly before repainting.

    Skipping appliance instructions

    Why it happens: People assume cleaning and servicing requirements are similar across models.

    Why it matters: Incorrect methods can damage components or reduce equipment performance.

    Better approach: Check the manual for the exact appliance and follow its instructions.

    Attempting hazardous DIY repairs

    Why it happens: A repair may look straightforward in a video or online guide.

    Why it matters: Incorrect work on electrical, gas, structural, or pressurized systems can cause serious harm.

    Better approach: Limit DIY work to tasks you understand and can perform safely.

    Using unsuitable cleaning products

    Why it happens: A product works well on one surface and appears suitable for another.

    Why it matters: Harsh chemicals can damage sealant, finishes, and appliance components.

    Better approach: Read product labels and never mix cleaning chemicals.

    Forgetting maintenance records

    Why it happens: Small jobs seem easy to remember.

    Why it matters: Repeated faults and missed servicing become harder to track.

    Better approach: Record dates, observations, repairs, and follow-up recommendations.

    Postponing recurring problems

    Why it happens: A temporary fix appears to solve the issue.

    Why it matters: Repeated leaks, drainage problems, or equipment faults may indicate an unresolved cause.

    Better approach: Investigate recurring symptoms rather than repeatedly treating them as isolated incidents.

    14. How Can You Keep Maintenance Manageable in a Small Home?

    Seasonal home maintenance tips featuring rainy-season roof checks, summer cooling maintenance, cold-weather pipe protection, and post-storm inspections.
    Prepare your home for changing weather with seasonal maintenance tasks that help identify roof damage, maintain cooling systems, protect plumbing, and inspect your property after severe weather.

    A smaller home may have fewer rooms and fixtures, but compact plumbing spaces, limited storage, and restricted ventilation can still create maintenance challenges.

    The most effective strategy is to make routine checks part of activities you already perform.

    Keep important areas accessible

    Avoid filling cabinets beneath sinks so completely that you cannot see the pipes. Leave suitable access around appliances that need periodic cleaning or servicing.

    Do not block ventilation openings or store items against surfaces that need regular inspection.

    Combine inspection with cleaning

    While cleaning the bathroom, look for deteriorating sealant and recurring moisture.

    When cleaning the kitchen, check the sink cabinet and observe whether faucets or drains are behaving normally.

    When tidying living areas, notice loose fixtures, damaged cords, or unusual marks on walls.

    These small observations help identify problems without requiring a separate inspection every time.

    Avoid unnecessary storage pressure

    Overfilled cupboards can make it difficult to notice leaks, retrieve equipment manuals, or access shutoff valves.

    Keep essential household supplies organized and remove items that prevent you from reaching maintenance points safely.

    For additional ideas about making compact rooms more functional, explore Small Space Home Tips.

    You can also use Home Storage Solutions to improve how household supplies and frequently used items are arranged.

    15. How Do Cleaning and Organization Support Home Maintenance?

    Cleaning, organization, and maintenance are related, but they solve different problems.

    Cleaning removes dirt and residue. Organization makes household items easier to access. Maintenance checks whether fixtures, systems, and building materials remain in suitable condition.

    Combining these activities helps you notice problems that might otherwise remain hidden.

    Create a practical household routine

    Daily: Clean spills, keep walkways clear, and notice unusual smells or sounds.

    Weekly: Clean frequently used areas and check accessible plumbing for visible leaks.

    Monthly: Inspect suitable household fixtures, test safety alarms, and review appliance requirements.

    Seasonally: Check accessible exterior areas, drainage, and weather-related maintenance needs.

    Annually: Review servicing records and plan necessary professional inspections.

    Keep the routine realistic. If a cleaning session reveals a repair issue, record it and determine its urgency instead of turning every task into a major project.

    Useful resources include Easy Home Cleaning Tips, Bedroom Organization Tips, and Home Decluttering Tips.

    These guides can help you organize everyday household responsibilities while keeping the central focus on maintaining the property’s condition.

    16. What Should You Know About Maintenance Costs and Repair Planning?

    Home maintenance costs vary according to property size, age, location, materials, equipment, and the condition of existing systems. A fixed budget will not suit every household, so begin by identifying your property’s likely needs.

    Separate routine costs from unexpected repairs

    Routine expenses may include recommended servicing, suitable cleaning supplies, replacement filters, and minor maintenance materials.

    Unexpected expenses may involve plumbing failures, roof damage, appliance breakdowns, or deteriorating building components.

    Review your records to identify recurring costs and likely future needs.

    Compare repair estimates carefully

    When professional work is necessary, request a clear description of the problem, the proposed repair, the materials involved, and any applicable warranty.

    For larger or less urgent projects, comparing itemized estimates can help you understand differences in scope and pricing.

    Do not select a contractor solely because the initial quote is the lowest. Consider qualifications, relevant experience, insurance where applicable, and the clarity of the proposed work.

    Address underlying causes

    Repeatedly paying for the same temporary repair can become more expensive than investigating the original cause.

    For example, recurring dampness may need a professional assessment of plumbing, exterior water entry, or ventilation rather than another layer of paint.

    A maintenance record helps you identify these patterns and make better decisions about future spending.

    17. Expert Advice for Better Home Maintenance

    Expert home maintenance tips featuring essential system checks, careful repair planning, suitable maintenance supplies, issue tracking, and DIY safety.
    Follow expert home maintenance advice to identify problems early, choose suitable materials, keep reliable maintenance records, and recognize when professional help is needed.

    Good maintenance depends less on owning expensive tools and more on careful observation, consistent records, and sensible decisions.

    Learn your home’s essential systems

    Know the location of the main water shutoff and understand which safety devices and appliances your home contains.

    Keep relevant manuals and professional service information accessible. This knowledge makes it easier to describe a problem accurately when requesting help.

    Repair causes instead of symptoms

    A stain, odor, crack, or recurring blockage is a sign to investigate.

    Determine whether the issue is cosmetic, related to normal wear, or evidence of a developing fault. Where the cause is uncertain, seek professional assessment rather than guessing.

    Choose maintenance materials carefully

    Sealants, cleaning products, replacement filters, and other supplies must be suitable for their intended use.

    Check compatibility with the relevant surface or appliance. Follow preparation, ventilation, curing, and safety instructions.

    Keep a record of recurring issues

    Record when a problem first appeared, what conditions seem to affect it, and what action was taken.

    For example, noting that a damp patch becomes visible after rainfall can provide useful information when arranging a roof or exterior inspection.

    Know when to stop a DIY task

    Stop if you discover exposed wiring, a suspected gas leak, unstable building materials, significant water damage, or a problem involving equipment you do not understand.

    Protect people from the affected area and contact the appropriate professional or emergency service.

    Professional judgment is an important part of home maintenance, not a failure to handle a job yourself.

    18. Complete Basic Home Maintenance Checklist

    Use this checklist as a practical starting point and adjust it to suit your property.

    Weekly checks

    • Look beneath accessible sinks for visible moisture.
    • Notice unfamiliar household odors or sounds.
    • Clean frequently used kitchen and bathroom surfaces.
    • Remove accessible debris from drain strainers.
    • Keep entrances and walkways clear.
    • Record any developing problem.

    Monthly checks

    • Test safety alarms according to manufacturer instructions.
    • Inspect visible plumbing connections.
    • Check accessible electrical cords and plugs.
    • Look for damp patches and ceiling stains.
    • Review appliance filter requirements.
    • Check frequently used fixtures for looseness.
    • Update maintenance records.

    Seasonal checks

    • Inspect visible roof and gutter conditions from a safe location.
    • Check window and door seals.
    • Review exterior drainage after rainfall.
    • Clean accessible vents as appropriate.
    • Arrange recommended equipment servicing.
    • Inspect accessible outdoor areas for damage.
    • Review local weather-related maintenance needs.

    Annual checks

    • Review professional service records and warranties.
    • Arrange necessary specialist inspections.
    • Assess the condition of aging fixtures and equipment.
    • Review recurring problems and their underlying causes.
    • Plan for likely repairs and replacements.
    • Update your maintenance schedule for the coming year.

    A checklist is a guide rather than a replacement for equipment manuals, professional recommendations, or local safety requirements.

    What Are the Most Important Basic Home Maintenance Tasks Every Homeowner Should Follow?

    The most important basic home maintenance tasks are checking for plumbing leaks, inspecting visible electrical components, testing safety alarms, maintaining household appliances, and monitoring walls, ceilings, doors, and windows for signs of damage. These routine checks help homeowners identify developing problems before they affect other parts of the property. Instead of waiting for something to break, a consistent maintenance routine allows you to address wear and tear at an appropriate time.
    Start by checking the areas most likely to develop problems. Look beneath sinks for moisture, inspect bathroom sealant for gaps, and pay attention to unusual appliance noises or unexplained odors. Follow manufacturer instructions for cleaning filters and testing smoke or carbon monoxide alarms. Outdoor inspections are equally important because damaged gutters, poor drainage, and deteriorating exterior seals can contribute to water entering the building.
    Important maintenance tasks include:
    Inspect visible plumbing connections and investigate leaks promptly.
    Test safety alarms according to their manufacturer’s instructions.
    Check accessible electrical cords and plugs for visible damage.
    Clean or replace appliance filters according to manufacturer guidance.
    Monitor ceilings, walls, and floors for unexplained moisture or changes.
    Inspect accessible exterior areas and drainage as the seasons change.
    A written checklist makes these tasks easier to remember and helps you prioritize repairs according to their urgency.

    How Often Should You Perform Basic Home Maintenance?

    Basic home maintenance should be performed throughout the year, with different tasks scheduled weekly, monthly, seasonally, or annually. The ideal frequency depends on the home’s age, climate, building materials, appliances, and existing condition. A regular schedule helps prevent important checks from being forgotten and makes it easier to identify changes before they become serious problems.
    Weekly checks can be incorporated into normal cleaning routines. Look for visible leaks, unusual smells, and developing problems around frequently used fixtures. Monthly inspections can include safety-alarm testing, checking accessible electrical cords, reviewing appliance filter requirements, and examining walls and ceilings for moisture stains. Seasonal maintenance should focus on local weather conditions, exterior drainage, window seals, and recommended equipment servicing.
    A practical maintenance schedule includes:
    Weekly: Check visible plumbing, clean frequently used surfaces, and notice unusual sounds or odors.
    Monthly: Inspect household fixtures, test safety alarms as instructed, and update maintenance records.
    Seasonally: Review exterior drainage, inspect accessible seals, and prepare equipment for changing weather.
    Annually: Review service records, arrange necessary professional inspections, and assess aging fixtures or equipment.
    These intervals are general guidelines rather than fixed rules. Always follow the manufacturer’s maintenance instructions and adjust the schedule when your property requires additional attention.

    How Can Basic Home Maintenance Help Prevent Expensive Repairs?

    Basic home maintenance can help reduce repair expenses by identifying developing problems before they cause extensive damage. A leaking pipe, deteriorating window seal, or blocked drainage point may initially require a relatively straightforward repair. If the issue continues unnoticed, however, it can damage surrounding materials, affect household equipment, and increase the amount of work needed to restore the property.
    Preventive maintenance is particularly valuable when dealing with water and moisture because damage may develop in areas that are not immediately visible. Regularly inspecting accessible plumbing, monitoring damp patches, and investigating unusual odors can help reveal problems earlier. Maintaining appliances according to their instructions may also help prevent avoidable performance issues.
    Practical ways to control maintenance costs include:
    Address leaks and other developing problems promptly.
    Keep invoices, service records, warranties, and repair dates organized.
    Follow recommended appliance servicing and filter replacement schedules.
    Obtain itemized estimates for significant professional repairs.
    Investigate recurring problems instead of repeatedly paying for temporary fixes.
    Reserve part of your household budget for necessary maintenance and unexpected repairs.
    Not every problem can be prevented, and routine maintenance cannot guarantee that equipment will never fail. However, a consistent preventive approach helps you make informed decisions, plan expenses more effectively, and reduce avoidable damage.

    Which Home Maintenance Tasks Can You Do Yourself, and When Should You Hire a Professional?

    Many routine home maintenance tasks can be completed without specialist training, provided they are appropriate for your abilities and can be performed safely. These may include cleaning suitable surfaces, inspecting visible plumbing for leaks, maintaining approved appliance filters, checking window seals, and tightening suitable loose screws. The key is understanding the limits of DIY work and recognizing when a task involves risks that require professional expertise.
    Some problems are more complicated than they appear. A damp patch might result from a leaking pipe, roof damage, or condensation, and each cause requires a different solution. Similarly, repeatedly tripping circuit breakers or persistent appliance faults should not be treated as ordinary cleaning or maintenance tasks. Attempting unfamiliar repairs may create additional damage or safety risks.
    DIY maintenance is generally suitable for:
    Cleaning accessible surfaces with appropriate products.
    Inspecting visible pipes and connections for signs of leakage.
    Cleaning filters that the manufacturer identifies as homeowner-maintainable.
    Checking doors, windows, and visible sealant for deterioration.
    Recording maintenance issues and arranging appropriate follow-up.
    Contact a qualified professional for:
    Electrical wiring faults, damaged outlets, or repeated breaker trips.
    Gas leaks, malfunctioning fuel-burning equipment, or suspected carbon monoxide problems.
    Structural cracks, unstable ceilings, or significant building movement.
    Persistent dampness, extensive water damage, or recurring plumbing blockages.
    Roof inspections or repairs that require unsafe access.
    Knowing when to seek professional help is an essential part of responsible home maintenance. It protects your household, helps prevent incorrect repairs, and ensures that complex problems receive appropriate attention.

    What Should Be Included in a Complete Home Maintenance Checklist?

    A complete home maintenance checklist should cover safety, plumbing, appliances, interior surfaces, ventilation, exterior drainage, and any systems specific to the property. Its purpose is to make routine inspections consistent, highlight outstanding repairs, and provide a record of completed work. A useful checklist should be practical enough to follow regularly rather than becoming an overwhelming list of tasks.
    Begin with the essential systems that protect the property and its occupants. Check for visible water leaks, inspect accessible electrical cords, test safety alarms according to their instructions, and monitor ceilings and walls for unexplained moisture. Add appliance care, bathroom sealant inspections, window and door checks, and seasonal exterior tasks according to your home’s needs.
    Your checklist should include:
    Safety: Test relevant alarms and identify visible hazards.
    Plumbing: Inspect accessible pipes, faucets, toilets, and water connections.
    Appliances: Follow cleaning, filter replacement, and servicing instructions.
    Interior condition: Monitor walls, ceilings, flooring, and wet-area sealant.
    Ventilation: Maintain accessible filters and keep vents unobstructed.
    Exterior condition: Inspect accessible drainage, gutters, windows, and visible roof conditions safely.
    Documentation: Record completed tasks, repairs, invoices, and recommended follow-up.
    Review the checklist monthly and adjust it when you discover recurring problems or when weather conditions change. Manufacturer instructions, professional recommendations, and local safety requirements should always take precedence over a general checklist.
    A well-organized maintenance record helps homeowners understand their property’s condition, plan necessary repairs, and manage ongoing responsibilities with greater confidence.

    Conclusion: Make Basic Home Maintenance a Consistent Habit

    Basic home maintenance is one of the most practical ways to protect your property, prevent avoidable repairs, and maintain a comfortable living environment. From inspecting the roof and cleaning gutters to checking plumbing, maintaining electrical safety, caring for appliances, and improving indoor air quality, small routine tasks can make a meaningful difference over time. The key is not to complete every task at once but to build a realistic maintenance routine that fits your home, budget, climate, and household needs.

    A simple seasonal checklist can help you identify potential problems early, organize essential tasks, and keep track of repairs that require professional attention. Regular inspections also make it easier to prioritize urgent issues instead of allowing minor concerns to develop into more expensive damage. Remember that maintenance requirements vary according to the property’s age, building materials, weather conditions, and installed systems. Always follow manufacturer recommendations and use qualified professionals for work involving electrical systems, gas appliances, structural concerns, or other potentially hazardous repairs.

    Start with a few manageable tasks, establish a monthly and seasonal schedule, and keep records of completed work and future repairs. As your routine becomes more consistent, maintaining your home can feel less overwhelming and more predictable. For additional practical advice on creating a cleaner, more organized, and comfortable living space, explore Heartomenal and make informed home care decisions that support your property’s long-term condition and everyday usability.