Introduction
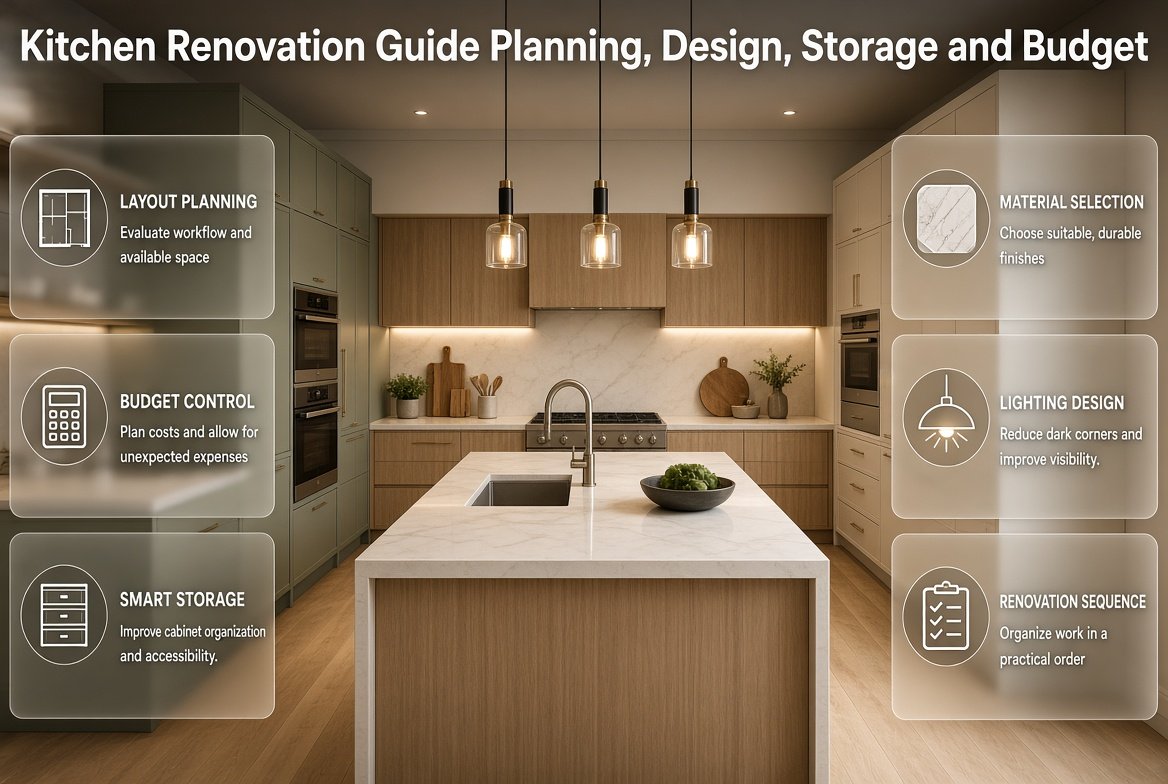
Kitchen Renovation Guide | A kitchen can look perfectly fine at first glance but still make everyday life difficult. Perhaps there is never enough counter space, cabinets are hard to organize, lighting creates dark corners, or the refrigerator door blocks a walkway. These problems can make cooking, cleaning, and family routines more stressful than they need to be.
A well-planned Kitchen Renovation Guide helps you identify these problems before spending money on new cabinets, countertops, appliances, or flooring. Instead of choosing materials first and trying to make everything fit later, you can plan the layout, establish a realistic budget, compare materials, and organize the work in the right order.
Kitchen renovation does not always mean removing everything and starting again. Sometimes, replacing cabinet doors, improving lighting, adding storage, or changing an inefficient worktop can make a meaningful difference. A complete remodel may be worthwhile when the existing layout, plumbing, electrical system, or cabinetry no longer meets your needs.
This guide explains how to assess your current kitchen, develop a renovation plan, estimate costs, choose suitable materials, improve storage, coordinate contractors, and avoid common mistakes. Whether you are updating a small kitchen or planning a complete renovation, you will learn how to make practical decisions that support your household, available space, and budget.
For more ideas about improving your home as a whole, visit Heartomenal. The goal is to create a kitchen that looks attractive, works efficiently, and remains comfortable to use long after the renovation is complete.
1. What Should You Consider Before Starting a Kitchen Renovation?
Before purchasing materials or hiring contractors, determine what your kitchen needs to do better. A renovation becomes easier to manage when every major decision responds to a specific problem.
Start by observing how you currently use the room. Notice where you prepare ingredients, wash dishes, store food, serve meals, and keep frequently used equipment. Consider whether more than one person regularly cooks at the same time.
Identify the Problems With Your Existing Kitchen
Walk through your kitchen and write down the issues that affect daily activities.
These might include:
- Insufficient countertop space for preparing meals.
- Cabinets that are difficult to reach or organize.
- Poor lighting around the sink or cooking area.
- Limited electrical outlets for everyday appliances.
- Flooring that is difficult to clean or maintain.
- Inadequate ventilation during cooking.
- A refrigerator or dishwasher that obstructs movement.
- Worn surfaces, damaged cabinet hinges, or persistent moisture problems.
Separate these issues into essential repairs, functional improvements, and visual upgrades.
For example, a leaking sink connection is an essential repair. Adding pull-out cabinet organizers is a functional improvement. Installing decorative pendant lights may be a visual upgrade, although lighting can also improve usability.
This distinction helps you decide where to spend money first.
Decide Whether You Need a Partial or Complete Renovation
A partial renovation focuses on selected components while keeping the rest of the kitchen.
It may involve repainting cabinets, changing handles, replacing a damaged worktop, improving lighting, or installing a new backsplash. This approach usually creates less disruption and may be more affordable when the existing layout remains practical.
A complete renovation may be appropriate when cabinets are extensively damaged, the room has a poor layout, essential systems need upgrading, or the kitchen requires major accessibility improvements.
| Renovation type | Best suited for | Main consideration |
|---|---|---|
| Cosmetic update | A functional kitchen that looks dated | Existing materials must be in reasonable condition |
| Partial renovation | Specific storage, surface, or lighting problems | New finishes should work with retained features |
| Full renovation | Major layout or infrastructure problems | Requires more planning, coordination, and budget |
| Accessibility-focused update | A kitchen that needs easier movement and reach | Dimensions and safety requirements need careful assessment |
Pro Tip: Do not replace a functioning component simply because it is old-fashioned. If your cabinets are structurally sound, updating their finish and hardware may leave more money for improvements that solve genuine problems.
Create a Kitchen Renovation Priority List
Rank each proposed change according to importance.
- Safety issues, leaks, damaged wiring, and ventilation problems.
- Layout and movement improvements.
- Essential storage and countertop requirements.
- Durable surfaces, appliances, and lighting.
- Decorative finishes and accessories.
This order prevents decorative decisions from consuming money needed for essential work.
2. How Do You Set a Realistic Kitchen Renovation Budget?
A realistic kitchen renovation budget includes more than cabinets and countertops. It must account for labor, materials, installation, plumbing, electrical work, delivery, waste removal, permits where required, and unexpected problems discovered during construction.
The total cost depends on kitchen size, location, material quality, labor rates, existing conditions, and the amount of work involved. Therefore, there is no single price that accurately describes every kitchen renovation.
Divide Your Budget Into Categories
Begin by establishing the maximum amount you can reasonably spend without compromising essential household expenses.
Next, request itemized estimates for the major parts of the project.
| Budget category | What to include |
|---|---|
| Cabinets and storage | Cabinet boxes, doors, drawers, handles, and organizers |
| Countertops and backsplash | Material, cutting, edging, and installation |
| Appliances | Cooking equipment, refrigerator, dishwasher, and necessary connections |
| Flooring and wall finishes | Surface materials, preparation, and installation |
| Plumbing | Fixtures, pipes, connections, and approved alterations |
| Electrical and lighting | Wiring, outlets, switches, lighting, and required upgrades |
| Labor | Demolition, carpentry, installation, finishing, and coordination |
| Other expenses | Delivery, waste disposal, permits, and temporary arrangements |
| Contingency | Money reserved for unforeseen issues |
Ask contractors to explain what their estimates include and exclude. A low quote may not include removal of old cabinets, surface preparation, transportation, or finishing work.
How Much Extra Money Should You Reserve?
Set aside a contingency fund for unexpected expenses. Around 10–20% of the estimated project cost is a useful planning allowance, although older homes, extensive remodeling, and uncertain existing conditions may require a larger reserve.
For example, if your planned renovation costs 500,000 in your local currency, a 15% contingency would equal 75,000. Your working budget would therefore be 575,000.
This is an illustration, not a market price.
Keep contingency money separate from the amount available for decorative upgrades. If no major problems arise, you can decide later whether to use the remaining funds for useful improvements.
Where Can You Save Money Without Reducing Quality?
The most effective savings usually come from simplifying the project rather than choosing the cheapest option for everything.
Consider these strategies:
- Retain the existing plumbing locations when the layout works well.
- Keep structurally sound cabinets and update their appearance.
- Compare several suitable countertop materials.
- Choose standard cabinet dimensions where practical.
- Select durable, easy-to-maintain finishes instead of costly specialty products.
- Purchase appliances based on actual household needs.
- Avoid moving walls or utilities unless the improvement justifies the cost.
You can find additional ideas in Budget Friendly Home Improvement Tips.
Compare the Full Cost, Not Just the Purchase Price
A cheaper material may require more maintenance or earlier replacement. Conversely, an expensive material may offer features your household does not need.
Compare purchase price, installation, cleaning requirements, repairability, expected service life, and availability of replacement parts.
Common Mistake: Spending the entire budget on visible finishes before confirming the cost of plumbing, electrical work, installation, and necessary repairs.
The solution is to establish a complete working estimate before making final purchases.
3. How Do You Plan an Efficient Kitchen Layout?
A kitchen layout determines how easily you can prepare food, move between appliances, clean surfaces, and work with other household members. Even beautiful cabinets become frustrating when their placement makes ordinary tasks difficult.
The best layout depends on the room’s dimensions, doorways, windows, utility connections, and the way you cook.
Understand the Main Kitchen Layout Options
One-wall kitchen: Cabinets, appliances, and the worktop occupy a single wall. This arrangement can suit narrow rooms, compact homes, and open-plan spaces. Its main limitation is restricted countertop space.
Galley kitchen: Two parallel runs of cabinets create a central passage. It can provide efficient storage and short working distances, but the passage must remain comfortable, especially when cabinet doors or appliances are open.
L-shaped kitchen: Cabinets follow two adjoining walls. This arrangement creates a flexible working area and may leave room for a dining table or additional storage.
U-shaped kitchen: Three connected sides provide extensive worktop and cabinet space. However, the layout needs enough room to avoid a cramped central area.
Island kitchen: A separate island can add preparation space, seating, or storage. It works best when the room has sufficient clearance around the island and when its installation does not obstruct important routes.
Plan the Main Work Zones
Think of your kitchen as a series of connected work areas.
- Storage zone: Refrigerator, pantry, and food cupboards.
- Preparation zone: Clear countertop space, knives, chopping boards, and commonly used ingredients.
- Cleaning zone: Sink, dishwasher, drying area, and cleaning supplies.
- Cooking zone: Cooktop, oven, heat-resistant surfaces, and cooking utensils.
- Serving zone: Space to plate meals and move food to the dining area.
These zones should relate logically to one another. For example, a preparation surface close to the sink makes washing vegetables and preparing ingredients easier.
The traditional kitchen work triangle connects the sink, refrigerator, and cooking area. It remains a useful planning concept, but it is not a rigid rule for every modern kitchen. Larger kitchens may work better with several distinct work zones.
Check Measurements Before Ordering Cabinets
Measure the room carefully, including:
- Wall lengths and ceiling height.
- Window and door positions.
- Existing plumbing connections.
- Electrical outlets and switches.
- Appliance widths, depths, and door-opening requirements.
- Wall irregularities and floor-level differences.
- Ventilation routes and any structural restrictions.
Do not assume that opposite walls are perfectly parallel or that a floor is level.
Confirm the final measurements before cabinets, worktops, and appliances are manufactured or ordered.
Allow Comfortable Movement
There is no universal aisle measurement suitable for every kitchen. The required clearance depends on the layout, appliance doors, accessibility needs, and applicable local building requirements.
Check the manufacturer’s installation instructions and have your designer or contractor verify the planned clearances.
Open the refrigerator, oven, dishwasher, and drawers on your plan to check whether they interfere with each other.
Expert Tip: Use masking tape on the floor to mark the proposed cabinet fronts and island edges. Walk through the marked space and test the routes before committing to a layout.
4. Which Kitchen Cabinets and Storage Solutions Should You Choose?
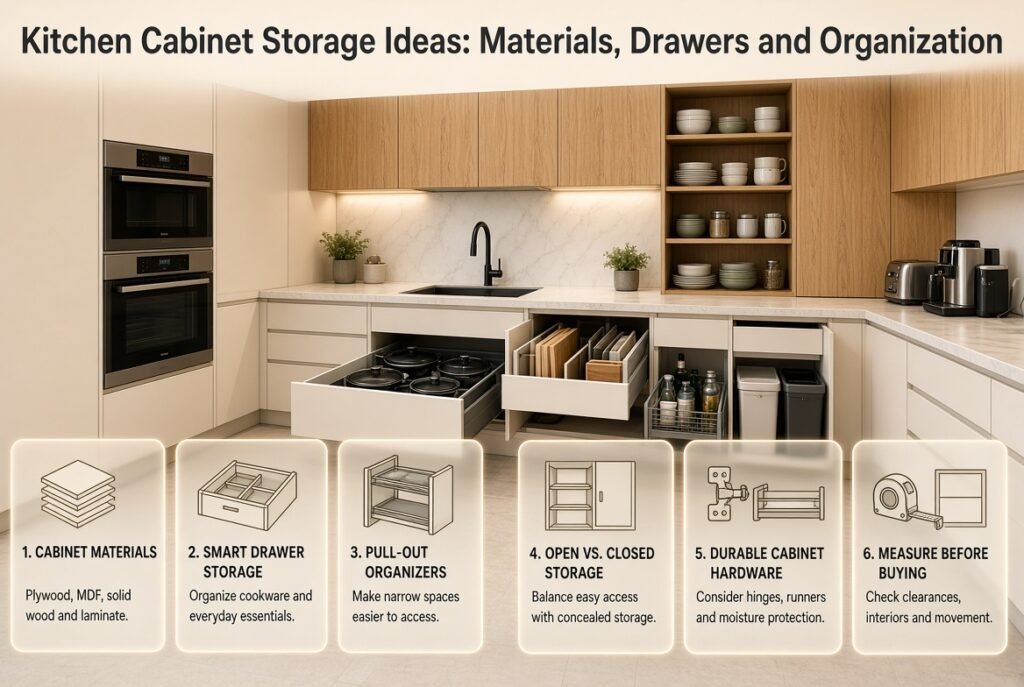
Cabinets affect storage capacity, visual appearance, accessibility, and the long-term maintenance of your kitchen. The right choice depends on your budget, available space, storage habits, and the condition of the room.
Compare Common Cabinet Materials
| Material | Advantages | Limitations |
|---|---|---|
| Plywood | Often strong and useful for cabinet construction | Quality and moisture resistance vary |
| MDF | Provides a smooth surface for painted finishes | Edges and damaged areas need protection from moisture |
| Particleboard | Can be economical for cabinet boxes | Swelling and damage may occur if moisture penetrates |
| Solid wood | Can be repaired or refinished depending on construction | Costs more in many markets and may respond to humidity |
| Laminated surfaces | Offer varied finishes and relatively easy cleaning | Damaged laminate can be difficult to repair invisibly |
Material names alone do not determine quality. Thickness, joinery, hardware, edge sealing, installation, and exposure to moisture all matter.
Ask suppliers about the construction of cabinet boxes, the quality of hinges and drawer runners, and the warranty.
Make Storage Match Your Routine
Think about what you store before deciding how many cabinets you need.
Deep drawers can make pots, pans, and food containers easier to reach than cupboards with several fixed shelves. Pull-out organizers may improve access to narrow spaces. Vertical dividers can help organize trays, chopping boards, and baking sheets.
Useful storage ideas include:
- Deep drawers near the cooking zone.
- Frequently used dishes near the dishwasher.
- Cooking utensils close to the cooktop.
- A dedicated location for small appliances.
- Adjustable shelves for changing storage needs.
- Pull-out waste and recycling bins.
- A pantry area for dry food and bulk supplies.
Avoid filling every available wall with cabinets if doing so makes the room feel crowded or reduces useful preparation space.
Are Open Shelves Better Than Upper Cabinets?
Open shelves provide quick access to frequently used items and can make a small kitchen feel visually lighter. However, they expose dishes and decorative objects to dust, grease, and cooking residue.
Closed cabinets conceal clutter and offer more protection for stored items, but poorly designed upper cabinets may be difficult to reach.
A mixed arrangement can offer a practical compromise: closed storage for everyday supplies and a small amount of open shelving for frequently used dishes or selected decorative pieces.
Improve Cabinet Organization Without Replacing Everything
If your cabinets remain structurally sound, consider adjustable shelf heights, drawer dividers, door-mounted organizers approved for the cabinet construction, and better internal lighting.
Measure the available interior space before buying organizers. A product that fits the advertised cabinet width may still interfere with hinges, pipes, or drawer movement.
5. How Do You Choose Kitchen Countertops, Flooring, and Backsplash Materials?
Kitchen surfaces experience frequent contact with water, food, heat, cleaning products, and heavy objects. Appearance matters, but material selection should also account for durability, maintenance, installation, and compatibility with the surrounding finishes.
Choosing the Right Countertop
Quartz surfaces: Engineered quartz is available in many colors and patterns. It is generally nonporous, but its resin content makes heat protection important. Follow the manufacturer’s care instructions.
Natural granite: Granite offers distinctive natural patterns and can be durable when properly selected and installed. Some varieties require periodic sealing, depending on their porosity and treatment.
Laminate: Laminate countertops can provide an affordable range of appearances and are relatively easy to clean. However, edges and joints need protection because water penetration can damage the substrate.
Solid wood: Wood creates a warm appearance and can be refinished in some circumstances. It needs appropriate maintenance and careful protection around sinks and wet areas.
Stainless steel: Stainless steel is practical for certain contemporary and professional-style kitchens. It tolerates many kitchen tasks but can show scratches, fingerprints, and water marks.
No material is perfect for every household. A family that cooks frequently may prioritize easy cleaning and repairability, while someone who uses the kitchen lightly may give greater weight to appearance.
Select Flooring for Daily Use
Kitchen flooring should withstand regular cleaning, foot traffic, occasional spills, and the movement of appliances.
Porcelain tile is often chosen for its durability and water resistance. However, grout maintenance, surface texture, and slip resistance still matter.
Luxury vinyl flooring can provide a softer underfoot feel and varied designs, but product quality, installation conditions, and the suitability of the subfloor should be checked carefully.
Natural stone offers distinctive patterns but may require sealing and specialized maintenance.
Engineered wood may work in certain kitchens when the product and installation system are suitable for the environment. However, standing water and persistent moisture remain concerns.
Before installing new flooring, inspect the subfloor and address movement, moisture, or unevenness. A premium finish cannot compensate for an unstable foundation.
Choose a Practical Backsplash
A backsplash protects walls around the sink and cooking area while contributing to the kitchen’s appearance.
Ceramic and porcelain tiles offer a broad range of colors and formats. Larger tiles may reduce the number of grout joints, while smaller tiles can work well for detailed designs.
Glass and other specialty surfaces can create a clean, reflective effect, but their installation requirements and cleaning needs vary.
Whatever material you choose, ensure that joints, edges, and penetrations are properly finished to prevent water from reaching vulnerable surfaces.
Coordinate Finishes Before Purchasing
Collect physical samples of cabinet finishes, countertops, flooring, backsplash materials, and paint.
View them together under the kitchen’s actual lighting. A cabinet color that looks neutral in a showroom may appear warmer or cooler at home.
Quick Tip: Choose one dominant finish, one complementary finish, and a limited accent. This helps create a coordinated appearance without making every surface compete for attention.
For broader styling inspiration, explore Home Decorating Tips.
6. Which Kitchen Appliances Should You Upgrade?
Replacing appliances can improve convenience, energy use, and cooking performance, but upgrading everything at once is not always necessary.
Start by evaluating each appliance’s condition, capacity, repair history, operating requirements, and suitability for the household.
Measure Before Buying
Check appliance width, height, depth, ventilation clearances, door swing, and connection requirements.
A refrigerator that fits between two cabinets may still prevent a nearby drawer from opening fully. A new oven may require electrical or ventilation provisions that the existing installation cannot support.
Confirm the installation requirements before ordering.
Choose Appliances Based on Actual Needs
A household that prepares several meals each day may benefit from a larger refrigerator, a practical oven, and durable cooking equipment.
Someone who rarely bakes may not need a large premium oven. Likewise, a dishwasher may be a valuable upgrade for a busy household but less important in a kitchen where space is extremely limited.
Compare energy labels where available, capacity, noise levels, cleaning requirements, warranties, repair support, and the availability of replacement parts.
Check Utility Requirements
Some appliances require dedicated electrical circuits, specialized outlets, water connections, drainage, or specific ventilation arrangements.
A qualified professional should confirm whether existing connections are suitable and whether upgrades are necessary.
Gas appliances require particular attention to safe installation and ventilation. Never improvise gas connections or electrical alterations.
The safest and most economical approach is to identify these requirements before construction begins.
7. How Can Lighting Make a Kitchen More Functional?
Good kitchen lighting helps you prepare food accurately, clean surfaces effectively, and move around safely. It also improves the appearance of cabinets, countertops, and finishes.
A useful lighting plan combines general illumination, task lighting, and optional accent lighting.
General Lighting
General lighting illuminates the overall room. Ceiling fixtures or appropriately arranged recessed lights can provide broad coverage.
Avoid placing every fixture in a straight line without considering cabinets and work surfaces. A person standing at the counter may cast a shadow over the area where light is needed most.
Task Lighting
Task lighting focuses on areas where specific activities take place.
Under-cabinet lighting can illuminate countertops without requiring additional ceiling fixtures. Dedicated lighting may also be useful near the sink, pantry, and other work areas.
Choose fixtures designed for their installation location, and ensure that wiring and installation meet applicable electrical requirements.
Accent Lighting
Accent lighting highlights selected features, such as open shelves, display cabinets, or architectural details.
It is optional. Prioritize adequate general and task lighting before spending money on decorative effects.
Choose Suitable Light Color
Light color influences how paint, wood, stone, and other materials appear.
Warmer light can create a welcoming atmosphere, while neutral light may provide a balanced appearance for food preparation. Consistency between fixtures usually produces a more coordinated result.
If possible, test lighting samples against your selected materials before finalizing the plan.
For more ideas about creating a comfortable living environment, read Home Comfort Tips.
8. Why Are Kitchen Ventilation, Plumbing, and Electrical Planning Important?
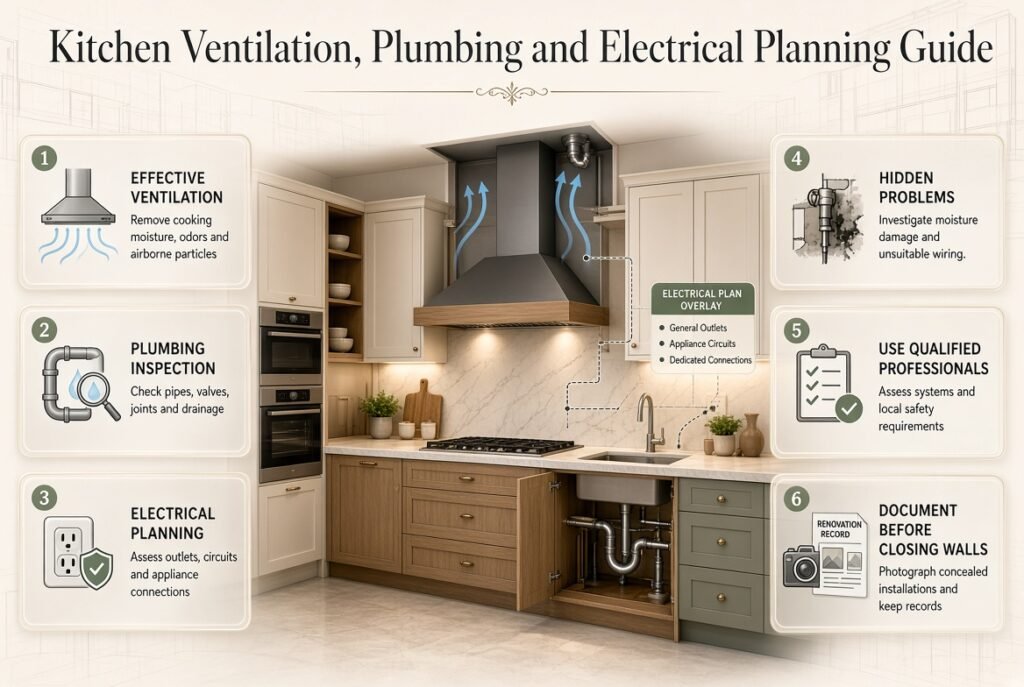
A kitchen renovation is not only a visual project. The systems behind the cabinets and walls affect safety, durability, indoor comfort, and the future cost of repairs.
Plan Effective Ventilation
Cooking releases moisture, heat, odors, and airborne particles. Suitable ventilation helps remove these by-products and can reduce the buildup of grease and moisture.
Choose a range hood or other extraction system appropriate for the cooking equipment and room. Where possible and permitted, an externally vented hood can remove cooking pollutants from the building rather than recirculating the air.
Recirculating systems may be necessary in some homes, but they depend on appropriate filtration and maintenance.
Confirm duct routing, exhaust discharge, clearances, and any building restrictions before choosing the appliance.
Inspect Plumbing Before Closing Walls
Replacing a sink, dishwasher, or refrigerator may require changes to water supply and drainage connections.
Before cabinets and finishes conceal the plumbing, inspect visible pipes, valves, joints, and the surrounding structure for signs of leaks or deterioration.
Any damaged or unsuitable plumbing should be addressed by a qualified professional.
If you are planning other wet areas in the home, Bathroom Planning Tips can provide useful supporting ideas, although kitchen plumbing requirements must be assessed separately.
Plan Electrical Outlets and Circuits
Identify where you will use kettles, mixers, coffee machines, microwaves, and other appliances.
Outlet placement should make everyday tasks convenient without creating unsafe arrangements involving cords near water, heat, or walkways.
A qualified electrician should assess circuit capacity, grounding, protective devices, appliance connections, and local electrical requirements.
Do not assume that existing wiring is suitable for new high-demand appliances simply because the old equipment worked.
Investigate Hidden Problems Early
Older kitchens may contain damaged wall surfaces, moisture-related deterioration, unsuitable wiring, or other issues that become visible only after demolition.
If you suspect asbestos-containing materials, lead-based coatings, or other hazardous substances, arrange appropriate assessment before disturbing them.
Expert Tip: Photograph the plumbing, wiring, and structural conditions before they are concealed. Keep the photographs with product manuals, warranties, and renovation records for future maintenance.
9. What Is the Correct Step-by-Step Kitchen Renovation Process?
A clear sequence helps prevent rework, missed measurements, and unnecessary delays. The precise schedule depends on the size of the project, material availability, inspections, and contractor coordination.
Step 1: Assess the Existing Kitchen
Document its dimensions, current layout, storage problems, visible damage, and essential requirements.
Decide which components can remain and which need replacement.
Why it matters: You can direct money toward meaningful improvements rather than automatically replacing everything.
Common mistake: Buying new appliances before confirming their dimensions and installation requirements.
Step 2: Create the Design
Develop a measured layout showing cabinets, appliances, work surfaces, doors, windows, utilities, and lighting.
Consider storage needs, comfortable movement, cleaning access, and future maintenance.
Why it matters: A complete plan allows different parts of the renovation to work together.
Professional advice: Obtain final measurements and installation specifications before placing custom orders.
Step 3: Establish the Budget
Prepare a cost breakdown covering materials, labor, installation, delivery, permits, waste disposal, and contingency.
Request itemized quotations and compare the proposed work rather than looking only at the total price.
Why it matters: You can identify financial gaps before construction begins.
Step 4: Finalize Materials and Products
Choose cabinets, countertops, flooring, fixtures, lighting, and appliances that meet your functional and financial requirements.
Confirm availability, delivery dates, warranties, and return policies.
Why it matters: Delayed materials can leave a kitchen unusable while other trades wait.
Step 5: Hire Qualified Contractors
Check relevant experience, references, insurance where applicable, written estimates, and local licensing requirements.
Agree on responsibilities, payment stages, change-order procedures, cleanup arrangements, and the expected schedule.
Why it matters: Clear expectations reduce misunderstandings and disputes.
Step 6: Prepare the Home
Remove personal items, empty cabinets, protect nearby rooms, and establish a temporary food preparation area.
Plan how the household will access drinking water, meals, refrigeration, and essential equipment while work continues.
Step 7: Complete Demolition Carefully
Remove designated cabinets, surfaces, fixtures, and flooring according to the agreed plan.
Inspect exposed areas for hidden damage before installing new materials.
Why it matters: Concealing a leak or damaged surface can create more expensive problems later.
Step 8: Complete Essential Systems Work
Address required plumbing, electrical, ventilation, and structural work before covering the affected areas.
Arrange inspections or approvals where required.
Step 9: Install Cabinets and Fixed Components
Install and level cabinets according to the manufacturer’s requirements. Verify alignment, attachment, and clearances before proceeding with countertops.
Custom countertops may require final measurements after cabinet installation.
Step 10: Install Surfaces, Fixtures, and Appliances
Complete countertops, backsplashes, flooring where appropriate to the chosen installation sequence, sinks, faucets, lighting, and appliances.
Follow product instructions and protect completed surfaces during remaining work.
Step 11: Test and Inspect
Check doors, drawers, appliance operation, plumbing connections, drainage, lighting, ventilation, and electrical installations.
Confirm that the contractor has completed agreed repairs and finishing work.
Step 12: Clean and Organize
Remove construction debris, clean surfaces using suitable products, and arrange everyday items according to the kitchen’s work zones.
Store manuals, warranties, spare materials, and maintenance instructions together.
10. How Long Does a Kitchen Renovation Take?
The timeline depends on the scope of work, the availability of materials, contractor schedules, and whether hidden problems are discovered.
A cosmetic update may take considerably less time than a full renovation involving custom cabinetry, utility relocation, or structural alterations.
| Project type | Main factors affecting duration |
|---|---|
| Cosmetic refresh | Preparation, painting, hardware, and minor repairs |
| Partial renovation | Cabinet work, new surfaces, appliance changes, and coordination |
| Full renovation | Demolition, inspections, systems work, cabinetry, surfaces, and finishing |
| Major structural remodel | Design approvals, engineering, construction, and additional inspections |
These categories are not fixed time estimates. Ask your contractor for a project-specific schedule with milestones and dependencies.
What Commonly Causes Delays?
- Custom cabinets arriving later than expected.
- Countertops requiring additional fabrication time.
- Appliances being unavailable.
- Hidden plumbing or structural damage.
- Changes made after construction begins.
- Inspection requirements.
- Poor coordination between different trades.
You can reduce delays by finalizing major selections early, confirming delivery dates, and making sure the contractor knows which tasks depend on others.
Plan for the Kitchen to Be Unavailable
During substantial work, cooking facilities may be unavailable for part of the project.
Set up a temporary area with safe access to essential food, drinking water, basic utensils, and suitable appliances. Plan simple meals and protect stored food from dust and construction activity.
Keep the temporary arrangement separate from active work zones. Do not operate cooking equipment in conditions that create fire, ventilation, or electrical hazards.
11. What Are the Most Common Kitchen Renovation Mistakes?
Many renovation problems begin with decisions made too early or details that were never properly checked.
Mistake 1: Starting Without a Complete Plan
Why it happens: Homeowners want to begin demolition or purchase attractive finishes immediately.
Why it causes problems: Missing measurements and unresolved design choices lead to rework, delays, and additional costs.
How to avoid it: Finalize the layout, utility requirements, major material selections, budget, and installation sequence before construction.
Mistake 2: Choosing Appearance Over Function
A dramatic island, decorative shelves, or oversized refrigerator may look appealing but make the kitchen harder to use.
Assess every major feature according to the space available and your actual routines.
Mistake 3: Underestimating Storage Needs
Homeowners sometimes plan cabinets around the room’s appearance rather than the items they need to store.
Inventory cookware, food, appliances, dishes, and cleaning supplies before determining cabinet sizes and internal organization.
Mistake 4: Buying Appliances Too Late
Late appliance selection can affect cabinet dimensions, ventilation, electrical requirements, and countertop planning.
Choose appliances early enough to confirm the required specifications before custom elements are manufactured.
Mistake 5: Selecting Materials Without Testing Samples
Colors and textures can appear different under natural light, warm LEDs, and showroom lighting.
Review samples together in the kitchen and consider how they look at different times of day.
Mistake 6: Ignoring Ventilation
A beautiful kitchen may still suffer from lingering cooking odors, excess moisture, and grease buildup if ventilation is inadequate.
Select suitable extraction equipment and arrange its installation before the surrounding cabinetry is finalized.
Mistake 7: Moving Utilities Without a Clear Benefit
Relocating sinks, cooking equipment, or major appliances may increase plumbing, electrical, and construction costs.
Move them when the improved layout justifies the additional expense, not simply because a different arrangement looks more modern.
Mistake 8: Hiring Contractors Based Only on Price
A low estimate may exclude essential work or rely on unclear assumptions.
Compare itemized quotations, relevant experience, references, project scope, payment arrangements, and warranty terms.
Mistake 9: Making Frequent Changes During Construction
Changing cabinet dimensions, materials, or appliance locations after work begins can affect several trades.
Use a documented change-order process that identifies the cost, schedule impact, and required approval before work proceeds.
Mistake 10: Forgetting Maintenance and Cleaning
Some finishes require specialized products, regular sealing, or careful protection from moisture and heat.
Choose materials that fit the time and effort you can realistically devote to maintenance.
12. What Do Experienced Renovation Professionals Recommend?
A successful kitchen renovation depends on practical decisions made consistently throughout the project. Professionals generally focus on measurements, coordination, durability, safety, and the details that remain hidden once installation is complete.
Prioritize the Components That Are Difficult to Change Later
Cabinet colors and handles can often be updated more easily than plumbing routes, electrical circuits, or the overall layout.
Resolve the structural and functional decisions first. Choose decorative finishes afterward, once you know what the space can accommodate.
Invest in Quality Where It Matters Most
A sensible budget does not require premium materials everywhere.
Consider spending more on heavily used drawer runners, suitable hinges, durable work surfaces, reliable plumbing fixtures, and appropriate installation.
Less critical decorative features can often be simpler without compromising the overall result.
Request Clear Specifications
Before work begins, establish the dimensions, material types, finish details, installation requirements, and agreed responsibilities for major components.
Written specifications make it easier to compare quotations and identify differences between proposed products.
Inspect Work at Important Milestones
Do not wait until the entire kitchen is finished to identify problems.
Review exposed utility work before it is concealed, cabinet alignment before countertop installation, and appliance clearances before final adjustments.
Raise concerns promptly and document agreed corrections.
Keep Maintenance Access in Mind
Valves, electrical components, appliance connections, and other serviceable parts should remain accessible as required.
A design that hides every practical component behind fixed finishes may look clean initially but can make future repairs more difficult.
Avoid Trends That Do Not Suit Your Home
A kitchen should complement the house and support the household’s needs.
Choose a style that works with existing architectural features, natural light, available space, and your preferences rather than copying a design that requires an unsuitable layout or excessive spending.
For broader planning principles, see House Renovation Planning.
13. How Can You Make a Small Kitchen Feel Larger?
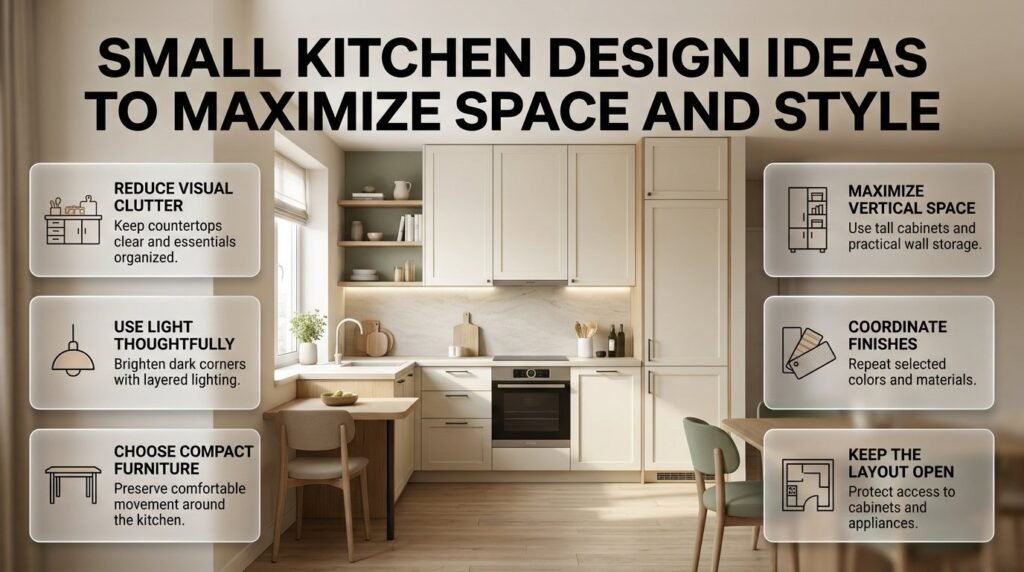
A small kitchen does not necessarily need an extension or major structural changes. Better organization, suitable lighting, consistent finishes, and carefully selected furniture can improve its appearance and usability.
Reduce Visual Clutter
Keep frequently used items accessible but organized. Store less frequently used equipment in designated cupboards and avoid filling every open surface with decorative objects.
A clear countertop makes food preparation easier and can help the room feel less crowded.
Use Light Thoughtfully
Lighter finishes can reflect more light, especially in rooms with limited natural illumination.
However, a small kitchen does not need to be entirely white. Soft neutrals, wood tones, or restrained darker accents can create depth without overwhelming the space.
Choose Furniture That Fits
If the kitchen includes a dining area, select furniture that allows people to sit and move comfortably without blocking cabinets or appliance doors.
A compact table, folding surface, or appropriately sized seating may be more useful than a large island.
Make Use of Vertical Space
Tall cabinets, carefully positioned shelves, and wall-mounted storage can free up valuable countertop space.
Check ceiling height, reach, structural support, and safe access before installing high storage.
Avoid Overcomplicated Finishes
Too many competing patterns, colors, and materials can make a small kitchen feel visually busy.
Choose a coordinated palette and repeat selected finishes to create continuity.
For additional space-saving inspiration, explore Home Tips & Ideas.
14. How Can You Make a Renovated Kitchen Easier to Maintain?
Long-term satisfaction depends on more than the first impression. A kitchen that is simple to clean, organize, and repair is often more useful than one designed only for appearance.
Choose Surfaces That Match Your Cleaning Routine
Consider whether materials tolerate the cleaning products you already use and whether they require special maintenance.
Follow manufacturer instructions for stone, wood, laminate, appliances, and specialty finishes.
Avoid abrasive products on surfaces that can scratch or lose their protective finish.
Prevent Moisture Problems
Repair leaking taps and connections promptly. Dry persistent standing water, check sink-area seals, and investigate recurring dampness rather than repeatedly covering the affected area.
Use suitable ventilation during cooking and keep exhaust filters clean according to the manufacturer’s instructions.
Organize Cleaning Supplies Safely
Keep cleaning products in a designated location, away from food and cooking ingredients. Store hazardous products according to their labels and keep them inaccessible to young children and pets.
Avoid placing heavy items in high cabinets where they are difficult to retrieve safely.
Establish Simple Maintenance Habits
A practical routine might include:
- Wiping worktops after food preparation.
- Cleaning spills before they dry.
- Checking under the sink periodically for moisture.
- Cleaning appliance filters as directed.
- Inspecting cabinet hinges and drawer runners.
- Maintaining ventilation equipment.
- Addressing damaged grout, seals, or finishes promptly.
For additional everyday household guidance, visit Everyday Household Tips and Tricks.
15. How Should You Inspect Your Kitchen Before Accepting the Completed Work?
Before making the final payment, review the finished work against the written agreement. The exact payment arrangements should follow your contract, and any required inspections or approvals should be completed as applicable.
Use a Practical Final Inspection Checklist
Cabinets and drawers
- Doors align properly and close smoothly.
- Drawers operate without catching.
- Handles and hinges are secure.
- Cabinet surfaces have no unexplained damage.
Countertops and backsplash
- Surfaces are properly supported.
- Visible joints and edges are finished appropriately.
- Sink and wall connections are sealed where required.
- There are no unexplained cracks, chips, or installation defects.
Plumbing
- Taps operate correctly.
- Drains clear properly.
- Visible connections show no signs of leakage.
- Water supply and drainage work as intended.
Electrical and lighting
- Installed lights and switches operate correctly.
- Outlets and circuits have been checked by the appropriate professional.
- Required protective devices and inspections are in place.
Appliances and ventilation
- Appliances operate according to their instructions.
- Doors and drawers open without obstruction.
- Required ventilation arrangements are complete.
- Filters, controls, and essential accessories are available.
Flooring and finishing
- Flooring is stable and appropriately finished.
- Skirting, trim, and visible edges are complete.
- Doors and nearby furniture are not obstructed.
- Construction debris has been removed.
Collect Important Documents
Keep copies of:
- Contractor agreements and approved changes.
- Final invoices and payment records.
- Product manuals and warranties.
- Appliance installation information.
- Required inspection or approval documents.
- Care instructions for countertops, flooring, and cabinets.
- Photographs of concealed utilities, where available.
Record any incomplete work in writing and agree on a practical completion date.
A careful handover helps you maintain the kitchen and provides useful documentation if a repair or warranty issue arises later.
How Do You Plan a Kitchen Renovation Step by Step?
Planning a kitchen renovation starts with understanding what needs to improve in your existing space. Before purchasing cabinets, countertops, or appliances, evaluate your kitchen’s layout, storage capacity, lighting, ventilation, and overall condition. Decide whether you need a cosmetic update, a partial renovation, or a complete remodel. This early assessment helps you avoid unnecessary expenses and ensures that every major decision supports your daily cooking and household routines.
Once you have identified your priorities, establish a realistic budget, measure the room accurately, and create a layout that allows comfortable movement between the sink, refrigerator, cooking area, and preparation surfaces. Select materials and appliances according to their dimensions, durability, maintenance requirements, and installation needs. Finally, organize the work in a logical sequence, from demolition and essential utility work to cabinetry, countertops, fixtures, and final inspection.
Important steps to follow:
Identify functional problems and establish renovation priorities.
Prepare a measured kitchen layout and storage plan.
Finalize the budget, materials, appliances, and contractor agreement.
Complete necessary plumbing, electrical, and ventilation work before covering affected areas.
Inspect the finished installation and collect warranties and maintenance instructions.
A clear plan reduces confusion, improves contractor coordination, and helps keep the renovation within its intended budget.
How Much Should You Budget for a Kitchen Renovation?
The cost of a kitchen renovation depends on the room’s size, existing condition, labor rates, material quality, appliance choices, and the amount of structural or utility work required. A cosmetic refresh involving paint, cabinet hardware, and lighting will generally cost less than replacing cabinets, moving plumbing, installing new countertops, and upgrading electrical systems. For this reason, homeowners should prepare a project-specific estimate rather than rely on a single general price.
Start by dividing the budget into separate categories for cabinets, countertops, flooring, appliances, labor, plumbing, electrical work, ventilation, delivery, and waste removal. Obtain itemized quotations from contractors so you can compare the actual scope of work instead of choosing the lowest total price. Reserve approximately 10–20% of the estimated cost as a contingency, adjusting the allowance according to the age of the property and the likelihood of hidden problems.
Practical ways to control renovation costs:
Retain structurally sound cabinets whenever their layout remains suitable.
Avoid relocating plumbing and appliances without a clear functional benefit.
Compare material quality, installation costs, and long-term maintenance.
Confirm appliance dimensions before ordering custom cabinetry.
Keep contingency funds separate from decorative upgrades.
The goal is not simply to spend less. It is to direct the available budget toward improvements that deliver lasting functionality, durability, and value.
What Kitchen Layout Is Best for Small or Large Kitchens?
The best kitchen layout depends on the room’s dimensions, available storage, door and window positions, appliance requirements, and the way the household uses the space. A one-wall layout can work well in a compact kitchen because it keeps cabinets and appliances along a single wall. A galley layout uses two parallel runs of cabinetry to create an efficient work area, while an L-shaped layout provides flexibility and may leave room for a dining table. Larger kitchens may benefit from a U-shaped arrangement or an island when sufficient clearance is available.
However, the most attractive layout is not necessarily the most practical. A kitchen island can provide additional preparation space and storage, but it may obstruct movement if the room is too narrow. Similarly, adding more cabinets is not useful if appliance doors cannot open comfortably or frequently used items become difficult to reach. Measure the kitchen carefully and check appliance door swings, worktop depth, walkways, and access to essential utilities before approving the design.
Layout planning priorities:
Keep food storage, preparation, cleaning, and cooking areas logically connected.
Allow comfortable movement when cabinets and appliances are open.
Position frequently used cookware and utensils near the relevant work zones.
Evaluate an island according to actual available clearance, not appearance alone.
Consider accessibility, household size, and future needs.
A well-designed layout makes cooking, cleaning, and sharing the kitchen easier, regardless of the room’s size.
Which Kitchen Renovation Materials Are Most Durable and Easy to Maintain?
The best kitchen renovation materials are those that balance durability, appearance, installation requirements, maintenance, and cost. Countertops, cabinets, flooring, and backsplashes experience different types of wear, so each material should be evaluated according to its intended use. For example, engineered quartz is popular for countertops because it is generally nonporous and relatively easy to clean, while laminate can provide an economical alternative. Natural granite offers distinctive patterns but may require sealing, depending on the specific stone.
Cabinet materials also deserve careful consideration. Plywood, MDF, particleboard, and solid wood differ in construction, moisture response, finish options, and repairability. Rather than choosing solely by material name, assess the quality of the cabinet box, edge protection, hinges, drawer runners, and installation. For flooring, consider water resistance, slip resistance, cleaning requirements, and the condition of the subfloor. Even a durable material can perform poorly if it is installed incorrectly or exposed to conditions it was not designed to handle.
Before selecting kitchen materials:
Compare purchase price and installation costs.
Check resistance to moisture, stains, scratches, and everyday wear.
Review manufacturer cleaning and maintenance instructions.
Obtain physical samples and view them under your kitchen’s lighting.
Confirm warranties, repair options, and the availability of replacement components.
Choosing materials based on real household needs helps prevent premature damage and makes long-term kitchen maintenance more manageable.
What Are the Most Common Kitchen Renovation Mistakes to Avoid?
The most common kitchen renovation mistakes usually involve inadequate planning, unrealistic budgeting, poor measurements, and decisions based on appearance rather than everyday use. Homeowners may order attractive appliances before confirming cabinet dimensions, select materials without testing samples, or spend heavily on decorative features while overlooking essential electrical, plumbing, and ventilation work. These decisions can lead to delays, additional expenses, and a kitchen that looks impressive but remains inconvenient to use.
Another frequent problem is hiring a contractor based only on the lowest quotation. A cheaper estimate may exclude demolition, waste removal, installation details, or necessary repairs. Before work begins, review the proposed scope, payment schedule, timeline, qualifications, warranties, and procedures for approving changes. During construction, inspect important milestones and address concerns before the next stage conceals the affected work.
Mistakes homeowners should avoid:
Starting demolition before finalizing the design and budget.
Ignoring appliance specifications and door-opening clearances.
Underestimating storage and countertop requirements.
Choosing unsuitable materials for wet or high-use areas.
Neglecting ventilation and necessary utility upgrades.
Making frequent design changes after construction starts.
Failing to inspect the completed work before final handover.
The best way to prevent these problems is to make major decisions early, document agreements clearly, and prioritize safety, functionality, and long-term maintenance over short-lived design trends.
Conclusion: Create a Kitchen That Works for Your Everyday Life
A successful kitchen renovation is about more than updating cabinets, countertops, and appliances. It is about creating a practical, comfortable, and well-organized space that supports your daily routine while staying within your budget. With careful planning, the right materials, and an efficient layout, you can improve your kitchen’s appearance and functionality without spending money on unnecessary upgrades.
Before starting your renovation, identify the problems that need attention, establish a realistic budget, and finalize your design before purchasing materials. Prioritize storage, lighting, ventilation, durable surfaces, and safe utility installations. Choose contractors carefully, compare detailed quotations, and reserve funds for unexpected repairs. These decisions can help prevent costly mistakes and make the renovation process easier to manage.
Remember that you do not always need a complete remodel to achieve meaningful improvements. Retaining sound cabinets, upgrading lighting, improving storage, or replacing worn surfaces may be enough to transform your existing kitchen. The best approach depends on your home’s condition, available space, household needs, and long-term plans.
For more practical ideas on home improvement, organization, and interior design, explore Heartomenal. Start with a clear plan, make informed decisions, and focus on improvements that offer lasting value.
Ultimately, the best kitchen renovation is one that combines thoughtful design, everyday functionality, and long-term durability to create a space you enjoy using for years to come.
Leave a Reply