Introduction
House Renovation Planning | Renovating a house can be exciting until the expenses start increasing, the work takes longer than expected, and one small change leads to three more problems. These situations often happen when homeowners begin construction before deciding what needs to be improved, how much they can spend, and which tasks should come first.
House renovation planning helps you turn an overwhelming project into a manageable process. Whether you want to update an outdated kitchen, improve your bathroom, repair aging walls, or renovate several rooms, a clear plan can help you control costs, coordinate contractors, and make better decisions.
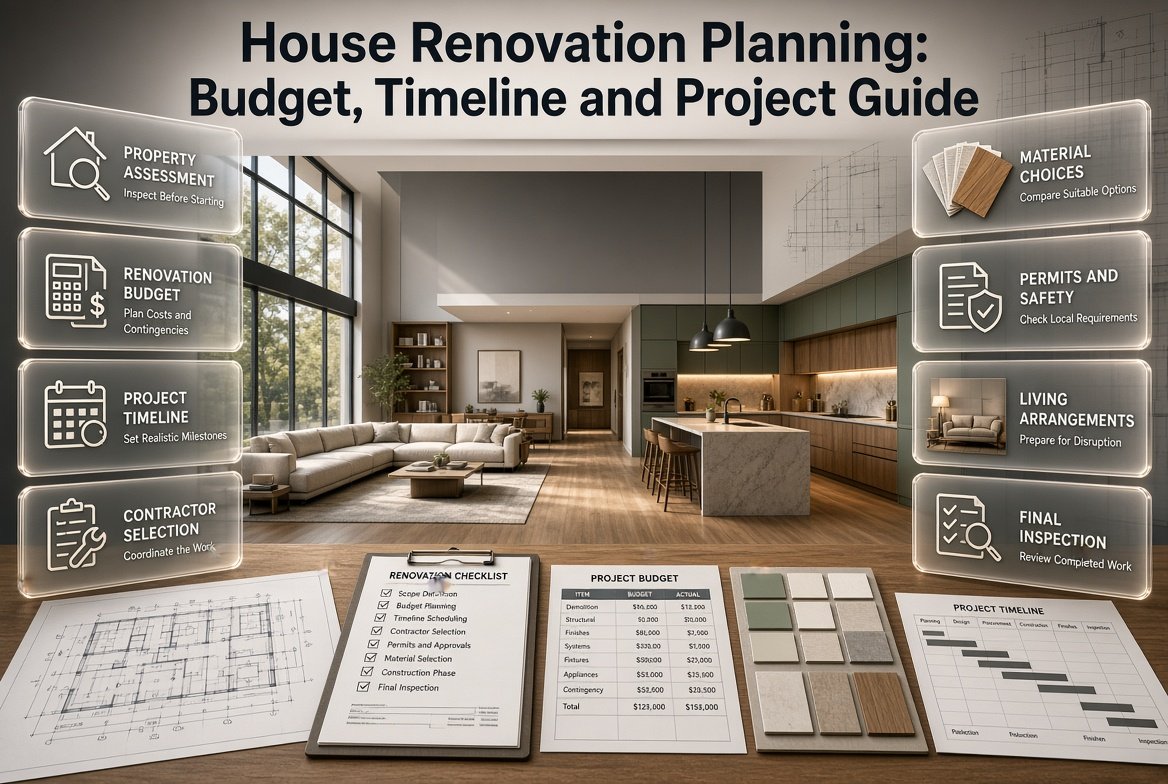
This guide explains how to assess your property, establish a realistic renovation budget, create a practical timeline, select suitable professionals, choose materials, and avoid costly mistakes. It also covers renovation permits, safety, temporary living arrangements, and the final inspection process so you can approach your project with greater confidence.
For more practical ideas about improving everyday living spaces, visit Heartomenal.
1. What Is House Renovation Planning?
House renovation planning is the process of identifying the improvements a home needs, setting priorities, estimating costs, arranging professional help, choosing materials, and organizing the work before construction begins.
A good plan connects your renovation goals with your available budget, property condition, household needs, and expected completion date. It also prepares you for unexpected repairs instead of allowing every new problem to disrupt the entire project.
For example, imagine you want to renovate an older home with a dated kitchen, a leaking bathroom, and peeling paint. Repainting the entire house first might seem productive, but repairing the bathroom leak and checking the kitchen plumbing should come earlier. Otherwise, later work could damage newly finished surfaces.
Effective planning answers five important questions:
- What needs to be repaired, replaced, or improved?
- Which problems are urgent, and which can wait?
- How much money can you realistically spend?
- What sequence of work will prevent unnecessary rework?
- Who will complete each task, and how will progress be checked?
The purpose is not to make every decision months in advance. It is to make the important decisions early enough to avoid preventable delays, waste, and expensive changes.
2. How Should You Assess Your House Before Renovating?
Start by inspecting the property and recording its current condition. This initial assessment helps you distinguish essential repairs from cosmetic improvements and reveals problems that could affect the budget or construction sequence.
Walk through every room, including storage areas, hallways, bathrooms, the kitchen, and outdoor spaces. Look for visible damage, poor ventilation, water stains, cracked finishes, loose fittings, and areas that no longer function well.
Inspect the main areas of the property
Structure and foundations: Look for unusual cracks, uneven floors, sagging areas, or signs of movement. A small surface crack is not necessarily a structural problem, but widening cracks or significant movement deserve professional assessment.
Roof and drainage: Check for leaks, damaged roofing materials, blocked gutters, and water collecting near the building. Moisture entering from above can damage ceilings, walls, insulation, and electrical fittings.
Plumbing: Examine visible pipes, taps, drains, water pressure, and areas around sinks and toilets. Persistent dampness or unexplained water bills may indicate a hidden leak.
Electrical systems: Note damaged outlets, exposed wiring, flickering lights, or frequently tripping circuits. Have a qualified electrician assess potentially unsafe installations rather than attempting risky repairs yourself.
Walls, ceilings, and floors: Record peeling paint, loose plaster, uneven surfaces, damaged tiles, and flooring that moves or feels unstable.
Windows and doors: Check whether they close properly, allow unwanted drafts, or show signs of moisture damage.
Ventilation and comfort: Notice rooms that remain damp, become excessively hot, or receive little natural light. These issues may require better ventilation, shading, insulation, or layout changes.
Create a renovation inspection checklist
Use a simple table to organize what you find.
| Area | Problem identified | Priority | Next action |
|---|---|---|---|
| Bathroom | Water leaking near the shower | High | Arrange a plumbing inspection |
| Kitchen | Insufficient storage | Medium | Plan cabinet improvements |
| Living room | Peeling paint | Low, if the surface is sound | Prepare and repaint |
| Roof | Signs of water penetration | High | Arrange a roof assessment |
| Bedroom | Poor natural lighting | Medium | Review lighting and window options |
Priorities depend on the severity of the problem. Water intrusion, structural concerns, electrical hazards, and other safety issues should be evaluated before decorative upgrades.
Pro Tip: Photograph existing damage before work starts. These pictures create a useful record, help contractors understand the scope, and make it easier to compare the property’s condition before and after renovation.
3. How Do You Set Renovation Goals That Make Sense?
Before choosing paint colors or browsing furniture, decide what you want the renovation to achieve. Clear goals make it easier to compare options and prevent the project from expanding unnecessarily.
Homeowners generally renovate for one or more of four reasons: repairing damage, improving daily function, updating appearance, or preparing a property for future needs.
Separate essential repairs from optional upgrades
Create three lists:
- Essential work: Repairs related to safety, structural condition, water intrusion, damaged utilities, and basic functionality.
- Important improvements: Better storage, improved lighting, updated fixtures, more usable space, or improved room layouts.
- Optional upgrades: Decorative wall treatments, premium finishes, statement lighting, and luxury accessories.
This method helps you protect the budget if an unexpected repair becomes necessary.
Suppose your original plan includes installing expensive kitchen countertops, replacing bedroom flooring, and repairing a leaking roof. If the budget cannot comfortably cover everything, the roof should generally take priority because delaying water-related repairs can increase damage.
Think about how your household uses each room
A successful renovation should solve real problems, not simply make rooms look different.
Ask yourself:
- Does the kitchen provide enough preparation space?
- Is there adequate storage for everyday belongings?
- Does the bathroom have suitable ventilation?
- Can family members move comfortably through the main living areas?
- Are there rooms that feel too dark, noisy, hot, or cold?
- Will the house still suit your needs in the next several years?
If you need more guidance on practical improvements throughout your home, explore Home Tips & Ideas.
Common Mistake: Choosing a design before identifying the problem. A beautiful kitchen can still be frustrating to use if storage, lighting, appliance placement, and work surfaces have not been planned properly.
4. How Do You Create a Realistic House Renovation Budget?
A renovation budget should include more than materials and labor. It must also account for professional assessments, permits where required, waste removal, delivery, temporary accommodation when necessary, and unexpected repairs.
The best starting point is to estimate the cost of each part of the project rather than relying on one broad figure.
Build your budget category by category
| Budget category | What to include |
|---|---|
| Assessment and design | Inspections, drawings, and professional consultations |
| Structural work | Necessary repairs to foundations, walls, roofs, or supporting elements |
| Plumbing and electrical | Pipework, wiring, fixtures, and safety upgrades |
| Labor | Contractors, tradespeople, and installation services |
| Materials | Tiles, paint, flooring, cabinets, timber, and other supplies |
| Permissions | Required permits, inspections, and associated charges |
| Site management | Waste disposal, delivery, protection, and cleanup |
| Temporary arrangements | Alternative accommodation or additional transport, if needed |
| Contingency | A reserve for unexpected but necessary costs |
Obtain written estimates using the same project specifications wherever possible. One contractor may include demolition and waste disposal, while another may exclude them. Comparing the headline totals alone can therefore be misleading.
How much contingency should you keep?
A contingency reserve of around 10–20% of the planned renovation cost is a useful starting point for many projects. Older homes, properties with hidden moisture damage, and major structural renovations may require a larger reserve based on professional advice.
For example, if your estimated renovation budget is 1,000,000 in your local currency, a 15% contingency would be 150,000. Your working budget would therefore be 1,150,000, provided you have the funds available.
The contingency is not money intended for decorative upgrades. Keep it available for genuine surprises, such as damaged plumbing discovered after removing a cabinet or deteriorated materials uncovered during repairs.
Estimate the cost of individual tasks
Instead of writing “renovate bathroom,” break the work into measurable components:
- Remove old fixtures and finishes.
- Repair the underlying surfaces.
- Inspect and update plumbing where necessary.
- Complete waterproofing.
- Install new tiles and fixtures.
- Improve ventilation and lighting.
- Finish, test, and clean the room.
Request separate prices for major components when practical. This makes it easier to identify where costs are increasing and which changes could reduce spending without compromising safety.
Decide what to do if the budget becomes tight
Use this order of review:
- Remove optional upgrades that do not affect essential function.
- Compare alternative materials with similar durability and maintenance requirements.
- Keep existing fixtures or layouts where they remain suitable.
- Phase nonessential rooms into a later project.
- Obtain clarification about labor, delivery, and installation charges.
Do not cut costs by ignoring structural defects, using unsuitable electrical components, skipping waterproofing, or hiring unqualified people for regulated work.
Expert Tip: Track the original estimate, approved changes, actual payments, and remaining balance in one spreadsheet. Update it whenever a purchase or payment is made, rather than trying to reconstruct expenses at the end of the month.
5. How Do You Build a Renovation Timeline?
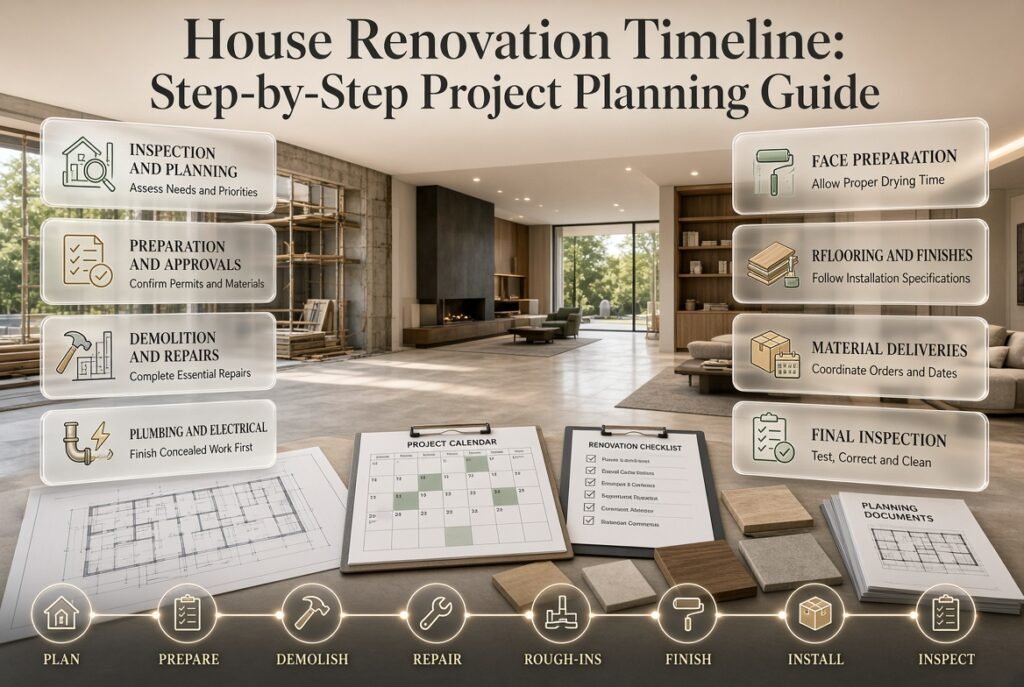
A renovation timeline identifies what must happen first, which activities can overlap, and when important decisions or deliveries must be completed.
The total duration depends on the size of the property, the condition of existing systems, material availability, contractor schedules, and whether you need permits or specialist inspections. A simple room refresh may take days, while a full-house renovation can take several months or longer.
Follow a sensible order of work
A typical renovation sequence looks like this:
Inspection and planning → Design and approvals → Ordering and preparation → Demolition → Structural repairs → Plumbing and electrical work → Insulation and wall preparation → Flooring and surface finishes → Cabinets and fixtures → Final testing and cleanup
The exact order may vary. For example, some flooring is installed before cabinetry, while other flooring is fitted afterward. Follow the product specifications and the agreed construction plan.
The essential principle is to complete concealed work, inspections, and messy construction before delicate final finishes.
Prepare a sample timeline
| Stage | Main activities | Scheduling consideration |
|---|---|---|
| Planning | Inspection, priorities, budget, design | Allow time for decisions |
| Preparation | Quotes, permits, material orders | Confirm availability before demolition |
| Demolition | Removal of approved materials | Check for hazardous materials in older properties |
| Repairs and rough-ins | Structural, plumbing, electrical work | Arrange required inspections |
| Surface work | Plastering, waterproofing, painting preparation | Respect curing and drying times |
| Installation | Cabinets, flooring, fixtures, fittings | Confirm accurate measurements |
| Completion | Testing, corrections, cleanup | Keep time for outstanding defects |
Add some flexibility to the schedule. Deliveries may be delayed, surfaces may require additional drying time, or a contractor may discover a problem that was hidden during the initial inspection.
Coordinate material deliveries carefully
Buying everything too early can fill the house with items that may become damaged, while ordering too late can leave workers waiting.
Confirm delivery dates for long-lead items such as custom cabinets, windows, doors, specialty tiles, and certain fixtures. Verify dimensions and specifications before approving orders.
Quick Tip: Ask each contractor which decisions they need from you and by what date. Choosing a tile after the installer is scheduled to begin can create avoidable delays.
6. Should You Renovate One Room at a Time or the Whole House?
The right approach depends on the project scope, available funds, household needs, and how much disruption you can tolerate.
| Approach | Advantages | Limitations | Best suited to |
|---|---|---|---|
| One room at a time | Easier to control spending and disruption | May involve repeated setup costs | Smaller budgets and occupied homes |
| Several rooms together | Better coordination for connected work | Requires more planning and upfront funds | Homes needing related upgrades |
| Whole-house renovation | Allows an integrated design and coordinated systems work | Highest disruption and management demands | Major, well-planned projects |
Renovating related spaces together can reduce duplicated work. For example, if several rooms require the same electrical upgrade, coordinating the work may be more efficient than arranging separate visits.
However, renovating everything simultaneously increases the number of decisions and expenses that must be managed at once.
Consider whether you can remain in the house
Living through a renovation may be practical when work is limited to one room and essential facilities remain usable. It becomes harder when the project involves major dust, unsafe work areas, water interruptions, electrical upgrades, or extensive kitchen and bathroom demolition.
Before deciding, consider:
- Whether there will be a functioning toilet and washing area.
- How meals will be prepared.
- Whether children or pets can remain safely away from work zones.
- Whether noise and dust will interfere with sleep or work.
- Whether temporary accommodation costs less than managing the disruption.
Do not occupy areas that contractors have identified as unsafe.
7. How Do You Choose Materials and Finishes?
Materials should be selected according to performance, durability, maintenance, appearance, and total installed cost. A low purchase price does not always mean a lower long-term cost.
A material may require specialist installation, frequent maintenance, expensive cleaning products, or replacement sooner than a more suitable alternative.
Compare materials using practical criteria
For flooring, consider moisture exposure, foot traffic, slip resistance, cleaning requirements, and the condition of the existing subfloor.
For walls, consider whether the surface is dry and sound, whether the finish can tolerate cleaning, and whether the room requires moisture-resistant products.
For kitchen and bathroom surfaces, assess resistance to water, heat, stains, and regular use. Always follow the manufacturer’s instructions for installation, sealing, and maintenance.
Match the material to the room
| Location | Main considerations |
|---|---|
| Kitchen | Cleaning, moisture, heat, storage, and heavy daily use |
| Bathroom | Waterproofing, ventilation, slip resistance, and plumbing access |
| Bedroom | Comfort, noise, durability, and ease of cleaning |
| Living room | Foot traffic, appearance, lighting, and furniture placement |
| Outdoor areas | Weather exposure, drainage, surface stability, and maintenance |
Request samples when color, texture, or finish matters. Materials often look different under natural daylight, warm artificial lighting, and the lighting already installed in your home.
Avoid changing specifications midway
Late changes can affect costs beyond the price difference between two products. A heavier fixture may need additional support, a different tile may require another adhesive, and a replacement cabinet may not fit the existing plumbing.
Finalize key dimensions and product specifications before ordering whenever possible.
For ideas on creating a cohesive appearance without losing sight of function, explore Home Decorating Tips.
8. How Do You Select the Right Renovation Contractor?
A contractor can influence the quality, cost, and pace of your renovation. Choosing someone solely because they offer the lowest quote can create problems if the estimate excludes essential work or the contractor lacks relevant experience.
Look for professionals whose qualifications, experience, communication, and written proposals match the work required.
Check experience and credentials
Ask potential contractors about similar projects they have completed. Where appropriate, inspect previous work or request references from recent customers.
Verify licenses, registrations, insurance, and specialist qualifications required in your location. Requirements differ by jurisdiction and type of work, so do not assume that one set of credentials covers every trade.
For major structural, electrical, gas, or plumbing work, use appropriately qualified professionals.
Request comparable written estimates
Give each contractor the same scope of work and specifications. Ask for a written breakdown that explains:
- Included and excluded tasks.
- Material types, grades, and quantities.
- Labor charges and payment stages.
- Expected start and completion dates.
- Waste removal and site protection.
- Responsibility for obtaining permits.
- Procedures for variations and unexpected repairs.
- Warranty terms and defect correction arrangements.
A detailed proposal makes it easier to identify omissions before the contract is signed.
Put the agreement in writing
Your contract should describe the work, price, schedule, payment arrangements, responsibilities, and method for approving changes. It should also address how disputes, delays, and defects will be handled.
Avoid making large payments without a clear contractual basis. Payment schedules should correspond to agreed milestones and applicable local requirements.
Common Mistake: Relying entirely on verbal promises. A written agreement helps both parties understand what was included in the original price and what counts as an additional charge.
9. What Permits and Safety Checks May Be Required?

Not every renovation needs formal permission, but certain projects require building approvals, specialist inspections, or authorization from a landlord, housing association, or relevant authority.
Requirements depend on your location, property type, and the nature of the proposed work. Structural alterations, additions, changes to certain utility systems, and work affecting protected buildings may involve additional requirements.
Check before construction begins
Ask the relevant local authority or a qualified professional whether your project requires:
- Building or renovation permits.
- Structural drawings or engineering approval.
- Electrical or plumbing inspections.
- Fire-safety measures.
- Permission for exterior changes or additions.
- Landlord or shared-property approval.
- Special handling for hazardous materials.
Do not assume that cosmetic work and structural alterations follow the same rules.
Plan for safety during the renovation
Construction areas should be separated from occupied spaces wherever practical. Keep children and pets away from tools, exposed wiring, open trenches, unstable materials, and unfinished stairs.
Control dust and debris using suitable protective measures. Older properties may contain asbestos, lead-based paint, or other hazardous materials. If you suspect such materials, arrange appropriate professional assessment before disturbing them.
Never remove potentially hazardous materials simply because they are hidden beneath a newer finish.
Expert Tip: Confirm who is responsible for inspections and documentation before work starts. A contractor’s statement that permission is unnecessary should be checked against the applicable local requirements when the project involves regulated work.
10. How Can You Make a Renovation More Energy-Efficient?
Renovation is an opportunity to improve comfort and reduce avoidable energy use. The best improvements depend on the building, local climate, existing equipment, and how the household uses electricity or fuel.
Start by identifying where energy is being wasted rather than automatically replacing equipment that may still be suitable.
Review insulation, air leakage, and shading
Check for gaps around windows and doors, poorly insulated areas, and rooms that receive excessive heat. Appropriate weather sealing, insulation, exterior shading, and ventilation improvements may reduce discomfort and energy demand.
However, sealing a building without considering ventilation can trap moisture and pollutants. Choose a balanced solution suitable for the property’s construction and climate.
Improve lighting and equipment
Energy-efficient lighting can reduce electricity consumption, particularly where lights are used frequently. When replacing appliances, compare their rated energy use, expected lifespan, maintenance requirements, and purchase price.
A more expensive product may offer savings over time, but the result depends on actual usage and operating costs.
Consider water efficiency
Repair leaking taps, select appropriate water-saving fittings, and review hot-water system performance. In bathrooms and kitchens, plan plumbing changes before installing final finishes so pipes can be accessed without damaging completed work.
For broader ideas about making a house more comfortable and practical, visit Home Comfort Tips.
11. How Do You Manage a Renovation While Living at Home?
Living in a property during renovation requires clear boundaries, daily organization, and realistic expectations. Even well-planned projects create noise, dust, temporary access restrictions, and interruptions to normal routines.
Before work starts, decide which areas must remain usable and which can be closed off completely.
Establish a temporary household setup
If the kitchen is being renovated, prepare a safe temporary area for simple meals. Store essential dishes, utensils, and frequently used items where they remain accessible.
If the bathroom is unavailable, arrange a reliable alternative before demolition. For larger projects, temporary accommodation may be more practical than trying to maintain normal routines in an active construction zone.
Keep personal belongings away from dust and moisture. Label storage boxes and photograph the location of essential items before moving furniture.
Agree on working hours and access
Discuss arrival times, parking, deliveries, keys, alarm arrangements, and access to water or electricity. Establish how the contractor will contact you about decisions or unexpected problems.
Keep children and pets away from the work zone even when workers are not present. Tools, open service areas, sharp materials, and incomplete installations can remain hazardous after the working day ends.
Keep essential household information available
Store important contact details, contracts, receipts, material specifications, and emergency arrangements in one accessible place.
If you are also reorganizing everyday routines during the project, Everyday Household Tips and Tricks can provide additional ideas for keeping household tasks manageable.
12. How Should You Track Progress and Control Changes?
A renovation needs regular oversight even when you have hired experienced professionals. Monitoring progress helps you identify missed details, coordinate deliveries, and resolve small issues before they become expensive problems.
You do not need to supervise every technical task. Instead, establish a consistent process for reviewing milestones and confirming decisions.
Hold short progress meetings
At agreed intervals, review completed work, upcoming tasks, outstanding decisions, and any issues affecting the schedule.
Ask practical questions:
- What has been completed since the previous review?
- What is scheduled next?
- Are any materials or approvals outstanding?
- Has the budget changed?
- Are inspections required before the next stage?
- Is any decision needed from the homeowner?
Keep a written record of important answers.
Use a formal change process
Unexpected conditions sometimes require changes. A hidden leak, damaged subfloor, or unsuitable existing installation may justify additional work.
Before approving a change, ask the contractor to explain the reason, cost, schedule effect, and alternatives. Record the agreed adjustment in writing before the additional work proceeds, except where immediate action is necessary to address an urgent safety issue.
Track the budget and schedule together
A cheaper material that arrives late may cost more overall if it delays several trades. Similarly, approving a layout change may affect plumbing, electrical work, cabinets, and finishes.
Evaluate decisions based on their full impact rather than looking only at the immediate price difference.
13. What Are the Most Common House Renovation Planning Mistakes?
Many renovation problems are not caused by a lack of design ideas. They happen because homeowners underestimate the amount of coordination required.
Avoiding these common mistakes can protect your budget and reduce disruption.
Mistake 1: Starting without a detailed scope
A vague instruction such as “modernize the kitchen” leaves too much room for different interpretations.
Why it causes problems: Contractors may estimate different tasks, making quotations difficult to compare. Important work may be excluded.
How to avoid it: List the exact repairs, replacements, materials, and finishes required. Clarify what will remain unchanged.
Mistake 2: Spending the entire budget on visible upgrades
Expensive finishes can consume the available funds before hidden repairs are addressed.
Why it causes problems: Essential work may be delayed or the project may stop when unexpected damage appears.
How to avoid it: Fund safety and necessary repairs first, keep a contingency reserve, and choose decorative upgrades afterward.
Mistake 3: Ignoring hidden problems
Fresh paint can temporarily disguise a stain, but it will not solve a leak or persistent moisture problem.
Why it causes problems: The underlying issue may continue damaging the property and ruin new finishes.
How to avoid it: Investigate the cause of recurring stains, dampness, movement, or unusual odors before covering the area.
Mistake 4: Changing the design too often
Repeated changes to layouts, fixtures, and materials create additional purchases, rework, and scheduling conflicts.
Why it causes problems: Contractors may need to redo completed tasks or wait for replacement products.
How to avoid it: Finalize important selections early. Approve later changes only after reviewing their full cost and schedule impact.
Mistake 5: Hiring based only on price
A low quote may exclude preparation, waste disposal, testing, or suitable materials.
Why it causes problems: The final cost can rise through additional charges, or the work may fail to meet the required standard.
How to avoid it: Compare written scopes, credentials, references, exclusions, and payment terms.
Mistake 6: Ordering materials without checking measurements
Cabinets, doors, appliances, and flooring can be unsuitable if dimensions or installation requirements are incorrect.
Why it causes problems: Returns, replacements, and modifications create delays and extra costs.
How to avoid it: Verify measurements on site, confirm specifications, and coordinate orders with the relevant installer.
Mistake 7: Forgetting ventilation and moisture control
A room can look finished while still having inadequate ventilation or unresolved dampness.
Why it causes problems: Moisture can damage materials, encourage mold growth, and reduce indoor comfort.
How to avoid it: Plan ventilation and moisture management as part of the renovation, especially in kitchens, bathrooms, and other humid spaces.
Mistake 8: Treating the completion date as guaranteed
A schedule is an estimate based on assumptions about access, materials, approvals, and existing conditions.
Why it causes problems: Rigid expectations may create pressure to skip appropriate checks or accept unfinished work.
How to avoid it: Include realistic flexibility, track milestones, and address delays promptly.
14. What Do Renovation Professionals Recommend?
Good renovation decisions are usually based on preparation, sequencing, accurate measurements, and consistent communication. The following practices help homeowners coordinate their projects without attempting to replace specialist judgment.
Investigate before covering a problem
If a wall shows recurring dampness, determine whether the cause relates to plumbing, exterior water penetration, condensation, or another issue. The correct repair depends on the cause.
Applying a new finish without resolving the underlying problem can waste money and create further damage.
Complete concealed work before decorative finishes
Plumbing, electrical installations, structural repairs, and required inspections should be coordinated before surfaces are closed. Taking photographs of relevant concealed installations, where safe and permitted, can help future maintenance and repairs.
Keep any required inspection records and product documentation.
Use accurate measurements rather than estimates
Measure openings, floor areas, cabinet spaces, and appliance clearances before ordering materials. Check measurements against the final design and the installer’s requirements.
For complicated spaces, obtain professional measurements rather than relying on a rough sketch.
Confirm product compatibility
Tiles, adhesives, sealants, waterproofing products, paints, and substrates must be compatible. A product that performs well in one location may be unsuitable for a wet room, exterior surface, or high-temperature area.
Follow manufacturer instructions and obtain specialist advice when specifications are unclear.
Protect completed work
Cover suitable finished surfaces during later construction, but use protection that will not trap moisture or damage delicate materials. Keep heavy equipment and debris away from completed floors, fixtures, and cabinets.
Schedule final painting and touch-ups after the messiest work has been completed wherever the construction sequence permits.
Maintain a single record of decisions
Keep approved plans, quotations, receipts, product details, warranties, inspection documents, and change approvals together. A clear record helps resolve misunderstandings and supports future maintenance.
Professional Recommendation: Prioritize the building’s condition and functionality before making expensive cosmetic choices. A visually impressive result is most valuable when the underlying systems are safe, durable, and suitable for everyday use.
15. How Do You Complete a Final Renovation Inspection?

The renovation is not truly complete simply because the contractors have finished their main tasks. Before making final payments, inspect the agreed work and identify outstanding defects, incomplete installations, missing documents, or items that require correction.
Your contract and local requirements determine the formal acceptance and payment process.
Check each renovated area
Inspect walls, ceilings, flooring, doors, windows, cabinets, and visible finishes under suitable lighting. Look for obvious damage, uneven installation, loose fittings, incomplete sealing, and unfinished edges.
Test accessible fixtures and equipment according to their intended use. Have qualified professionals complete technical testing for electrical systems, plumbing, heating, gas installations, and other specialist work.
For wet areas, confirm that the required waterproofing and installation checks were completed before final finishes were installed.
Prepare a snagging list
A snagging list is a written record of defects or incomplete work that needs attention.
Include:
- The room or exact location.
- A clear description of the issue.
- A photograph when useful.
- The correction required.
- The person responsible.
- The agreed completion date.
Review the list with the contractor and confirm the process for correcting each item.
Collect the necessary documents
Depending on the project, you may need:
- Final invoices and payment records.
- Warranties and product manuals.
- Permit and inspection documentation.
- Details of installed equipment and materials.
- Records of approved changes.
- Maintenance recommendations.
- Contact information for relevant contractors.
Keep these records for future repairs, maintenance, and property transactions.
16. How Can You Maintain Your Home After Renovation?
Regular maintenance helps protect the investment you have made in your property. A new finish or replacement component still needs appropriate care, and small problems are usually easier to address before they develop into larger repairs.
Start by following the maintenance instructions supplied with your new materials, appliances, fixtures, and equipment.
Create a simple maintenance schedule
Monthly: Check for visible leaks, unusual odors, blocked drains, damaged sealant, and signs of moisture.
Seasonally: Inspect accessible drainage areas, exterior finishes, window seals, ventilation, and weather protection as appropriate for the local climate.
Annually: Review the condition of major building elements and arrange qualified inspections where needed. Follow the recommended service intervals for installed equipment.
This is a general framework, not a replacement for manufacturer instructions or professional maintenance requirements.
Keep renovation records updated
Record the date of installation, product specifications, warranty details, and any maintenance performed. This information makes it easier to select compatible replacement parts and understand the property’s history.
Do not assume that every new component has the same maintenance requirements as the one it replaced.
Address warning signs promptly
New leaks, recurring dampness, unusual cracks, electrical faults, and persistent ventilation problems deserve timely attention. Avoid covering or ignoring symptoms simply because the renovation has recently finished.
A well-maintained home is not necessarily one that never needs repairs. It is one where problems are identified, assessed, and addressed before avoidable damage spreads.
17. What Is the Best Way to Plan a House Renovation on a Limited Budget?
A limited budget requires careful prioritization rather than simply choosing the cheapest materials available. The goal is to complete the most important work safely, retain suitable existing features, and postpone optional improvements without compromising the building.
Use a needs-first renovation strategy
Begin with a professional assessment of urgent repairs and essential systems. Then decide which improvements will make the biggest practical difference to daily life.
For example, repairing a leaking sink, improving inadequate storage, replacing damaged cabinet hardware, and repainting sound walls may provide meaningful improvements without requiring a complete kitchen replacement.
Keep what still works
If existing cabinets are structurally sound, you may be able to retain them and update the handles, finish, or internal organization. Suitable flooring, doors, and fixtures may also remain in place if they are safe and functional.
However, retaining an item should not prevent necessary repairs or create compatibility problems with new work.
Compare total value rather than purchase price
When reviewing alternatives, consider purchase cost, installation, maintenance, durability, expected lifespan, and replacement difficulty.
A lower-cost material may be a sensible choice in a lightly used area but a poor choice in a location exposed to frequent moisture or heavy wear.
Divide the project into manageable phases
A sensible sequence might involve essential repairs first, functional upgrades second, and decorative changes later. Each phase should have its own scope, budget, and completion criteria.
Avoid beginning a new phase until you know how it will affect unfinished work, access, and the total project cost.
What Is the Best Way to Plan a House Renovation From Start to Finish?
The best way to plan a house renovation is to begin with a detailed property inspection, identify essential repairs, establish a realistic budget, and organize the work in the correct sequence. Before choosing finishes or purchasing materials, understand the condition of the house and decide which improvements will make the biggest difference to safety, functionality, and comfort. A structured plan helps you control expenses, compare contractor quotations, and avoid unnecessary changes during construction.
Important steps to follow:
Inspect the roof, plumbing, electrical systems, walls, floors, and drainage.
Separate urgent repairs from optional upgrades.
Prepare a written scope of work and budget with a contingency reserve.
Confirm permits, contractor responsibilities, material specifications, and timelines.
Schedule a final inspection before accepting the completed work.
How Much Should You Budget for a House Renovation?
Your renovation budget should cover materials, labor, professional services, permits where required, waste removal, delivery charges, and any temporary accommodation you may need. The total depends on the property’s condition, the size of the renovation, local labor rates, and the quality of materials selected. A room makeover generally requires a different budget from a renovation involving structural changes or complete plumbing and electrical upgrades.
A practical starting point is to reserve approximately 10–20% of your estimated renovation cost for unexpected expenses. Older properties or projects with uncertain structural conditions may require a larger reserve. Obtain detailed quotations and compare what each contractor includes before committing your funds.
Budget management tips:
Prioritize essential repairs before decorative improvements.
Record estimated and actual expenses separately.
Confirm additional costs before approving changes.
Keep contingency funds available for genuine unexpected repairs.
Consider completing nonessential improvements in later phases.
Which Renovation Projects Should Be Completed First?
Renovation work should generally begin with safety concerns, structural defects, active leaks, and problems affecting essential building systems. These issues can become more expensive if they remain unresolved beneath new finishes. Once the property’s condition has been assessed, plan work involving plumbing, electrical installations, and other concealed systems before closing walls or installing final surfaces.
The exact sequence depends on the house and the scope of work. For example, repairing a roof leak should come before repainting a water-damaged ceiling, while bathroom waterproofing should be completed and checked before the final tiles are installed.
Recommended priorities:
Address structural concerns and immediate safety hazards.
Repair roof leaks, plumbing problems, and persistent moisture.
Complete necessary electrical and plumbing upgrades.
Finish wall preparation, flooring, cabinetry, and fixtures in the appropriate order.
Complete painting, decorative details, and final styling toward the end.
How Can You Avoid Delays and Costly Mistakes During a House Renovation?
The most effective way to reduce renovation delays is to finalize the project scope, confirm measurements, arrange required approvals, and coordinate materials and contractors before work begins. Many problems arise when homeowners change layouts midway through construction, order unsuitable products, or discover that quotations exclude important tasks. Regular communication and written records make these issues easier to manage.
Create a realistic timeline that accounts for material deliveries, professional inspections, drying times, and possible hidden damage. When an unexpected problem occurs, ask the contractor to explain the proposed solution, additional cost, and effect on the completion date before approving nonurgent changes.
Practical ways to prevent problems:
Compare written quotations using the same specifications.
Confirm material dimensions and availability before ordering.
Maintain a written record of decisions and approved changes.
Review progress against agreed milestones.
Avoid rushing safety checks or essential repair work to meet a deadline.
Is It Better to Renovate a House All at Once or One Room at a Time?
The right approach depends on your available budget, the extent of the work, and whether you can comfortably live in the property during construction. Renovating one room at a time can make expenses easier to manage and allow you to maintain access to other parts of the house. However, separate phases may increase overall costs if contractors need to repeat setup, transportation, or demolition arrangements.
Renovating several connected areas together can improve coordination when the work involves shared plumbing, electrical systems, flooring, or structural changes. A whole-house renovation may also produce a more consistent design, but it usually requires greater financial preparation and more careful management of temporary living arrangements.
Choose the approach that fits your situation:
One room at a time: Suitable for limited budgets and smaller upgrades.
Several connected rooms: Useful when work can be coordinated efficiently.
Whole-house renovation: Better suited to major projects with a defined scope and sufficient funding.
Temporary accommodation: Consider it when essential facilities are unavailable or the property cannot be occupied safely.
Conclusion
Successful house renovation planning starts with understanding your property’s needs, setting clear priorities, and creating a realistic budget before construction begins. Whether you’re updating a single room or renovating the entire house, careful preparation helps you avoid unnecessary expenses, reduce delays, and make informed decisions throughout the project.
Focus on essential repairs first, choose durable materials that suit your household, and work with qualified professionals who provide clear quotations and written agreements. Keep a contingency fund for unexpected problems, monitor progress regularly, and inspect the finished work before considering the renovation complete.
Remember, a successful renovation isn’t just about creating a beautiful home. It’s about improving safety, functionality, comfort, and long-term value while staying within your financial limits. Start with a clear plan, take each stage step by step, and make decisions based on your actual needs rather than temporary design trends. With the right preparation and consistent attention to detail, you can transform your house into a more practical, comfortable, and welcoming place to live.
Leave a Reply